Claim a KB Hub
1.0 Introduction
The following steps explain how to add and claim a hub. When adding the hub you will associate it with the KB site. Once the hub has been successfully claimed the hub will be configured for the KB hardware type.
Notes:
- A hub configured for KB will ONLY support the Standard NXT and Borealis KB controller types.
- A hub will support up to 32 doors.
- If your system consists of more than 32 Keri NXT or KB doors then multiple hubs will be required.
- The hub must be added to a DHCP network with an active, unrestricted internet connection.
The following steps assume that you have followed the instructions for setting up the hub (powering-up the hub and adding it to a DHCP network).
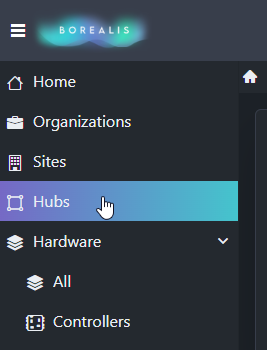
- From the Borealis main menu, click on Hubs.

- Click the CREATE button in the upper-right.
- The create hub form will appear.
- Enter a name for the hub.
- Enter the hub GUID (this will be printed on the outside of the hub).
- Enter the hub PIN (this too will be printed on the outside of the hub).
- Select the site to assign to the hub.
- Click the SAVE button.

- You will see a notification at the top of the screen that the hub has been successfully added.
- Initially, the hub will show as offline.
- After a few seconds the hub status will display: 'Updating Started'.

- Please allow 3-5 minutes for the hub to receive its initial update.
- When the hub is updated, the status will display 'Update Completed'.

- Once the hub status is Online and updated, it is ready to use and you can now add controllers to the hub.

- To verify that the hub is fully updated, click on the hub name and the hub details screen will appear. The hub details screen will display time and date stamps of when the controller received its initial update.

Related Articles
Claim a Standard NXT Hub
Introduction The following steps explain how to add and claim a Standard NXT hub. When adding the hub you will associate it with the NXT site. Once the hub has been successfully claimed the hub will be configured for the NXT hardware type. Notes: At ...Create a KB Site
1.0 Introduction The following section explains how to add a KB site to Borealis. Once the KB site has been added you will then be able to add a claim a hub. When the hub is associated with a KB site it will automatically be configured to work with ...Add a KB Controller via Scan
Add a KB Controller via the Hub's Scan Function From the main menu, click on Hubs. Your hub will appear in the list. Locate the Actions drop-down menu on the right, click the down-arrow and select Scan, or click the SCAN button. The scan function ...Hub Management Improvements
1.0 Introduction The Hub Management Improvements introduces a range of powerful new features designed to enhance control, efficiency, and visibility across hubs. Key enhancements include new options for restarting services, resetting hubs, and ...Replace a KB-Configured Hub
1.0 Introduction The following steps explain how to replace a hub that has been configured for KB controllers. A replacement hub will automatically be updated with the system database located in the Cloud and therefore, once updated you will not need ...