BioSync - Using the BioManager Software
1.0 Introduction
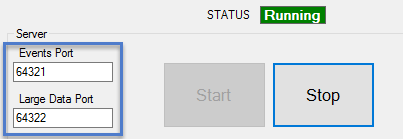
BioManager software is Client-Server based software. The server is installed only on 1 PC (together with the client) and the client can be installed on other PCs (without the server). If you are using the client from a remote PC and connecting to the server over the internet, port forwarding needs to be done so the client can connect to the server. This is done in the router connected to the internet. The ports that need to be forwarded are found in the server configuration:
- Click on the BioManager Server Setup icon (via the desktop).

- Login to the server settings using the default user name and password (both admin).
- You will then see the default port numbers displayed.
2.0 Changing the default Admin Password
By default you do not need a password to log into the BioManager client. The following steps explain how to setup a password for the default operator so that anyone who tries to log into the client will be prompted for a user name and password.
- From within BioManager, double-click on Operators.
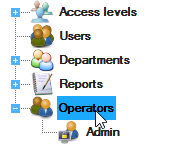
- Double-click Admin.
- A window will appear.
- Enter a new password for the admin account, then confirm the password by re-entering it.
- Click on the SAVE & EXIT button.
- Next click on Settings >> Servers.
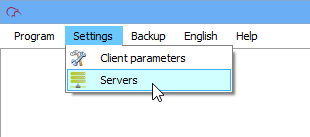
- The server window will appear and the Local server will be selected.
- Click the EDIT button.
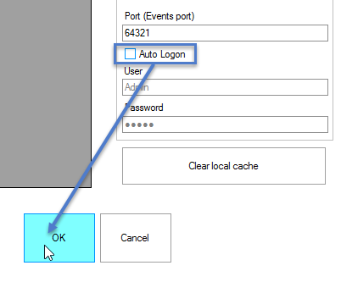
- Deselect 'Auto Logon'.
- Click OK.
- Click the SAVE & EXIT button.
- Close the client window.
- Double-click the client icon on the desktop.
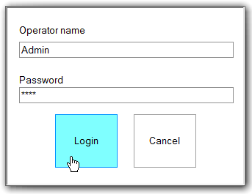
- You will then be prompted to enter the administrator's user name and associated password.
3.0 Setup a New Operator Account
To setup a new administrator/operator account, you should:
- Right-click on Operators and select Add Operator.
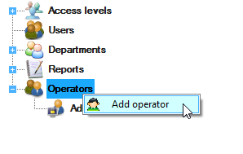
- Add a new Operator name.
- Follow through with steps 4-14 from the previous section.
4.0 Adjust the Display Style
The visual appearance of the user interface can be changed by selecting from the menu View >> Appearance Style.
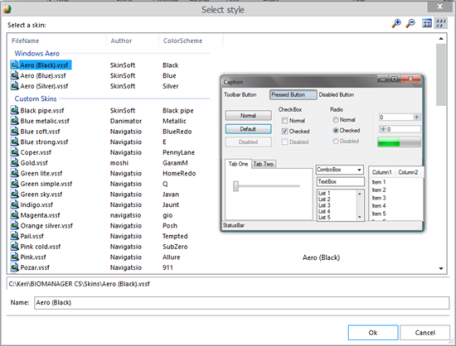
The selected style is stored in the Client and is loaded at client startup.
Shadow Style - The shadow style can be selected from the menu View >> Appearance >> Shadow Style.
5.0 System Parameters
Select Settings >> System Parameters from the main menu.
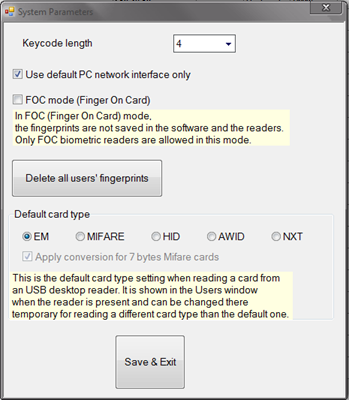
Keycode length - Determines the number of digits used for a code keyed into a KBF-3KP. If entered values for the keycode are longer than the selected value, then digits will be removed from left to right. For example, if the keycode entered on the keypad was 12345678 and the specified keycode length was set to 5 digits, the code sent from the KBF-3KP would be 45678.
Refer to the above image for the descriptions related to FOC mode and Default card type.
6.0 Enrolling Users and Credentials
6.1 Credential Enrollment Terminology
- User Code - This is the imprint (the number that is printed on the credential).
- Site Code - This is referred to as the Facility Code in Borealis and Doors.NET (note: Keri NXT and MIFARE credentials do not use a facility code) - therefore the value in the Site Code field (in BioManager) will not be used when using these credential types.
- User ID (Card numbers) - This is referred to as the 'Cardnumber' in Borealis and Doors.NET. It is the unique Wiegand card number that is associated with the cardholder/user. This number will also be generated in Borealis/Doors.NET during the enrollment.
6.2 Enrolling a User with a 26-Bit HID Credential
- From the BioManager user interface, click on Users (in the left-pane).
- The Users screen will appear.
- Click the NEW USER button at the bottom of the window.
- Enter the new user's full name.
- Enter the credential's Facility Code (in the Site Code field).
- Enter the credential's Imprint (in the User Code field).
- The credential's unique cardnumber will be generated.
- The user's access level will automatically be set to 'Unlimited' - this level has the BioSync readers added to it by default.
- Click the SAVE NEW button to complete the user and credential enrollment.
6.2 Enrolling a User with a Keri NXT Credential
- From the BioManager user interface, click on Users (in the left-pane).
- The Users screen will appear.
- Click the NEW USER button at the bottom of the window.
- Enter the new user's full name.
- Enter the credential's Imprint in the User ID (Card number field).
- A Site code and User code will also be generated but these can be ignored (as they are not required).
- The user's access level will automatically be set to 'Unlimited' - this level has the BioSync readers added to it by default.
- Click the SAVE NEW button to complete the user and credential enrollment.
6.2 Enrolling a User with a 32-Bit MIFARE Credential
Detecting the Unique Mifare Card Number
- From the BioManager user interface, click on Users (in the left-pane).
- The Users screen will appear.
- Click the NEW USER button at the bottom of the window.
- Connect the USB enrollment reader to the PC.
- The reader will be displaying a red LED.
- Put the cursor into the User ID (Card number field) and remove the 0 that is added, by default.
- Place the MIFARE credential onto the reader.
- The reader will beep once and the LED will go green.
- The detected MIFARE number will then be detected and entered into the field.
- Enter the user's full name.
- A Site code and a User Code will also be generated but these are not required so they can be ignored.
- The user's access level will automatically be set to 'Unlimited' - this level has the BioSync readers added to it by default.
- Click the SAVE NEW button to complete the user and Mifare credential enrollment.
7.0 Enroll User Fingerprints
Now that the credential has been enrolled, you are ready to enroll user fingerprints. The fingerprint is associated with the enrolled User ID number, this means if the reader is in Fingerprint-Only mode the same card number will be transmitted when the fingerprint is verified (the same as with all other reader modes) - There is not a separate enrolled number associated with the fingerprint.
 Note: If
you have users which will only use fingerprint enrollment you would
 have to enroll a number that will be transmitted when the fingerprint is verified.
- Open an existing user record (which has a card/tag enrolled).
- Click the EDIT button.

- In the fingerprint enrollment section, click on the BioSync reader that will be used for enrollment.
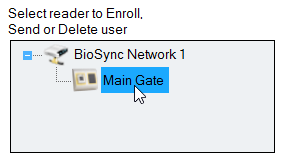
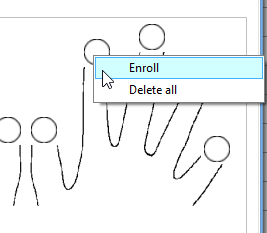
- On the diagram of two hands, right-click the small circle that corresponds to the finger you will be enrolling (for example; your right-index finger).
- Select Enroll.
- Place the finger on the sensor of the BioSync.
- Leave the finger on the sensor for approximately 2 seconds and you will hear a beep and will see a momentary red LED .
 Note: When enrolling fingerprints with the BioSync B100 readers you will need to swipe the finger downwards a minimum of 5 times at the B100 reader (rather than placing the fingerprint on the sensor.
 - In BioManager the small circle on the diagram will be red and there will be a number which indicates the verification %
of the fingerprint.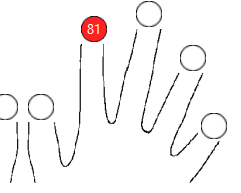
- Ensure the percentage is 75% or greater, then click the SAVE button.

- The fingerprint will now be assigned to the user record and you will be able to use the BioSync in all three reader modes (see next section).
8.0 Check the Memory Status of BioSync Readers
- Select Biometry >> Memory Status from the main menu.
- Click on Read. A list of all online BioSync readers will be displayed along with the number of enrolled fingerprints.
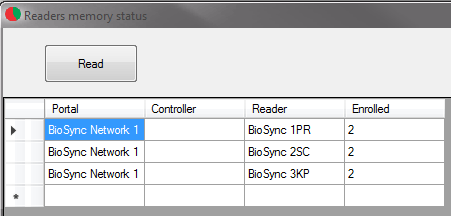
- If you want to check the memory status for a specific BioSync, right-click on the reader and select "Memory status" - the following event will be displayed in the events table.

9.0 Delete Expired Users from all BioSync Readers
- Select Biometry >> Delete expired users from all readers from the main menu.
- This will delete ALL expired users from ALL BioSync devices (Valid to date parameters of the user is less than today's date).
- The following events will display in the events table:

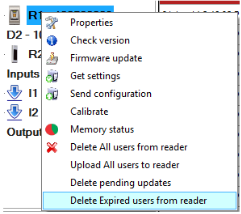
- If you want to only delete the expired users from a specific BioSync reader, right-click the reader and select "Delete Expired users from reader".
10.0 Backup and Restore the BioManager Database
The BioManager should be backed-up regularly (especially if there are frequent changes to the database, such as editing and enrolling users. A full backup of users, settings and the BioSync hardware can be made very quickly). You would use the database backup and restore procedure if you wish to deploy the BioManager software on a different PC/workstation.
10.1 Backup the Database
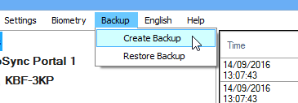
- From the Backup menu select Create Backup.
- Click YES to the prompt.
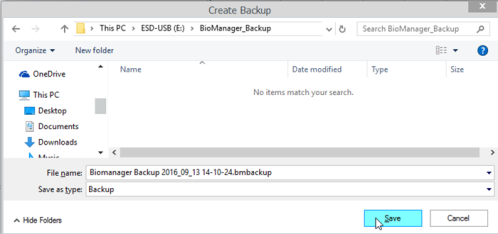
- Window File Explorer will open allowing you to specify a destination directory for your backup file (typically this would be an external drive or a USB thumb-drive.
- Click the SAVE button to save the backup file.
- You now have a copy of your entire BioManager database.
10.2 Restore the BioManager Database
Once you have installed the latest version of BioManager software (onto the new PC) you are ready to restore the database.
- Re-connect the backup thumb drive or other storage device into an available USB port.
- Double-click the BioManager Client icon located on the desktop.

- You will automatically be logged into the client.
- From the Backup menu, select the Restore option.
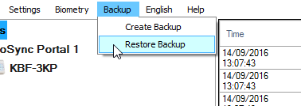
- Navigate to the USB storage device and select your backup file.
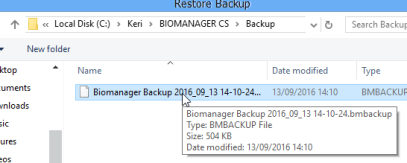
- Click the OPEN button.
- You will see the following message.

- The database will be restored and you will be disconnected from the BioManager local server.
- From the top right corner of the client, click on Connect To.
- Select Local.

- You should then see the client populate with the database information.
Note: If it seems as though the Users are missing from your system then you will need to clear the local cache file.
- Click on Settings >> Servers.
- Click the button named Clear local cache.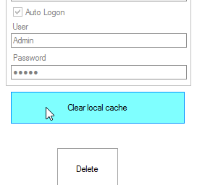
- Close the Server Settings window.
- You should then Disconnect and reconnect to the local BioManager Server (via the icons in the top-right of the client).
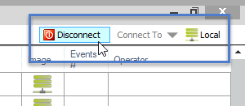
- Your database information should then be displayed correctly.
 P/N: 02302-001 Rev. B |
Related Articles
BioSync - Migrate the BioManager Software
Perform the following steps to migrate the BioManager installation: 1. Create backup file (menu backup). 2. Using ServerSetup remove service. 3. Install at new PC. 4. Restore backup. Also moving the database folder can do the job, just do not forget ...BioSync B100-KP Setup
BioSync B100-KP Reader Setup 1.0 Introduction Setting up a B100-KP reader as a new installation is a three step process. Each of these steps is covered in its own document: BioManager Software Installation CNV-1000 Converter Setup (used to connect to ...BioSync Fingerprint Readers - Data Sheet
BioSync Fingerprint Readers Data SheetBioSync KBF-1FP Setup Guide
1.0 Introduction Setting up a KBF-1FP reader on a new installation is a three step process. Each of these steps is covered in its own document: BioManager Software Installation CNV-1000 Converter Setup (used to connect to the BioSync via ethernet) ...BioSync KBF-2PR Setup Guide
1.0 Introduction Setting up a KBF-2PR reader as a new installation is a three step process. Each of these steps is covered in its own document: BioManager Software Installation CNV-1000 Converter Setup (used to connect to the BioSync via ethernet) ...