BioSync KBF-ENR1 Setup Guide
1.0 Introduction
The ENR-1 is a desktop card reader with fingerprint reader that allows you to quickly and easily enroll EM and Mifare Card Serial Number (CSN) credentials plus HID 125KHz and Keri NXT 125KHz cards into the BioManager software. It requires no drivers to be installed. Simply connect the ENR-1 to an available USB port and you are ready to go. The ENR-1 is ideal for when you do not know the number that is programmed into your cards.
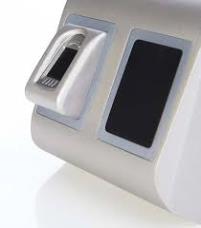

2.0 KBF-ENR-1 Features
- EM and Mifare Card Serial Number Reader
- Reads EM Proximity Cards 125KHz (ISO 4100)
- Reads Mifare Cards 13.56MHz (Classic, CSN, Ultralight and Desfire)
- Read range 1 to 8cm
- USB powered
- Enables easy card enrollment
- No installation or drivers
- 3 LEDs and an internal buzzer
- ABS housing
Note: The BioManager software supports multiple client connections, but if using a USB reader, the client on the PC with the reader connected will be the only operator that will see the reader (It will be hidden for operators connected from other workstations).
3.0 ENR-1 Detecting the Card Format
- Log into the BioManager client.
- Double-click the Users icon.
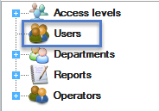
- Click the NEW USER button at the bottom of the screen.

- Connect the ENR-1 reader into a USB port on the host PC.
- The ENR-1 will be automatically detected and two new icons will be visible in the BioManager client.
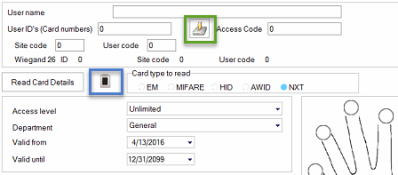
Note: The icon highlighted above in blue may be slightly different, depending upon the exact model of BioSync enrollment reader you are using.
Note: The two additional icons will remain on the screen for the duration of time that the USB reader is connected to the PC (even if you have a different BioSync reader selected for enrollment purposes). - To the left of the blue icon you will see a READ CARD DETAILS button. Use this button if you are unsure what format is enrolled into the card. Simply place the card/fob onto the ENR-1 reader and leave it there while you click through the available formats.
- The green icon is used for presentation enrollment.
- When the correct format card is detected the reader will beep multiple times and you will see an amber LED.
- The credential type window will appear displaying the specific card format, plus the detected card ID - The Card ID is the number that you need to make a note of:
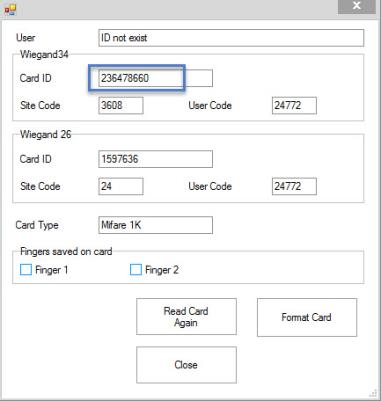
- Close the card type window now that you know the format.
4.0 ENR-1 Presentation Enrollment
- Log into the BioManager client
- Double-click the Users icon.
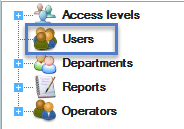
- Click the NEW USER button at the bottom of the screen.

- Enter a new User name
- Plug the ENR-1 into an available USB port.
- Place the card onto the ENR-1 reader.
- To enroll the card click the icon highlighted below while the card is still resting on the reader.
- The Card ID will be automatically detected and displayed.

- Click the SAVE NEW button.

- The new cardholder record will automatically be assigned the Unlimited access level and will therefore be sent out to all the online BioSync readers.
- You are now ready to enroll fingerprints or add access codes.
5.0 Enrolling the Card into Doors.NET
The card is now enrolled in BioManager and has been sent to the BioSync reader(s) on the network but you now have to enroll the same User ID (Card number) into Doors.NET:
- From within Doors.NET, go to Home >> Cardholders.
- Enter a last name and a first name (optionally a middle name).

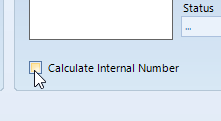
- Deselect Calculate Internal Number.
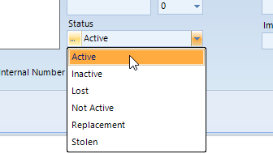
- Set the status to Active.
- In the Cardnumber field, enter the unique card number you have already detected and enrolled into the BioManager software.
- Press the Add Card button.
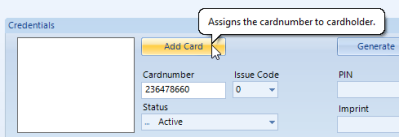
- The unique card number will appear in the white credentials box.

- You should now test the card by setting a KBF-2SC reader into Card OR Finger mode (right-click the reader in BioManager >> Properties >> Set Entry Mode)... then present the card at the KBF-2SC.
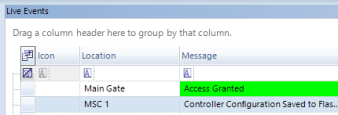
- The LED on the reader should go green and you should see an access granted event in live events.
- Refer to the separate BioSync reader setup guides for information about fingerprint or access code enrollment.
Related Articles
BioSync KBF-2SC Setup Guide
1.0 Introduction Setting up a KBF-2SC reader on a new installation is a three step process. Each of these steps is covered in its own document: BioManager Software Installation CNV-1000 Converter Setup - (used to connect to the BioSync via ethernet) ...BioSync KBF-2PR Setup Guide
1.0 Introduction Setting up a KBF-2PR reader as a new installation is a three step process. Each of these steps is covered in its own document: BioManager Software Installation CNV-1000 Converter Setup (used to connect to the BioSync via ethernet) ...BioSync KBF-3KP Setup Guide
KBF-3KP Fingerprint Reader Setup 1.0 Introduction Setting up a KBF-3KP reader on a new installation is a three step process. Each of these steps is covered in its own document: BioManager Software Installation CNV-1000 Converter Setup - (used to ...BioSync KBF-1FP Setup Guide
1.0 Introduction Setting up a KBF-1FP reader on a new installation is a three step process. Each of these steps is covered in its own document: BioManager Software Installation CNV-1000 Converter Setup (used to connect to the BioSync via ethernet) ...BioSync CNV-1000 Converter Setup Guide
1.0 Introduction The CNV-1000 is an Ethernet to RS-485 converter that is required for communication to the BioSync readers/network. The converter is used to scan for and detect the BioSync readers via their serial number/MAC address - so no ...