Change the Host PC IP Address
Often IP devices (such as access control panels, IP cameras and network routers and switches) use either a DHCP (Dynamic Host Configuration Protocol) or they will have a default static IP address. Often the static address is something like: 192.168.0.1, 192.168.0.254, 192.168.2.1, 169.254.0.1 but it will be stated in the device's supporting documentation. To connect to the device, the host PC needs to be set to an IP address on the same range as the device's default IP address.
For example; the default IP address for Mercury SCP controllers is 192.168.0.251. This guide explains how to change the IP address of the PC so that you can connect and log into the controller and then change the IP address to what you wish the controller to use.
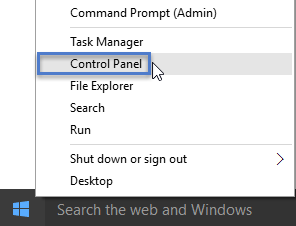
- From the Windows Start menu go to Control Panel (via a right-click).
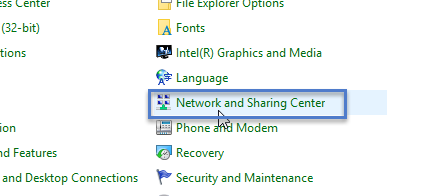
- From the Control Panel Items window locate and click on Network and Sharing Centre.
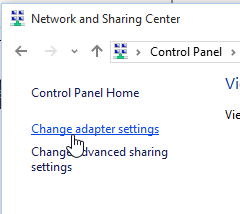
- On the left of the Network and Sharing Center window, click on Change Adapter Settings.
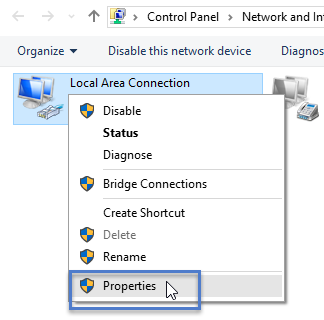
- Right click on the Local Area Network and select Properties.
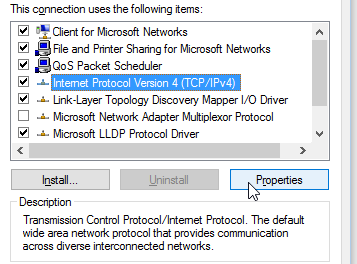
- Locate and click on Internet Protocol Version 4 (TCP/IPv4).
- Click on the Properties button.
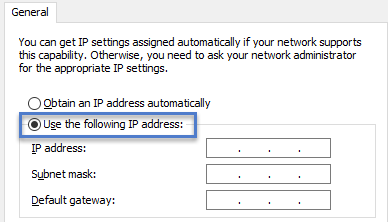
- Verify that the IP option is set to Use the Following IP Address.
- Input a new IP address for the host PC (an address on the same range as the device's default static address).
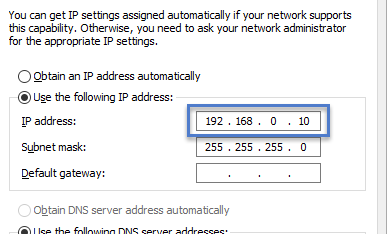
- Leave the Default Gateway blank.
- Click the OK button.
- Click the CLOSE button on the LAN properties window.