Detach/Attach a Doors.NET Database
1.0 Introduction
This document explains how to detach a Doors.NET database - (so it can be copied to a backup location and used for migrating a system to a different host PC/Server), It then explains how to attach a Doors.NET database. Typical examples would be: if you are attaching a Doors32 converted database, if you are migrating your system to an upgraded host PC or if you are upgrading to a newer version of Windows operating system.
This document guides you through the process of detaching and attaching a Doors.NET SQL database using SQL Studio Manager 2016 and an SQL Express 2016 database. Keri recommends consulting an IT administrator when administering databases installed in a full version of SQL Server.
IMPORTANT NOTES
- Microsoft does not provide a downgrade path for SQL databases. This means you cannot use 2016 or SQL 2014 files on a SQL 2012 database engine. You can, however use SQL 2012 files on any other newer version of SQL Server.
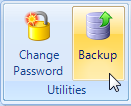
- You MUST ensure you have made a backup of your database before you attempt to detach it. The quickest and easiest way to do this is via Tools >> Backup. The Live Events grid will generate an event once the backup is complete.
On a 64-bit Windows operating system, the database backup file will be found at the following location:
- C:\Program Files\Microsoft SQL Server\MSSQL13.ECLIPSE\MSSQL\Backup
The following procedure would typically be used to move the entire Doors.NET system onto a different host workstation, or if the Windows operating system is being upgraded. It uses SQL Express 2016 but the steps are almost identical as other SQL Express versions.
Detaching The Doors.NET SQL Database
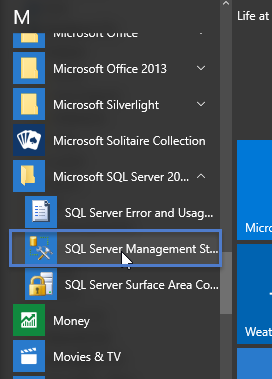
1. From the Windows Start menu >> All Programs/Apps >> Microsoft SQL Server 2016 >> SQL Server Management Studio Express.
2. Right-click the start menu item and select ‘Run as administrator’.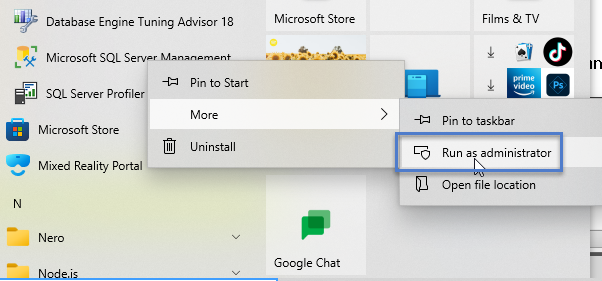
3. Please allow extra time for the program to configure itself and load if you are running it for the first time.
4. A connection window will appear displaying the host name and the database instance (default for Doors.NET is ECLIPSE).
5. Leave Authenticate at the default selection of Windows Authentication (you must ensure you have full Administrative Rights to the PC). If Windows Authentication is disabled you will need to consult an IT administrator.
6. Click on the Connect button.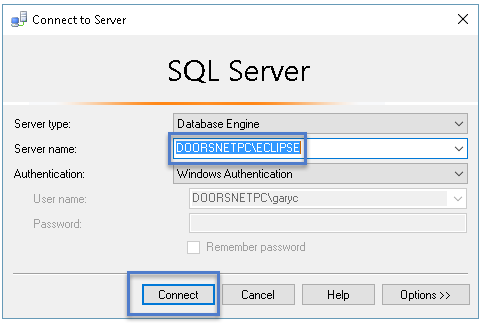
7. Expand Databases, listed in the left-hand pane and right-click on DHS_MAIN.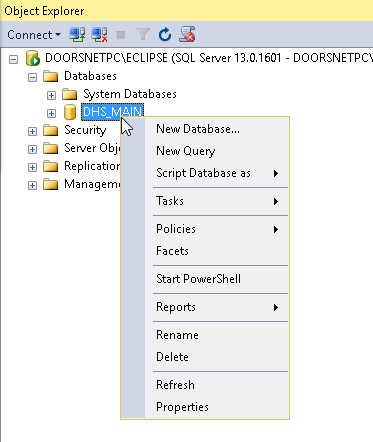
8. From the menu options go to Tasks >> Detach.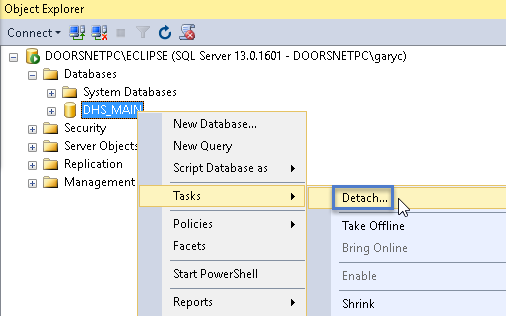
9. From the Detach Database window check the Drop Connections option.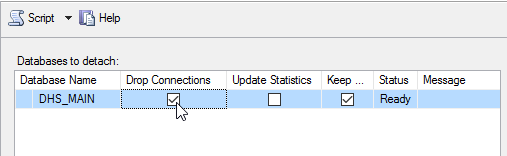
10. Click the OK button to detach the database.
11. The database will no longer be listed as a Database within Studio Manager.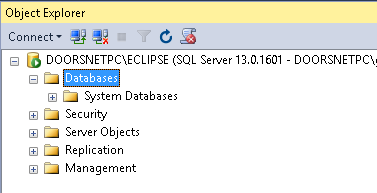
12. Two SQL database files will now be available (DHS_MAIN.mdf and DHS_MAIN_log.mdf) that can be copied and moved to another PC that has been prepared with a fresh install of Doors.Net and SQL Server/Server Express. These files must be copied to same directory shown in the image below.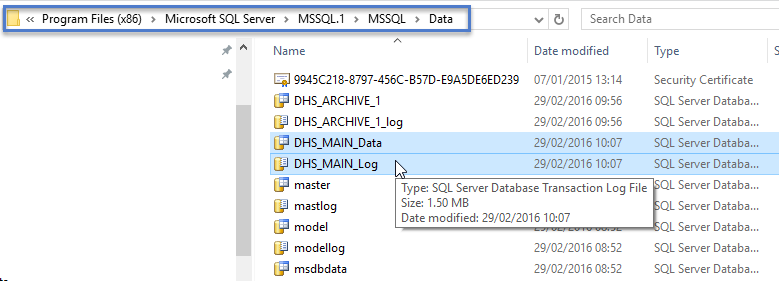
Note: For a 32-bit operating system the default database file path will be:
Program Files >> Microsoft SQL Server >> MSSQL.1 >> MSSQL >> Data
Note: The detach procedure is used if you have performed a fresh install of Doors.NET using the default selections. You would detach the database that gets installed automatically and then attach the backup database files (or converted database files for upgrades from Doors32).
13. Keeping a copy of these two database files will also provide you with a full database backup.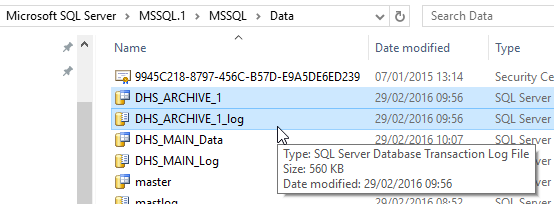
Attaching a Doors.NET SQL Database
- From the Windows Start Menu go to All Programs >> Microsoft SQL Server 2016 >> SQL Server Management Studio Express.
- Right-click the Start menu item and select Run as administrator.
- A connection window will appear and will be displaying the host PC name, the DoorsNET database instance of ECLIPSE and the Authentication Mode should be set to Windows Authentication.
- Leave all settings at their default values and click the Connect button.
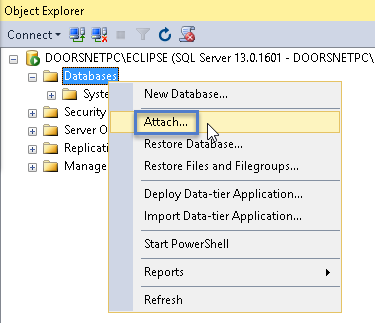
- Right-click on Databases, listed in the left-hand pane, and choose Attach.
Note: At this point you should have already copied your back-up database files into the default SQL file directory, as highlighted below:
6. Click the Add button.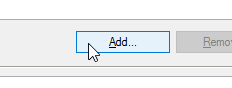
7. The browse window will open automatically to the default SQL data folder.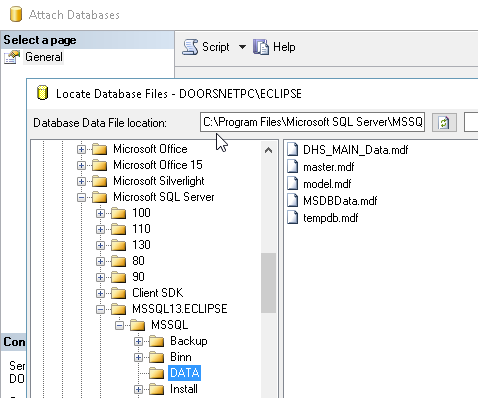
8. Select your Doors.NET database.mdf file.
9. Then click the OK button and allow it to run.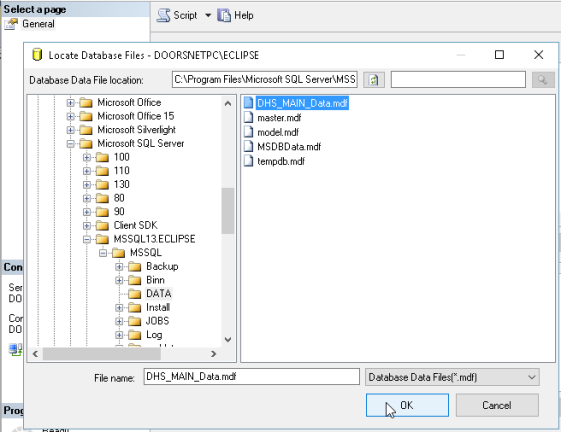
10. Finally, click the OK button in the lower right corner.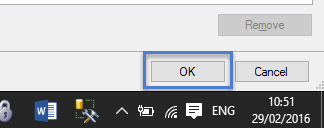
11. In the lower left corner of the Attach database window, you can observe the progress bar which indicates when the database is successfully attached.
12. Once complete the Doors.NET database will be listed under Databases in the left pane of Studio Manager.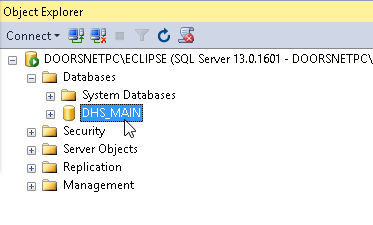
Update the Database using UpdateDHSDB
1. Locate the the UpdateDHSDB executable file (the default location is:
C:\Keri\DoorsNET).
Note: If the application server PC and the database PC are different, you should copy this file to a thumb drive and then copy it somewhere onto the database PC (it doesn’t matter where). This program must be run on the workstation that the database resides.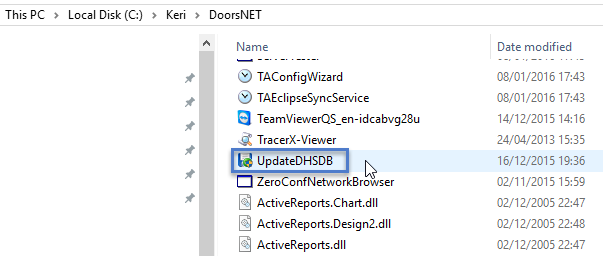
2. Right-click and select Run as administrator.
3. When the update database window appears you will see that Upgrade an existing database is selected by default, so click the Next button.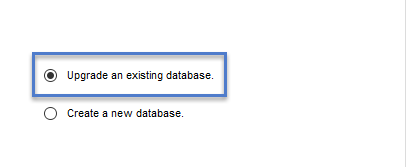
The default settings and values are as follows:
- The server/PC name should be displayed along with the SQL instance of ECLIPSE. (1)
- The Authentication mode should be set to Windows Authentication. (2)
- The database you should select from the database list is DHS_MAIN. (3).
- Un-check Backup Target Database (unless you do specifically wish to create a backup of the database). (4).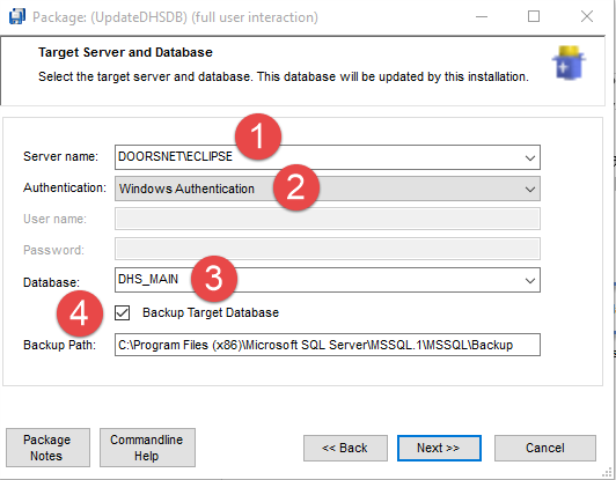
4. Click the Next button.
5. On the Begin Process screen click the Finish button.
6. Allow the upgrade process to run.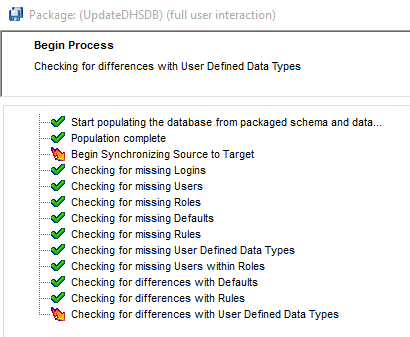
7. In a few moments you should see that the upgrade has completed.
8. Click the Exit button to complete the upgrade procedure.
The final step is to run the Gateway Wizard to associate the gateway windows service with the attached database. Running the gateway Wizard is covered in a separate document (P/N: 01565-002).
Related Articles
Doors32 to Doors.NET Database Installation Troubleshooting
Doors32 to Doors.NET Database Installation Troubleshooting - Standalone Document (attached)Doors32 to Doors.NET Database Conversion Procedure
1.0 Introduction This document provides basic information regarding the process for converting a Doors32 database/system for use in a Doors.NET access control system. It is intended to ensure that you (the customer) understand the steps you need to ...Doors.NET Standalone Technical Documents
Here you can download various Doors.NET technical documentation in PDF format: Doors.NET Setup and Installation Guides Doors32 and PXL Controller Upgrade Data Sheet Recommended PC and Operating System Information Doors.NET Ethernet Communication ...Doors32 to Doors.NET Conversion Procedure
Doors32 to Doors.NET Conversion Procedure - Standalone Document (attached)What are the Steps For Upgrading a Doors32 System to Doors.NET?
Introduction This document provides the requred steps for converting a Doors32 (PXL-500) system into a Doors.NET system. Notes: PXL-250 controllers are not supported with Doors.NET The minimum firmware version for PXLs when using Doors.NET is ...