Display Live Video From an Alert
1.0 Introduction
 Note: This section assumes you have already followed the steps to add and setup your camera(s) in Doors.NET
8.1 Select the Event Type in Filters
- In Doors.NET, go to Setup >> Filters.
- Select the existing Standard Filter.
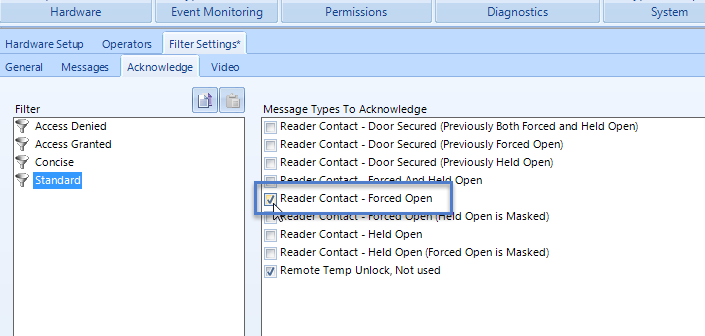
- Click on the Messages tab.
- Ensure the Reader Contact - Forced Open event is selected.
- Click on the Acknowledge tab.
- Ensure the Reader Contact - Forced Open event is selected.
Save the filter.
8.2 Configure Device Types
A device type should now be configured. The device type is where you select to view live video.
- In Doors.NET, click on Setup >> Device Types.
- Click ADD DEVICE TYPES button or select one of the existing device types.
- In the properties on the right, ensure Show Video is selected.
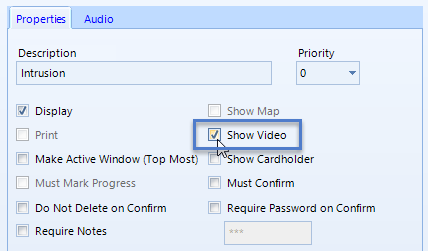
- Save the Device Type.
8.3 Assign the Filter and the Device Type
The filter should now be assigned to the reader which has a camera associated with it:
- In Doors.NET, go to Setup > Hardware Setup >> All.
- Expand the hardware tree and select the appropriate reader. The reader properties will be on the right.
- Ensure Advanced View is enabled for the hardware properties.
- Locate the Monitoring section.
- Set the correct filter to the reader.
- Set the correct device type to the reader.
- Set Require Acknowledgment to Yes.
- Save the reader settings.
8.4 Viewing the Live Video
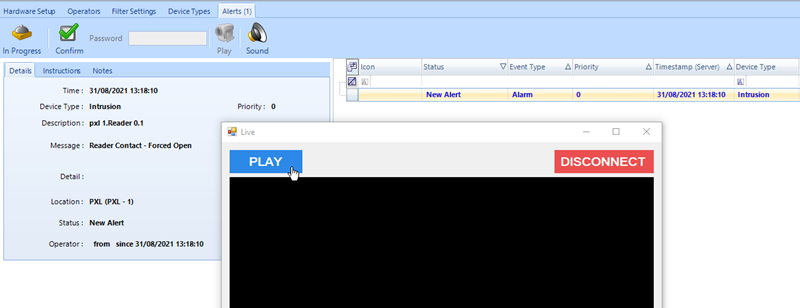
- Generate the door-forced event at the designated reader.
- An alert will appear in the software.
- At the same time, a live video window will appear.
- Click the PLAY button to view what is happening, physically at the reader.
The live video feed from the camera should then appear.
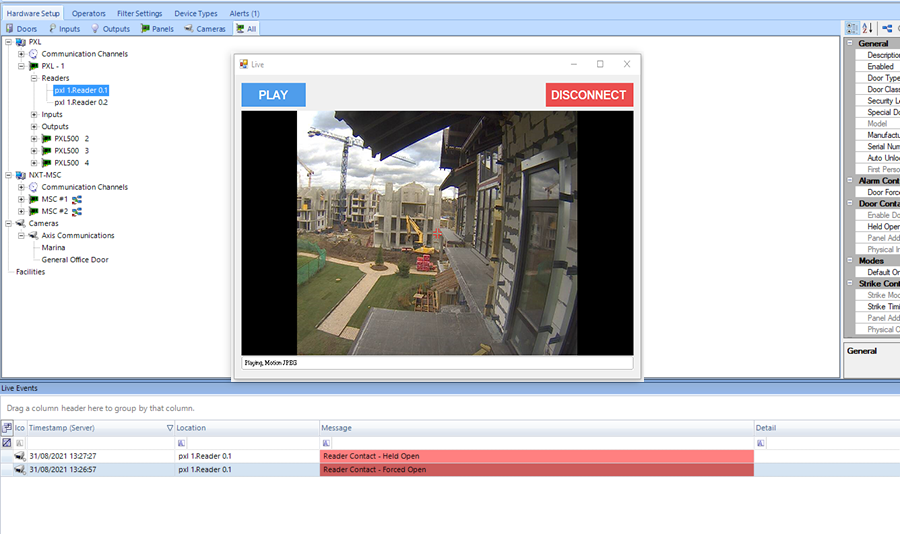
- You can re-size the video window and can also move it to a different monitor (for example; if you wish to confirm the alert).
9.0 View Recorded Video Clips
The following steps explain how you can configure Doors.NET to associate video recordings with an alert.
Notes:
- To retrieve H.264 recorded video clips from an AXIS camera, you will need to install the Axis Media Control SDK. The SKD can be downloaded from the following location: https://kerisys.sharefile.com/d-s55b32be11c09457983ea84742fc85def
- There is no guarantee that recorded video exists at the camera for the Doors.NET event timestamp - some cameras are edge devices that may or not have an SD card for video storage.
- These video recordings are not stored in the Doors.NET client - they are retrieved from the camera's recorded video storage location.
- The camera must be already be configured for recording.
- All Axis cameras require an on-board SD-card for video storage.
- Some Axis camera models also have AI level (i.e face detection or vehicle) in addition to basic motion.
- Many cameras will send video clips to be saved at the NVR or a cloud source.
- Pre-pre/post event settings has a minimum value of 5. If it is set to lower that 5 it will default to 5 regardless.
9.1 Steps to View Recorded Video Clips
The following steps explain how to view recorded video clips for a camera that has been associated with a reader.
- Add a camera and then associate the camera with a hardware object (for example, a reader).
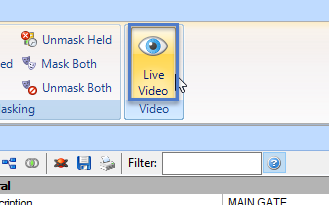
- Select the reader and verify that you can view live video from the camera (click on the eye icon).
Close the live video window.
- Generate an an event at the reader (for example; access granted, access denied, door forced, etc).
In live events, in the icon column, you will see a camera icon. If you do not see the icon column you will need to use the field chooser to display the column.
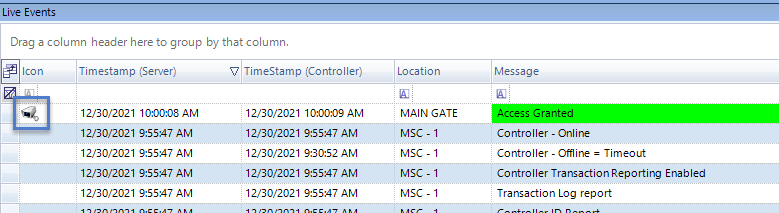
- Double-click the camera icon and you will see a message prompting you to view video playback. Click YES.
If video exists at the camera, the video clip will be displayed.
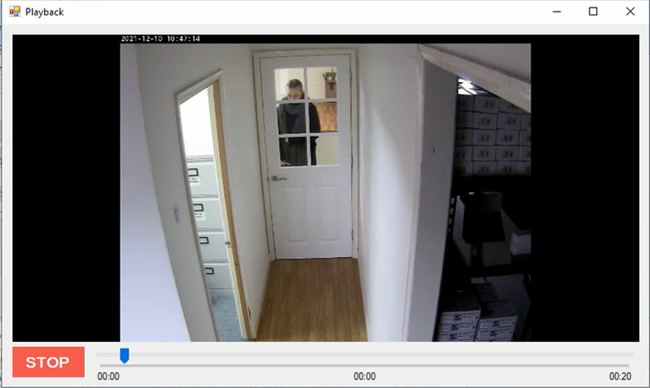
- By default you will see 10 seconds before the event (Pre Event) and 10 seconds after the event (Post Event) - So a 20 second playback (+/- 10 seconds from event time) is the default. These settings can be configured in the camera settings within Doors.NET.
Note: These video recordings are not stored in the Doors.NET client - they are retrieved from the camera's recorded video storage location.
Related Articles
Video Plug and Play Setup Guide
1.0 Introduction From Doors.NET v5.0.0 onwards, Keri Systems offers a new Video Plug-and-Play option that replaces the previous Reflections™ video program. The feature allows you to add a multitude of camera models from several manufacturers. Once ...Video Plug and Play Setup Guide - Axis Cameras
1.0 Introduction From Doors.NET v5.0.0 onwards, Keri Systems offers a new Video Plug-and-Play option that replaces the previous Reflections™ video program. The feature allows you to add a multitude of camera models from several manufacturers. Once ...Video Plug and Play Setup Guide - Digital Watchdog
1.0 Introduction From Doors.NET v5.0.0 onwards, Keri Systems offers a new Video Plug-and-Play option that replaces the previous Reflections™ video program. The feature allows you to add a multitude of camera models from several manufacturers. Once ...Video Plug and Play Setup Guide - Open Eye
1.0 Introduction From Doors.NET v5.0.0 onwards, Keri Systems offers a new Video Plug-and-Play option that replaces the previous Reflections™ video program. The feature allows you to add a multitude of camera models from several manufacturers. Once ...Video Plug and Play Setup Guide - Hanwha Wisenet Wave
1.0 Introduction From Doors.NET v5.0.0 onwards, Keri Systems offers a new Video Plug-and-Play option that replaces the previous Reflections™ video program. The feature allows you to add a multitude of camera models from several manufacturers. Once ...