Doors.NET - Admin Client Only Install
1.0 Introduction
This section explains how to install just the administrative client onto a PC, such as for installations where multiple client connections are required.
Important Note: If the host PC/Application Server PC software is updated you are also required to update any client PCs as well.
2.0 Installation Procedure via the
Download File
The latest version of Doors.NET can be downloaded from the Software Downloads section of the www.kerisys.com website. Click here for information about downloading the software.
- Double-click the self-extracting installation file.
- Wait a few moments while the file extraction initializes, then click the EXTRACT button.
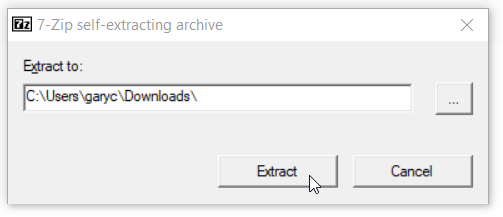
- You can also right-click the file and select 'Extract All'.
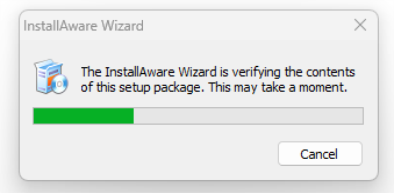
- Once all the files have been downloaded, click on the DoorsNETInstaller executable.
- The installer will initialize.
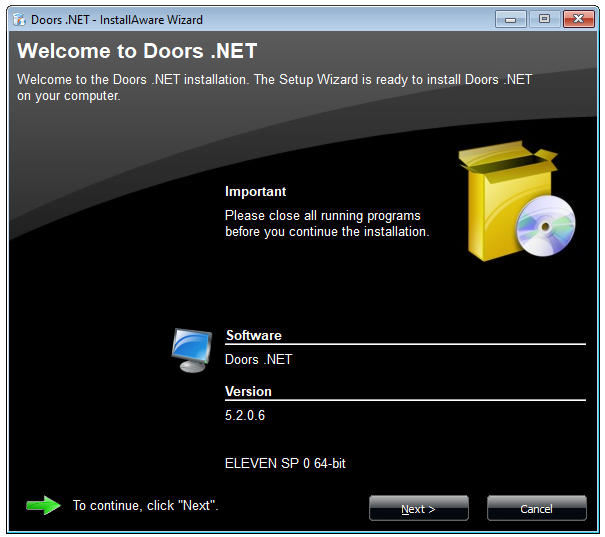
- Welcome screen - The version to be installed will be displayed along with the detected Windows operating system.
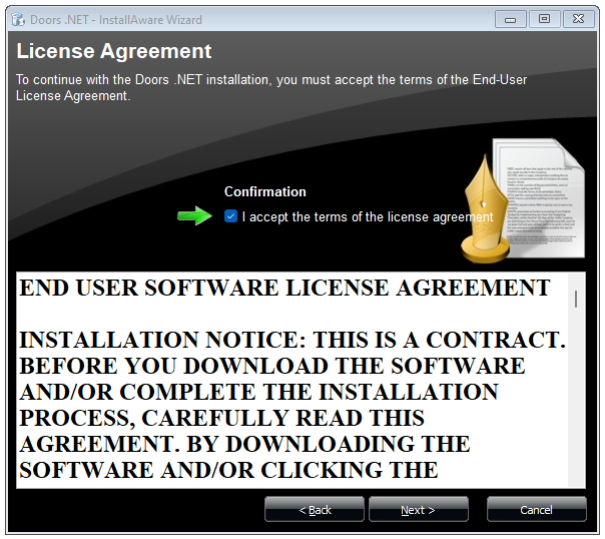
- Software License Agreement - Read through the agreement and place a check mark in the confirmation box.
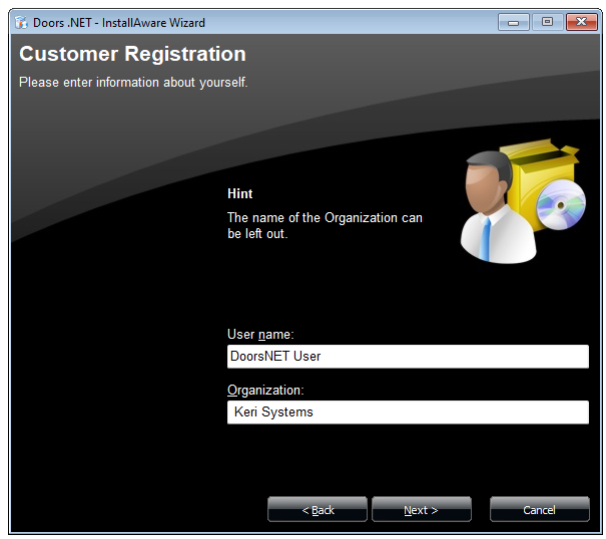
- Customer Registration - Enter a user name and (optionally) an organization name. Note: This is not the user name that you will use to log into the software. It is just for registration purposes.
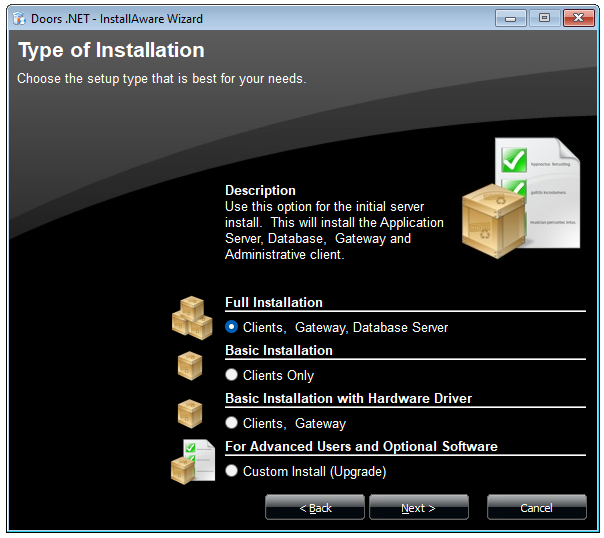
- Type of Installation - Select Basic Installation.
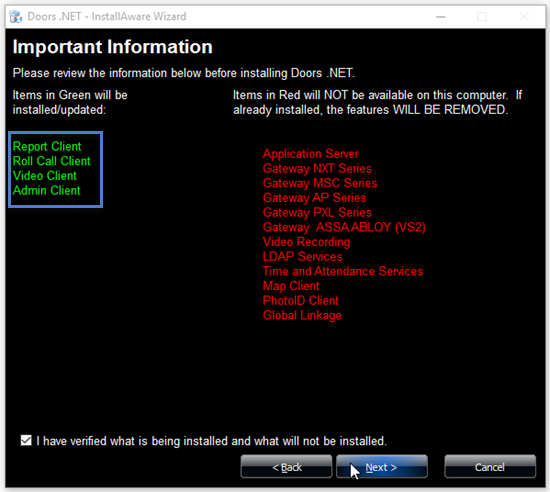
- Verification - You should just the Admin Client highlighted in green on the left. The installer will also install the report client, rollcall client and video clients. Tick the verification box to proceed to the next screen.
- Destination Folder - The folder location for all the supporting software files (such as the help file). This should ideally be left at the default setting unless it specifically must be changed.
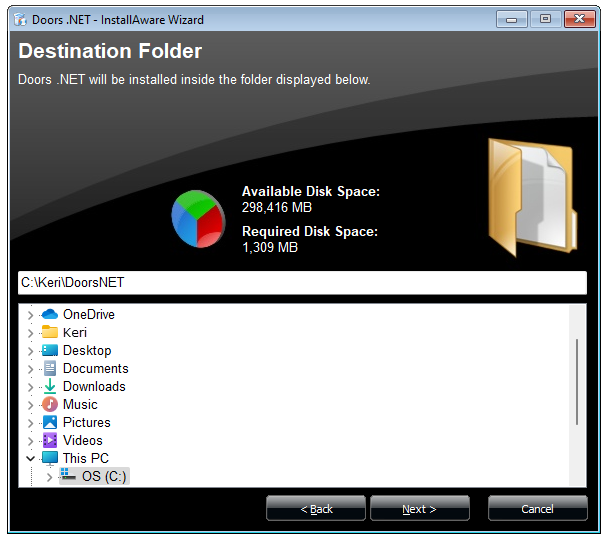
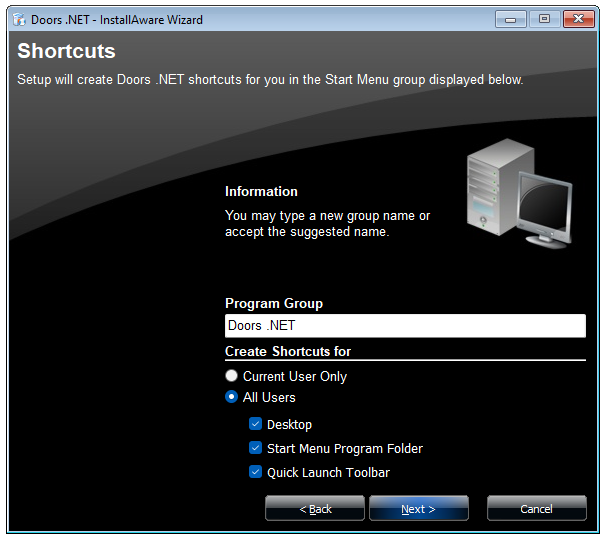
Note: You can install the client into a folder on a USB drive/memory stick. These files could then be manually copied onto the local drive of remote workstations to save you having to run the installer multiple times at each of the remote workstations. - Shortcut Selections - Choose to create shortcuts for the Desktop or Start Menu, or both.
- Ready to Install - Simply click the Install button and the client installation will begin.
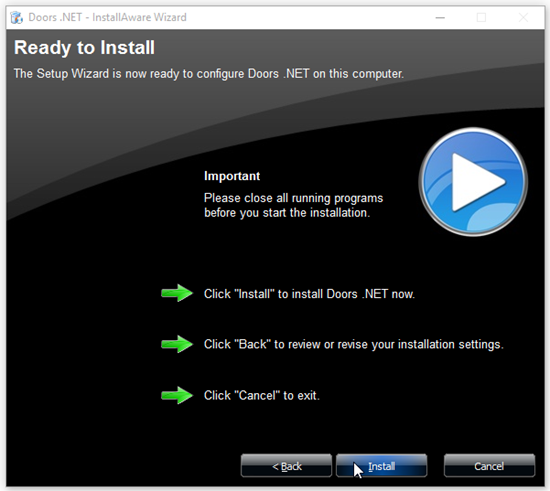
- Installation of the client should take somewhere between 15 and 20 minutes (depending upon the specification of your PC). When installation completes you will see a recommended option to run the License Manager. This is not necessary for a client-only install so click the Finish button and you will be ready to use the client.
Related Articles
Doors.NET FAQs
Doors.NET Software Questions Where can I download the latest version of the Doors.NET software? Note: To download the latest version of Doors.NET from the Kerisys.com website you will need to first register an account and then log into the site with ...Doors.NET Troubleshooting Guide
The following guide aims to assist you in troubleshooting and identifying some of the issues that may be encountered when setting up and using the Doors.NET software and supported hardware. Where there are multiple possible causes, the suggested ...Doors.NET - Quick Start Guide
1.0 Introduction This document covers the basic installation and configuration of Doors.NET with Standard NXT, PXL, Entraguard, NXT-MSC (Mercury-Powered) or True Mercury controller types. It assumes that the computer being used for the Doors.NET ...Doors.NET - Migrating a System
1.0 Introduction There are several steps that need to be taken to successfully transfer a Doors.NET installation onto a different host PC. It is important that these steps are performed in the exact order that they are listed: Important Notes: The ...Doors.NET - End User's Guide
Doors.NET user guide for the end-users (attached).