Doors.NET - License Activation - Online
1.0 Introduction
Following installation of the software the system will need to be activated. Activation is performed using the License Manager Utility and is most easily done using an active, unrestricted Internet connection.
The License Manager registers and activates your software and validates any applicable features or controller values, allowing system use. Please have your license key ready before beginning this section.
2.0 Run the License Manager Wizard
- Once Doors.NET has successfully installed you will be prompted to run the License Manager.
- The welcome screen will be displayed.
- Click the Next button.
- Enter the license key - either one you have created yourself or a license that was provided by Keri Systems. If you have been emailed the license key you can copy and paste the license key into the fields. If you do not have a license key you will have to contact Keri Systems Inside Sales or you can generate a license online by clicking here. Enter your key then click Next.
- You will then see the registration page. Enter information about the site and installer contact details.
- Click Finish to complete the installation.
- Click OK to the following message.
- Then Yes to start or restart the Application Server Windows Service.
- If you have installed the Global Linkage Service (for creating custom automation functionality), then you should also start/restart the GLS service.
- The License Manager application will now open and the list of installed components will be on the left. The Application Server should show as Licensed and the gateway server for hardware communication should show: Licensed - Needs Configuration.
- Select the gateway service then click the Settings button. You are now ready for the next step - Gateway Configuration.
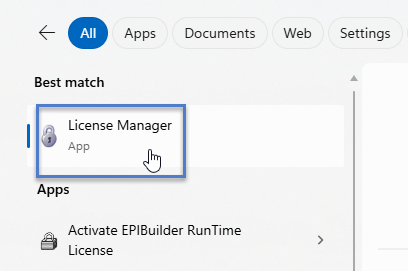
Note: The Doors.NET License Manager can also be opened via the Windows Search field, then entering 'License Manager'.

Related Documents
- Creating a Doors.NET License Key
- Doors.NET - License Activation - Offline
- Doors.NET - License Activation - Demo Mode
- Doors.NET - Gateway Setup and Configuration
Related Articles
Photo ID License Activation - Online
1.0 Introduction This article walks you through the process of activating the Doors.NET Photo ID client using an active, unrestricted internet connection. 2.0 Ensure Badging is Enabled on Your Doors.NET License The first thing you should do is check ...Doors.NET License Activation and Gateway Configuration
Doors.NET - License Activation and Gateway Configuration (PDF) P/N: 01565-002 Rev F (attached)Doors.NET FAQs
Doors.NET Software Questions Where can I download the latest version of the Doors.NET software? Note: To download the latest version of Doors.NET from the Kerisys.com website you will need to first register an account and then log into the site with ...Doors.NET - End User's Guide
Doors.NET user guide for the end-users (attached).Doors.NET - End Users Guide
Doors.NET End Users Guide (attached)