Doors.NET - Migrating a System
1.0 Introduction
It is important that these steps are performed in the exact order that they are listed:
Important Notes:
- The version of SQL Server on the new machine must be the same or a later version (as Microsoft does not provide a downgrade path for SQL Server and their associated databases). For example; you can go from SQL 2016 TO SQL 2019 but you cannot use an SQL 2019 database on an SQL 2016 database engine.
- The new host PC will be required to have SQL Studio Manager installed. This can be installed very easily via the License Manager, once the Doors.NET software has been installed.
- When migrating your Doors.NET system to a new PC and you are using encrypted administrator passwords (Doors.NET v4.0.3 onwards), be aware that you will need to re-use your existing license key. You will therefore need to obtain your current license key prior to performing the system migration... you can also make a copy of the entire C:\Keri\DoorsNET directory from the old PC as this will include the license file.
- If you use the Photo ID client you will need to revoke the Photo ID license on the old PC so that it can be re-activated on the new PC. Additionally you should also make a copy of the entire C:\Keri\DoorsNET directory as this will include the cardholder images and Photo ID badge templates (unless they have been saved to a location different to the default location).
2.0 Backup the Current Database
- Create a backup of the current installation on the old PC by going to Tools >> Backup in Doors.NET.
- Once you have created the backup, you will be prompted to go to the backup file location.
Copy the .bak file onto a memory stick or other storage device/network location.
3.0 Install Doors.NET on the New PC
 Note: You will need to be registered and logged into the Kerisys.com website to download software:
- Download the latest version of the Doors.NET software. The most up-to-date version of the Doors.NET software can be downloaded from here: https://downloads.kerisys.com
- Ensure the new PC meets all the specification requirements for running Doors.NET.
- Ensure the new host PC is up-to-date with all the latest Windows updates.
- If you have any anti-virus software running, Keri recommends temporarily switching it off while you are running the installation and then adding Door.NET as an exception once the software has successfully installed and the PC has rebooted.
- For installation, ensure you have full administrative rights on the new PC.
- Install the Doors.NET software on the new PC.
- Once the software installation has completed, you will be prompted to open the License Manager/run the License Wizard.
4.0 License Doors.NET on the New PC
Once installation has completed you will need to activate the existing Doors.NET license on the new PC.
- You will need to re-use the old Doors.NET license key on the new PC.
- You can find the current Doors.NET license key by opening The License Manager (Start Menu >> Doors.NET >> License Manager (on the old PC).
- If you have the entire C:\Keri\Doors directory from the old PC you can also copy the ApplicationServerLicense.dlsc file into the same location on the new PC and this will also transfer across the license information. Once copied across you should then restart the Doors.NET Application Server Windows service on the new PC:
- Once you have completed the Doors.NET software installation on the new PC you will be prompted to run the License Manager.
- When the license manager opens, click Next.
- Copy and paste the existing license key into the license fields.
- Enter the end user and integrator contact information. It is optional but is helpful if you need to contact technical support in the future. Click NEXT again.
- A summary of the license information will be displayed. Click the FINISH button and you should see a confirmation that the old license has been registered on the new PC.
- Click YES to proceed with starting/restarting the application server Windows service.
- Click OK to restart any additional Doors.NET services which have been installed.
- The License Manager will now open. Listed on the left side of the screen will be all the services which have been successfully installed and licensed.
- The software is now fully installed and licensed so you are ready to proceed to the next step.
5.0 Delete the Default Database on the New PC
If you have done a new install of Doors.NET on a brand-new PC, chances are that you have also selected to install SQL Express and the default SQL database. You will therefore now be required to remove the default database from the new PC so that you will be able to attach the backup file(s) from the previous PC.
- On the new PC, open SQL Studio Manager (right-click and 'Run as Administrator').
- You will have to wait a short while if it is the first time you have run the program.
- Log into Studio Express, connecting to the ECLIPSE instance with Windows authentication.
- On the left pane, navigate to the DHS_MAIN database. This database (and the ECLIPSE instance are installed automatically when you select to install the database along with the Doors.NET software).
- Right-click the DHS_MAIN database and select to Delete. The database will be removed from Studio Manager and the database files will also be removed from the PC.
- You are now ready to attach the database which was backed up in section 2.0.
6.0 Restore the Backup Database File
You can now attach the backup database file but for now, minimise SQL Studio Express.
NOTE: It is important to know that due to limitations imposed by Microsoft, you will not be able to use a newer database on an older version of SQL/SQL Express (as there is no downgrade path for SQL databases). For example; you CAN use an SQL 2008 database on SQL 2014, but you CANNOT use an SQL 2014 database on SQL 2008.
- Insert the USB drive into the new PC (or other storage device which has the Doors.NET backup).
- Locate the Doors.NET backup file on the storage device (.bak file).
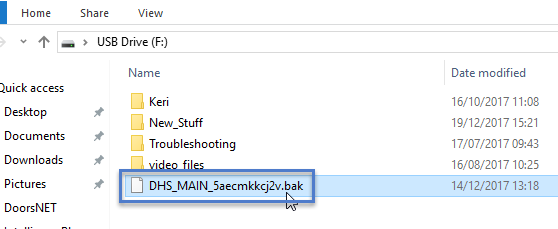
- On the new PC, copy the backup file into the following location:
C:\Program Files\Microsoft SQL Server\MSSQL13.ECLIPSE\MSSQL\Backup - (on a 32-bit OS)
C:\Program Files (x86)\Microsoft SQL Server\MSSQL13.ECLIPSE\MSSQL\Backup - (on a 64-bit OS) - Restore the SQL Studio Manager window.
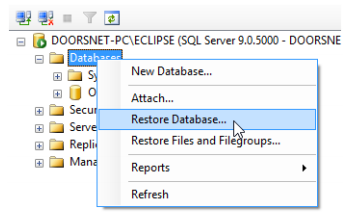
- Right-click Databases and select Restore Database...
- Set the source as Device.
- Click the browse icon
 .
. - Click the ADD button.
- Select the database file which you have copied across to the PC.
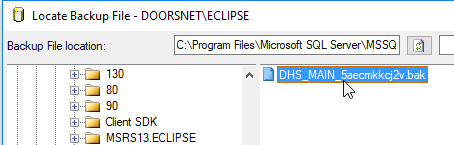
- Click OK.
- Click OK again.
- The restore plan information should be similar to what is displayed below:

- Click OK at the bottom of the Restore Database window.
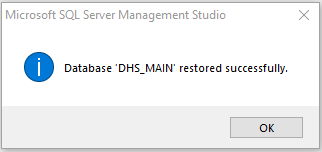
- You may need to be patient at this point if you are restoring a large database. Eventually you should see a message stating the database has been restored successfully.
- The next step is to run the gateway wizard.
7.0 Run the Gateway Wizard
You are now required to run the gateway wizard (to associate the gateway in the database with the windows service that is installed on the new PC). Until you do that your controllers will not come online.
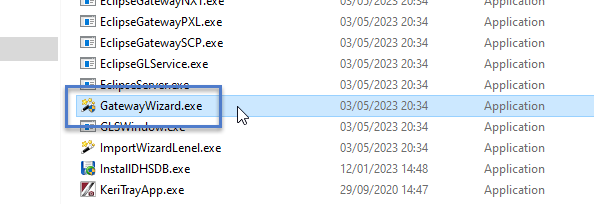
- From the Windows start menu, navigate to the Doors.NET subfolder.
- Right-click Gateway Wizard and 'Run as Administrator'.
- The gateway wizard log in window will open.
- From the gateway selection drop-down list, select the gateway type to match the hardware type that is installed.
NOTE: For NXT Mercury-Powered controllers, select the option: 'MSC - SCP Series' - Enter the Doors.NET username and password (default - both areadmin), click Connect.

- Select the gateway from the Existing Gateways section on the left. Click Next.
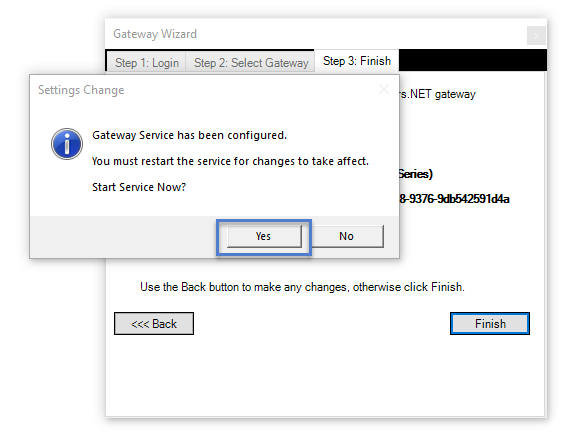
- Click Finish and you will be prompted to start the gateway windows service.
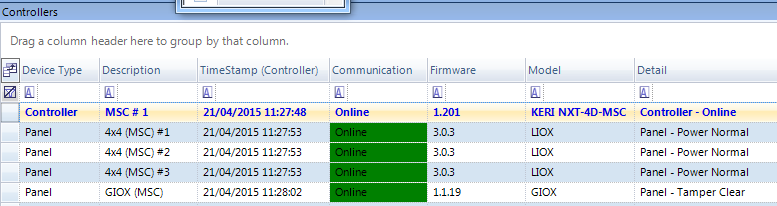
- The system is now fully restored on the new PC.
- Log into the admin client to check that your controllers are online.
The final step is to manually update the Doors.NET database.
8.0 Run UpdateDHSDB
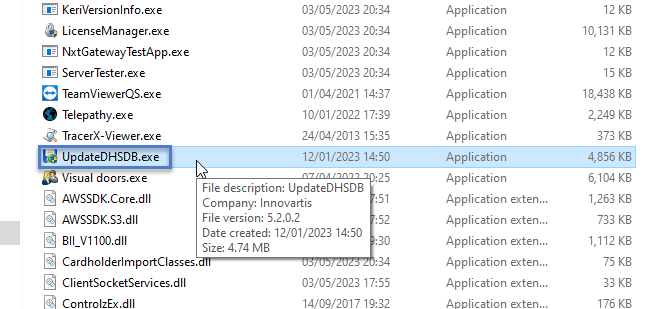
- First, locate the UpdateDHSDB executable file which can be found in the following default location on a typically installation: C:\Keri\DoorsNET. Double-click to open the application. You may need to wait a few moments for it to initialize.
- The database select window will appear.
- The server name will default to the local host PC name.
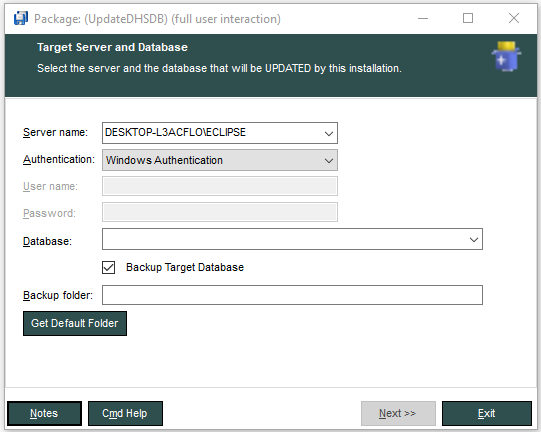
- Select DHS_MAIN from the Databases list.
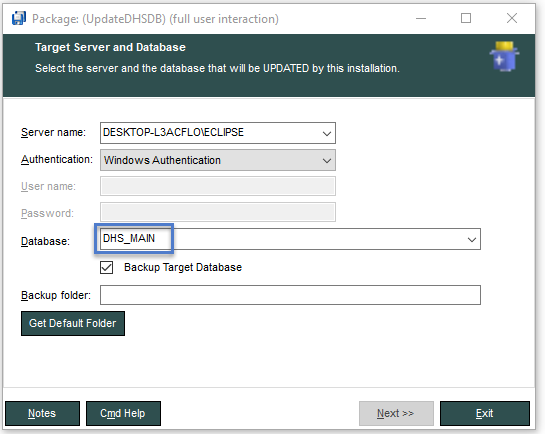
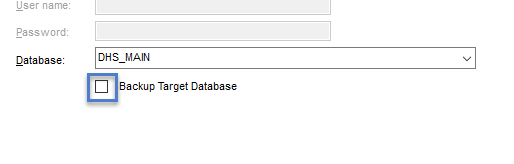
- Deselect 'Backup Target Database' unless you wish to create a backup. Click on "Next", then "Finish."
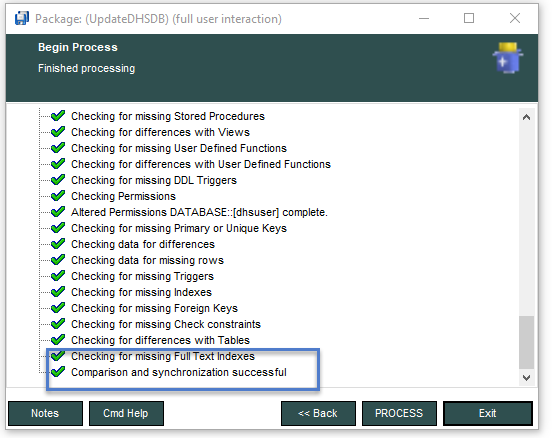
- Allow the program to run. As it does, it looks for changes that need to be applied to the SQL database table and automatically makes those changes.
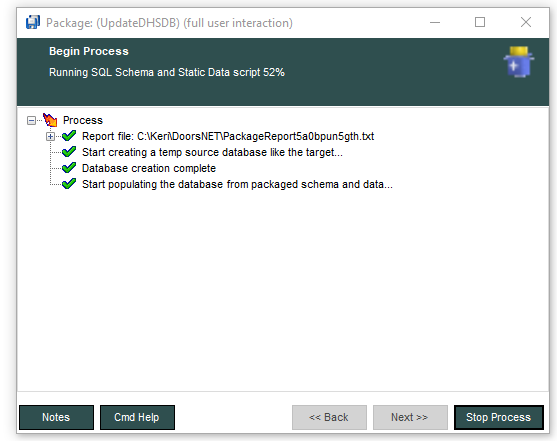
- The database updating should take no more than a minute to complete, however, on a large system (with a lot of events, controllers and cardholders) it may take a few minutes. When it has successfully completed, click on Exit to finalize the procedure.
Related Articles
Doors.NET FAQs
Doors.NET Software Questions Where can I download the latest version of the Doors.NET software? Note: To download the latest version of Doors.NET from the Kerisys.com website you will need to first register an account and then log into the site with ...Doors.NET - Custom Installation
1.0 Introduction A full installation installs the minimum required components for a single-PC system (the Application Server, hardware gateways, archive service and administrative client). The custom install option is used to install additional ...Doors.NET - Full Installation
1.0 Introduction The Doors.NET software can be downloaded from the www.kerisys.com software downloads section. You can download just the installation file or you can download the entire installation file set (which will allow you to perform the ...Restore the Doors.NET Database
Instructions for Restoring the Doors.NET SQL Database Notes: - performing this task will completely overwrite ALL data in the existing Doors.Net database. - this backup procedure pertains to Doors.Net databases using Microsoft SQL Server 2016 ...Doors.NET - End User's Guide
Doors.NET user guide for the end-users (attached).