Elevator Control - Scheduled Override of Floors
1.0 Introduction
In normal elevator control operating mode access to controlled floors will require the presentation of an access credential to the reader in the elevator cab. Occupancy requirements at some facilities may require that some floors services by the elevator are available to persons other than credential holders. This option can be easily configured in Doors.NET using a combination of time schedules and elevator access groups to create an elevator override schedule. This schedule is then assigned to the reader within hardware setup. The steps to follow for setting up floor overrides are below:
2.0 Setup Procedure
The following setup procedure assumes you have already configured your Doors.NET software and hardware for elevator control. The elevator controller should be online and the elevator control reader should be wired into bus 1 of the NXT-Mercury Powered or reader port 1 of an SCP controller.
- Click Time Schedules from the Home tab.

- Click Add to add a new Time Schedule.
- Highlight the new schedule and give it a descriptive name.
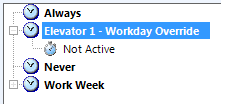
- Highlight the default time interval where it states ‘Not Active’.
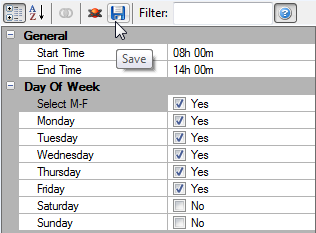
- From the properties on the right, set a start time and a stop time (where free access will begin and end).
- Select the days of the week when the free access will be operational then click save.
- Click the ‘Elevator Groups’ icon from the Home tab.

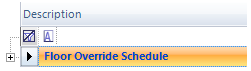
- Click the ‘Add’ icon and rename the new schedule, I.E Floor Override Schedule, press Enter then Yes to the notification.
- Highlight the new schedule name by clicking the black arrow to the left of the name, the schedule name should highlight in orange.
- From the floor selection list on the right, highlight a selection of floors you wish to unlock at a certain time. To select multiple floors you can use the Ctrl or Shift keyboard keys.
- Select the Time Schedule you previously setup then click the assign icon.
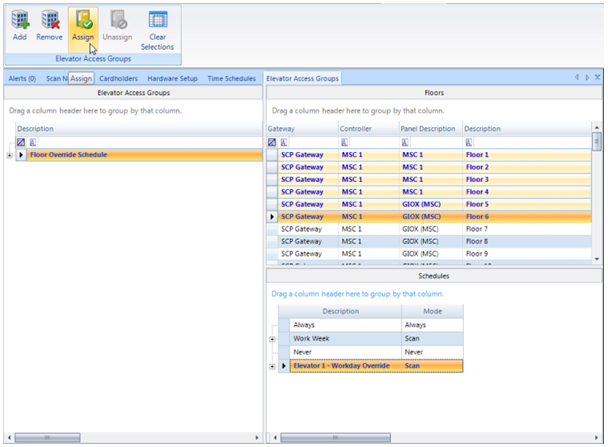
- The selected floors and the associated time schedules will appear beneath the elevator access group name.

- You can select different floors and a different schedule by clicking the ‘Clear Selections’ icon, re-selecting the elevator access group name, selecting different floors, selecting a different time schedule then clicking the ‘Assign’ button again.
- Next, go to Setup >> Hardware Setup >> All and locate the elevator controller in the hardware tree.
- Double-click to expand the controller entry then select the reader listed on bus 1.
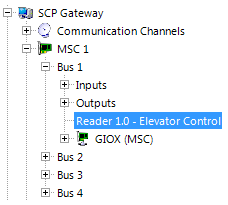
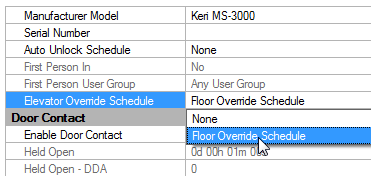
- With Advanced View enabled find the ‘Elevator Override Schedule’ in the reader properties, set this to the Override Schedule you created in the Elevator Access Groups page then save.
Note: Due to the operation of the MSC/SCP gateway, under certain circumstances it may take until the next minute for the overrides to action on the hardware.