Entraguard Controller Setup in Visual Doors
1.0 Introduction
Visual Doors supports the Entraguard, Silver and Titanium Telephone Entry controllers functioning as a node on a PXL-500 network for seamless integration with a PXL system. The Entraguard can work as a single unit or networked to other Entraguard or PXL units. This guide explains how to add the Entraguard using a serial or Ethernet connection and it explains basic configuration.
Supported Entraguard-specific controllers types are:
- Entraguard Titanium 250
- Entraguard Titanium 250, modem
- Entraguard Silver
- Entraguard Silver, modem
- Entraguard Platinum 5000
- Entraguard Platinum 5000, modem
Once you have setup and configured the Entraguard, refer to the Entraguard User Setup guide for instructions on adding users for the Entraguard. Entraguard information can be adding to existing users who already use cards or they can be added as new Entraguard users.
2.0 Adding an Entraguard Primary via Serial or USB-Serial Connection
Notes:
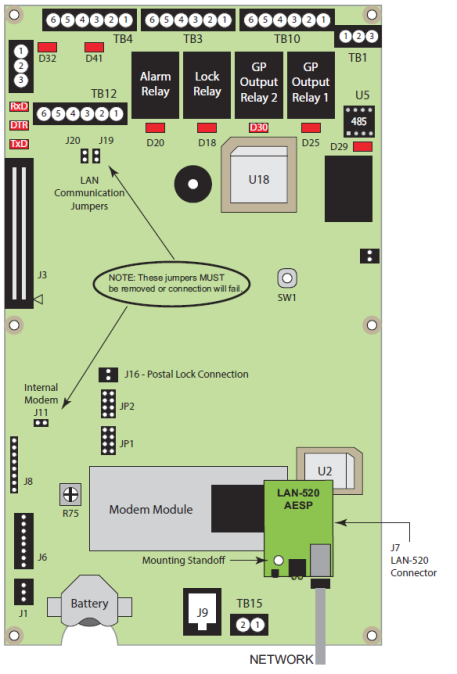
- When using the Entraguard Silver or Platinum with RS-232 serial communications, ensure the J19 and J20 jumpers are both set.
- Ensure the J11 (Internal Modem jumper) is off.
Manually Add a new Entraguard
- Set the address for the Entraguard as address #1 (refer to the standalone Entraguard Installation guide for instructions).
- Connect one end of the serial cable to the Entraguard and the other to the PC COM port or into the USB-Serial adapter.
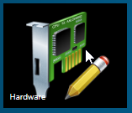
- From the home screen, click on the Hardware tile.
- If you have multiple, different hardware types, ensure the PXL gateway is selected.
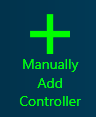
- Click the Manually Add Controller icon.
- Enter a new description for the Entraguard Primary controller.
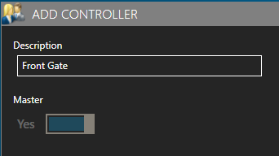
- Select from the available controller types the correct model of Entraguard controller.
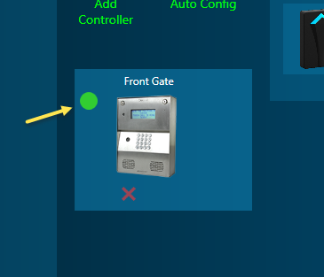
- The Entraguard will be added to the hardware screen and the red dot next to the controller will indicate it is currently offline.
- By default, the new controller will be assigned a serial communication channel so all you have to do is enter a COM port number.
Note: If you are using a USB-Serial adapter, you may need to go into Device Manager to check what COM port the device is using. To access Device Manager, right-click Windows start menu >> Device Manager >> Port COM & LPT).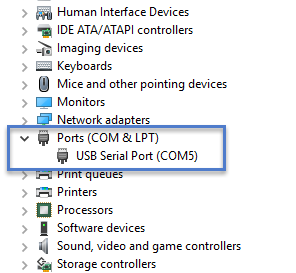
- Enter the correct COM port number then click save.
- Within a few seconds the red dot should turn green, indicating the Entraguard is now online.
3.0 Modem Connection Method
- When using the Entraguard Silver or Platinum with an external modem (connected to the RS-232 port), ensure the J19 and J20 jumpers are both across the pins.
- Ensure the J11 (Internal Modem jumper) is off.
- Follow the steps outlined in the previous section (Serial connection method).
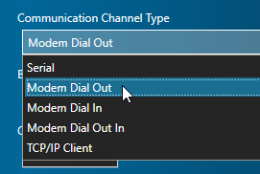
- Locate the communication channel options and set the channel type to: Modem Dial Out.
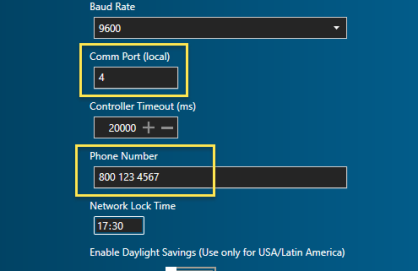
- Enter the Com port number for the modem connected to the host PC.
- Enter the phone number for the remote location of the PXL Primary controller.
- Click on the green save icon.
| 4.0 | Adding an Entraguard Primary via Ethernet Connection |
Note: Support for the LAN unit on Entraguard begin with PCB 23217-001 Rev. E. Earlier units cannot support a LAN unit.
- Power-down the Entraguard Primary controller.
- On the Entraguard PCB, remove jumpers from J11, J19 and J20.
- Insert the LAN-520X into port J7, orient the LAN-520 as shown below.
- Apply power to the Entraguard.
- For setting up the LAN-520 with an IP address refer to the standalone Basic LAN-520 Setup Guide standalone document (P/N: 01519-001).
- Once you have set the LAN-520 with an IP address, log into the Visual Doors software.
- From the home screen, click on the Hardware tile.

- If you have multiple, different hardware types, ensure the PXL gateway is selected.
- Click the Manually Add Controller icon.
- Enter a new description for the Entraguard Primary controller.

- The Entraguard will be added to the hardware screen and the red dot next to the controller will indicate it is currently offline.
- From the Communication Channel Type drop-down list, select TCP/IP client.
- Locate the IP address field and enter the IP address that is assigned to the LAN-520 that is connected to the Entraguard.
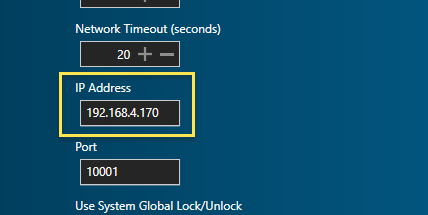
- Click outside of the IP address field, then click the green save icon.
- Within a few seconds the red dot to the left of the Entraguard will go green indicating the Entraguard is online.

Related Articles
Entraguard Controller Configuration in Visual Doors
Entraguard Settings Once the Entraguard is online it can be configured on the Hardware Setup screen. Description - Enter a description for the Entraguard controller, for example, where the controller is located within the facility. Communication ...Visual Doors Data Sheet
Visual Doors Data Sheet (attached)Visual Doors - Full Reference
Visual Doors - Full Reference Guide - P/N: 01691-001 - Rev B (attached)Controller Settings in Visual Doors
Controller Settings PXL Controller Settings Description - Enter a description for the controller, for example, where the controller is located within the facility. Enabled - Allows to you quickly toggle between enabling and disabling the controller. ...Setup Time Schedules in Visual Doors
Time schedules are assigned to access groups to determine the hours in which cardholders are able to gain access. They are also used in Auto Unlock Schedules (AUL). AUL schedules are assigned to doors to determine when the door should automatically ...