Global Linkage - Quick Start Guide
1.0 Introduction
Notes:
- To program a Global Linkage you must have a Global Linkage license enabled and you must be using Mercury Powered NXT or Standard Mercury controllers.
The decision-making is performed by the Global Linkage Service (GLS) at the host PC so it is important to understand that the global linkage actions will only happen when the programmed hardware is online.
2.0 Global Linkage Macros
| 2.1 | GLS Macros Overview |
The Global Linkage macros are the actions that you wish to be performed. A single trigger can be used to activate multiple actions (macros).
| 2.2 | GLS Macro Examples |
Some commonly used Global Linkage Macros:
- Activating or Deactivating Outputs
- Masking or Unmasking Inputs
- Grant an Anti-Passback Free Pass
- Send out an E-mail Message Notification
- Export or Email a saved report
- Activate a Local Linkage Procedure
- Momentarily Unlock a Door or Group of Doors
- Set Card + PIN on a Door or Group of Doors
3.0 Global Linkage Triggers
| 3.1 | GLS Triggers Overview |
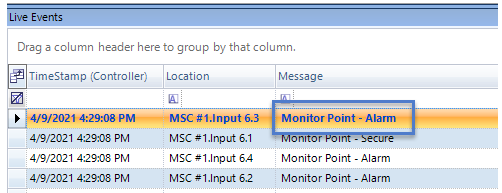
The Global Linkage triggers are specific designated events. Any events that appears in the Live Events grid can be used as a Global Linkage trigger. A very basic global linkage trigger is an input alarm event (when an input on the system has gone active).
Or the trigger could be a door forced open event, anti-passback violation or a double-card
presentation at a specific reader.
Any event that you can generate in live events can be used as a Global Linkage trigger.
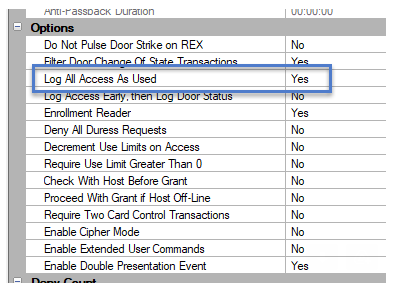
Note: The displaying of certain events is determined by certain reader settings. For example; enabling two-card control or double-card presentations (or the processing of door status events): For example; if you have Log all access as used you will immediately see an access granted event from a valid cardholder. Otherwise, you would not see the access granted event until the door was physically opened.
Refer to the reader setup section in the Doors.NET help file for further information. The important thing is to generate in live events the specific event you want to use
as the Global Linkage Trigger.
| 3.2 | GLS Trigger Examples |
Note: Different hardware types generate different types - Some controller types do not generate every event type, but all of the following event types can be used as triggers:
- Access Denied - Deactivated Card
- Access Denied - Not in File
- Access Denied - Never At This Schedule
- Access Denied - Reader Locked
- Control Point - Activated
- Control Point - Deactivated
- Control Point - Offline
- Controller Offline = Timeout
- Controller - Online
- Monitor Point - Alarm
- Monitor Point - Secure
- Door Locked
- Door Unlocked
- Reader Contact - Forced Open
- Reader Contact - Held Open
4.0 Global Linkage Trigger and Macro Setup
The following example explains how to setup a basic Global Linkage action which will unlock a group of doors following a double-card presentation at a specific reader. Those same doors will then lock again following a single card presentation at the same door.
| 4.1 | Macro Setup |
Create a Macro to Unlock Some Doors
The following steps explain how to create a macro that will unlock a door and then a second macro that will re-lock the same door. The steps are then replicated for any additional doors that need to be locked/unlocked.
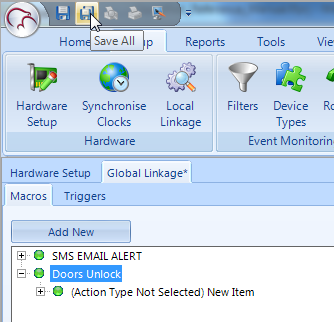
- From within Doors.NET, click on the Global Linkage icon (via the Home tab).
- On the Global Linkage Macros tab click the ADD NEW button.
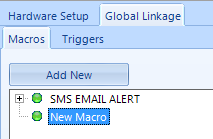
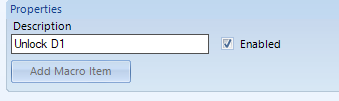
- Give the new macro a descriptive name, click the ADD MACRO ITEM button then click save/save all.
- Highlight the new action type and give that a descriptive name.
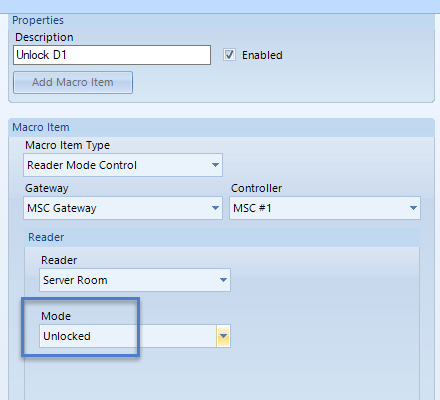
- From the Macro Item type drop-down list select Reader Mode Control.
- Select the appropriate hardware gateway.
- Select the relevant controller.
- Select the 1st reader to be unlocked.
- Set the Reader Mode to Unlock.
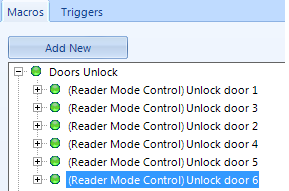
- Highlight the macro, click Add Action Item again, then repeat this same process for every reader on the system that needs to be part of the global unlock configuration. You will then have a Macro with multiple action types listed beneath - One action for each doors that will need to be unlocked. Keep in mind, as it is global linkage the doors can be located on completely different controllers, even different hardware gateways.
Create a Macro to Re-lock those Same Doors
- Click the ADD NEW button again.
- Select the new macro and name, such as re-lock doors.
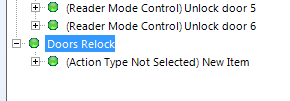
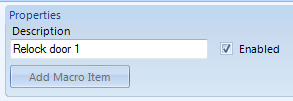
- Click the Add Macro Item button.
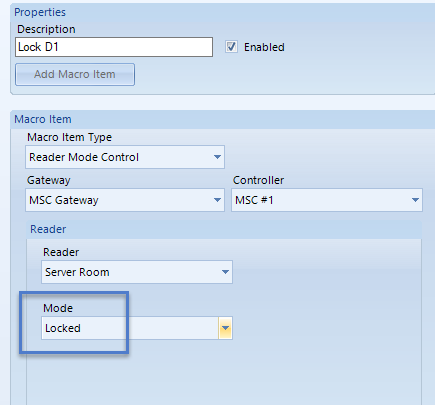
- Again, give a descriptive name to the action type.
- From the Macro Item type drop-down list select Reader Mode Control.
- Select the appropriate hardware gateway.
- Select the relevant controller.
- Select the first reader to be re-locked.
- Set the Reader Mode to Locked.
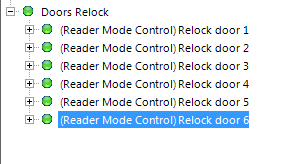
- As with the first macro, multiple action types need to be added - One action for each doors that will need to re-lock. So repeat steps 3-9 for the additional doors.
- You can now right click on the first macro, select 'Execute' and the configured doors should unlock.
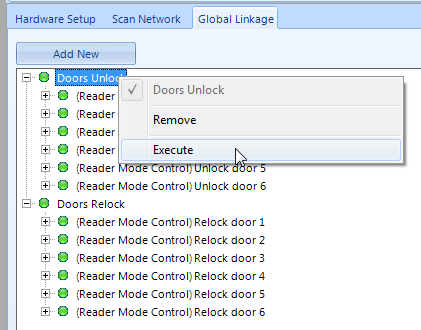
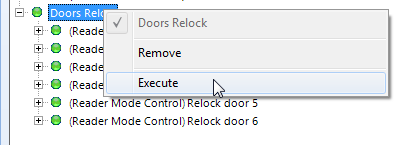
- Right-click on the second macros and those same doors should relock.
| 4.2 | Trigger Setup |
Create the Trigger that will Unlock the Doors
For this example we will use a double-card presentation at a specific reader to unlock the selected doors.
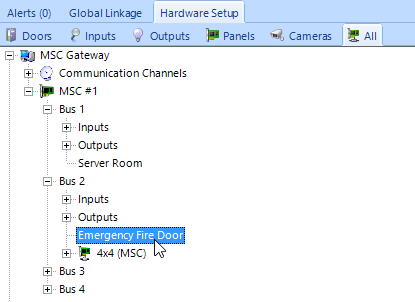
- From within Doors.NET go to Setup >> Hardware Setup >> All to display the hardware tree.
- Expand the hardware tree and select the designated reader (the reader that will be used for unlock the group of doors).
- The selected reader properties will be on the right.
- Ensure that Advanced View is enabled for the reader properties.
- Scroll down the reader properties until you locate Options.
- Ensure that Enable Double Presentation Event is set to Yes.
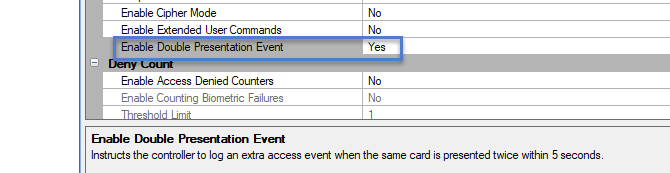
- Save the reader properties.
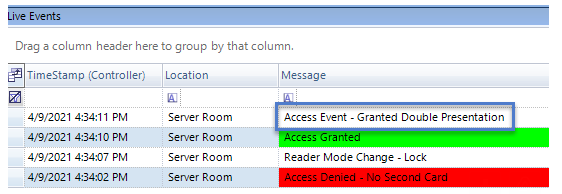
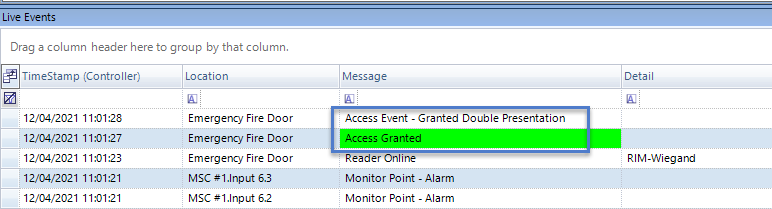
- Present a valid card to the designated reader twice within 5 seconds.
- Open live events and you should see an Access Granted even and then an 'Access Event - Granted Double Presentation' event - this second event will be the trigger event to unlock the doors.
Setup Trigger Condition 1
A triggers must now be defined and the trigger will have two conditions. The first condition, is the double-card presentation and it will unlock the group of doors, the second is an access granted event (single card presentation) while the door is already unlocked. Both occur at the same reader and so both conditions can be added to the same trigger.
Note: The trigger event to re-lock the doors could also be something completely different, such as an input point going active or secure.
- From the Global Linkage menu, click on the Triggers tab.
- Click the ADD NEW button.
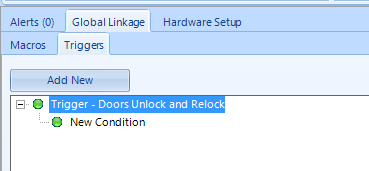
- Select 'New Global Trigger' and the properties will be on the right.
- Give the first trigger a description (such as 'Trigger - Doors Unlock and Re-lock').
- Ensure that 'Enabled' and 'Ignore Old Messages' are both selected.
- From the Condition Type drop-down list, select Reader, then click the ADD CONDITION button.
- Select New Condition (now listed beneath the new trigger name).
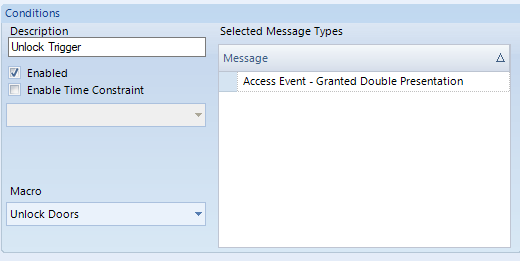
- Give the first condition a description, such as 'Unlock Trigger'.
- In the list of available message types, locate the double presentation event. Then click the ADD MESSAGES button.
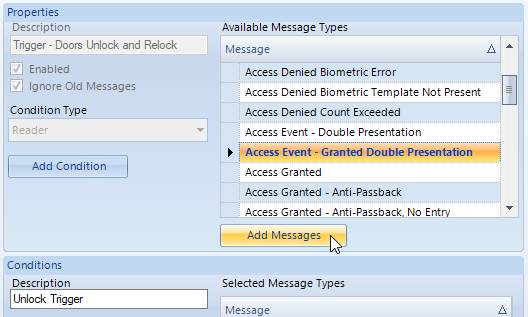
- The selected event will appear in the Message pane.
- From the Macro drop-down list, select the Unlock Doors macro.
- Save the trigger settings.
Setup Trigger Condition 2
- The second trigger condition will re-lock all the selected doors if an access granted event is generated at the designated reader, when the door is already unlocked.
- Select the 'Doors Lock and Unlock' trigger and click the ADD CONDITION button again.
- Select the New Condition entry on the left.
- Give the new condition a new description, such as 'Re-lock Trigger'.
- In the list of available message types, locate the 'Access Granted - Reader Unlocked' event. Then click the ADD MESSAGES button.
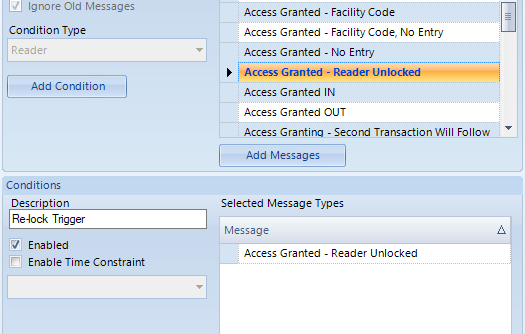
- The selected event will appear in the Message pane.
- From the Macro drop-down list, select the Relock Doors macro.
- Save the trigger settings.
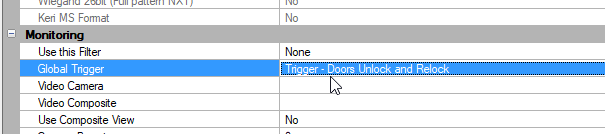
Configure the Designated Reader as a GLS Trigger
The final step is to configure the designated reader as the Global Linkage Trigger reader:
- In Doors.NET, go to Setup >> Hardware Setup >> All - to display the hardware tree.
- Expand the hardware tree and select the reader you wish to configure.
- Scroll down the reader properties and locate the Monitoring section.
- For the Global Linkage Trigger drop-down menu, select the new trigger.
- Save the reader settings.
5.0 Test the Global Linkage Functionality
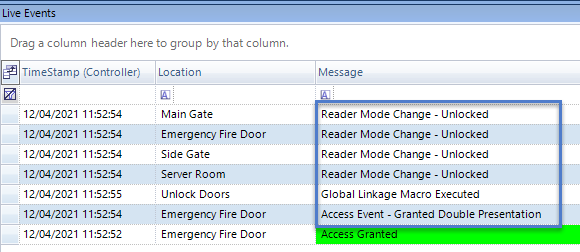
Generate a double-card presentation at the designated reader and the doors will unlock.
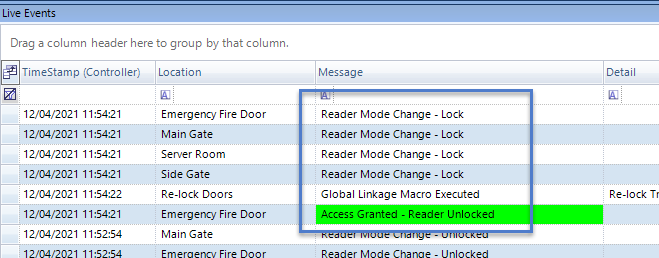
Generate a single card presentation while the door is unlock and the same doors should then re-lock.
Related Articles
Doors.NET - End User's Guide
Doors.NET user guide for the end-users (attached).Doors.NET - End Users Guide
Doors.NET End Users Guide (attached)Photo ID Badging Client - Quick Start Guide
Logging In Click/double-click on the 'Keri Photo ID Icon' located on the desktop or via Start >> All Programs >> Doors.Net >> Keri Photo ID. Log into the badging client using the default user ID and password (both 'admin'). On the left-hand pane ...Doors.NET - Quick Start Guide
1.0 Introduction This document covers the basic installation and configuration of Doors.NET with Standard NXT, PXL, Entraguard, NXT-MSC (Mercury-Powered) or True Mercury controller types. It assumes that the computer being used for the Doors.NET ...Doors.NET Quick Start Guide - Standalone Document
Doors.NET - Quick Start Guide - Standalone Document (attached)