Global Unlock - Card Driven
Using the Global Linkage module to Activate Global Unlock using a Card
1.0 Introduction
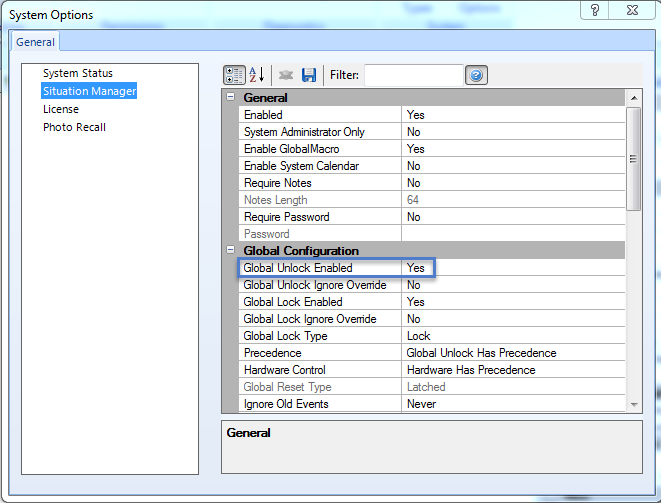
This setup procedure assumes the Global Unlock feature has already been setup and configured within System Options >> Situation Manager.
2.0 Global Linkage Macro Setup
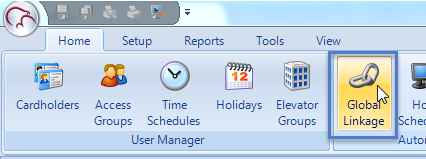
From within the software click on the Home >> Global Linkage icon.
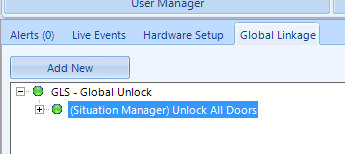
- Click the Add New button.
- Rename the new Macro GLS Global Unlock, or similar.
Click the Add Macro Item button directly beneath the description.
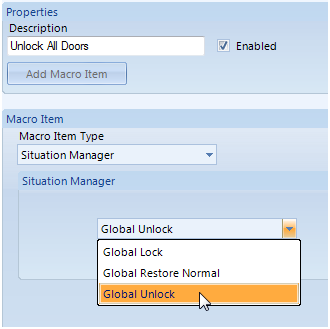
Highlight the new item and give that a new description as well, i.e ‘Unlock All Doors’.
- From the Macro Item Type drop-down list, select Situation Manager.
- From the Situation Manager selection, choose Global Unlock.
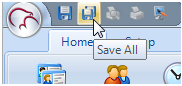
- Click the Save All icon in the upper-left of the screen.
Click Add New button again.
- Rename the second Macro GLS – Global Restore.
Click the Add Macro Item button and rename it something like ‘Restore All Doors’.
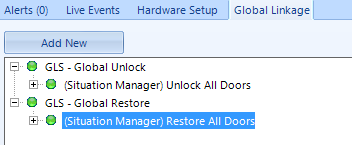
- Select Situation Manager from the Macro Item Type list.
From the Situation Manager list choose ‘Global Restore Normal’
- Click Save All icon to save the macro settings.
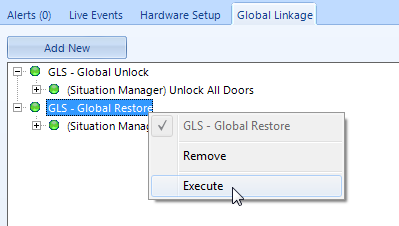
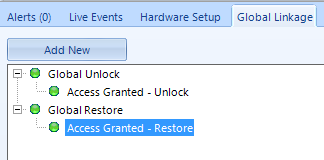
- If you right click the first Macro and choose Execute all the doors will globally unlock.
- If you right-click the second Macro and Execute all doors will return to their normal state again.
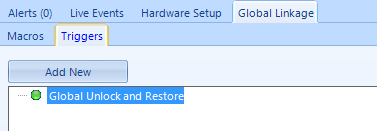
3.0 Global Linkage Trigger Setup
- Click on the Triggers tab.
- Click the Add New button.
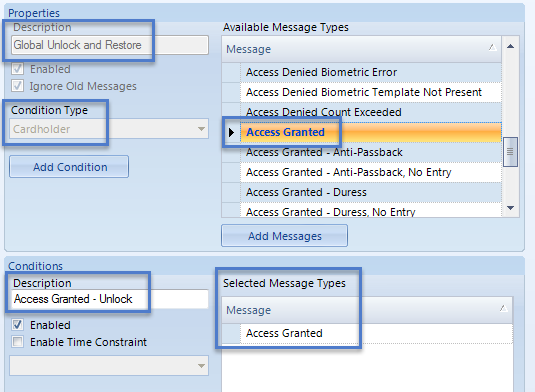
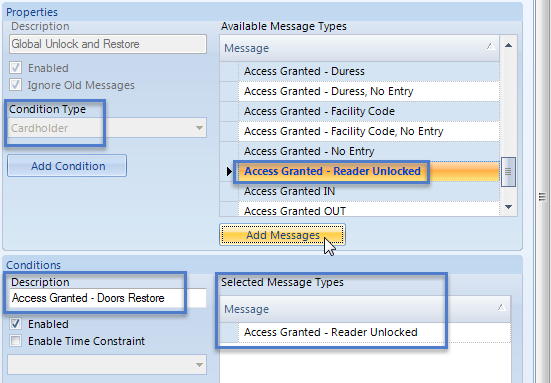
- On the right-hand side (Description) Rename the trigger to something like: ‘Global Unlock and Restore ’.
- From Condition Type select Cardholder.
- Click the Add Condition button.
- Highlight 'New Condition' on the left.
- Rename where you see 'New Condition' on the right...
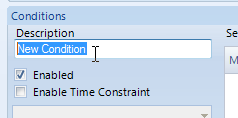
- ... To something like: "Access Granted - Doors Unlock"
- From the Available Message Types select Access Granted.
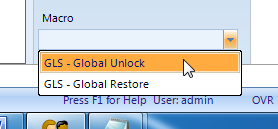
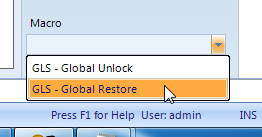
- From Macro selection Choose the Global Unlock Macro.
- Remember to save your settings.
The Global Linkage Unlock and Restore triggers are now setup. You could now assign the Global Linkage setting to the card record. When that card is presented (to any reader on the system) all the doors will Globally Unlock. The thing is, we don't as yet have a means of putting the doors back to their normal operating mode. There are several options at this point:
- You could set up a second trigger from an input on the system. The trigger action would be the input going active - This would then be configured to activate the Global Restore macro.
- You could create a second trigger condition for when the same card is presented while the doors are unlocked; it will generate a slightly different message (shown in Live Events as 'Access Granted' - Reader Unlocked' You would then use this trigger message type to active the restore macro.
- Or you could have a second card (a Global Restore Card) when this card is presented, while the doors are Globally Unlocked, the doors will then go back to their normal operating mode.
The remainder will explain the second and third options... Using one card for both functions or using two different cards, (1 used for Globally Unlocking the doors and the other for Restoring the doors).
4.0 Assigning multiple Trigger Actions
We will now create the trigger action that will activate the Global Restore Macro.
- Highlight the same trigger again.
- Click the Add Condition button again to create a second condition for the Global Linkage Trigger.
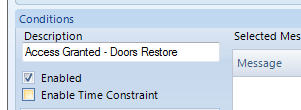
- Rename the trigger something like: 'Access Granted - Doors Restore'.
- From the Available Message Types list, locate and highlight the Access Granted - Reader Locked message.
- Click the Add Messages button.
- From Macro selection choose the Global Restore macro.
- Both required trigger conditions now activate both macro actions.The Access Granted message puts the doors into Global Unlock. The Access Granted - Reader Unlocked message puts the doors back to their restored state.
5.0 Using Separate Triggers
If you are going to have one card for the Global Unlock setting and another card for the Global Restore setting you should create two separate triggers with one condition in each. The Global Unlock trigger will include the Access Granted message and the Global Restore trigger will include the Access Granted - Reader Unlocked message.
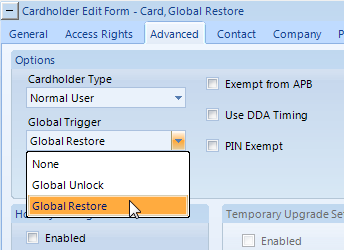
6.0 Assigning the Global Unlock or Global Restore Trigger to a Cardholder
- Create a new card record for the purpose of Global Unlock.
- Save the record and then go to the Advanced tab.
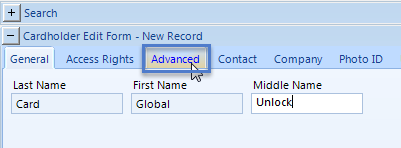
- Locate the Global Trigger option and select the Global Unlock Trigger.
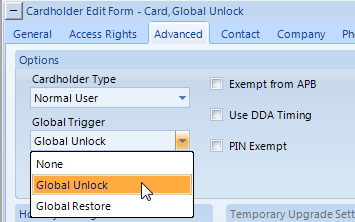
- Save the new setting.
- Add and save a second card record.
- Go to the Advanced tab.
- Select the Global Restore Global Trigger option.
- The last thing to do is to fully enroll a card and assign it a valid access group.
Remember: If you want to use a single card to perform Global Unlock AND Global Restore you will add both conditions to the same Global Trigger. If you have two different cards to perform the tasks you would define two different Global Triggers, each with its own trigger condition.
Related Articles
Global Unlock - Software
1.0 Introduction This section explains how to use the built-in Global Unlock feature via icons located on the home tab, allowing you to immediately unlock all doors or a designated group of doors, over multiple controllers and even over different ...Global Unlock - Hardware
1.0 Introduction Included in Doors.NET is the ability to perform a Global Unlock of all doors on the system from an input on the system, designated as a Global Unlock input. This input cannot be programmed for any door function; such as ...Global Linkage Data Sheet
Global Linkage Data Sheet (attached)Global Linkage Overview
The Global Linkage Module and related user interface screens provide a means of automating system functions, features and notifications system-wide. The configuration of the Global Linkage Module consists of two parts; the Global Macro (what you want ...Global Linkage Macros
The following list details all the Global Linkage Macro options that are available in Doors.NET. These are the 'when' conditions which can be thought of as 'what you would like to happen' - When the system sees a specific trigger it will execute the ...