Unlock and Lock Doors Using an Input
1.0 Introduction
To program a Global Linkage you must have a Global Linkage license enabled and you must be using Mercury Powered NXT or Standard Mercury controllers.
2.0 Macro Setup
- From the Global Linkage macros tab click the Add New button.

- Give the new macro a descriptive name, click the Add Macro Item button then click save/save all.
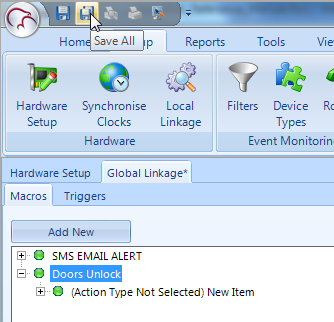
- Highlight the new action type and give that a descriptive name.

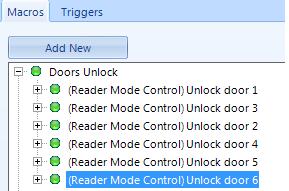
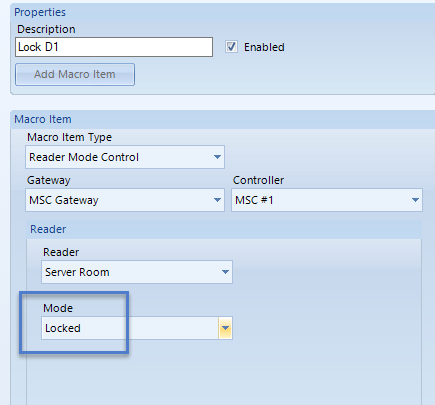
- From the Macro Item type drop-down list select Reader Mode Control.
- Select the appropriate hardware gateway.
- Select the relevant controller.
- Select the 1st reader to be used.
- Set the Reader Mode to Unlock.

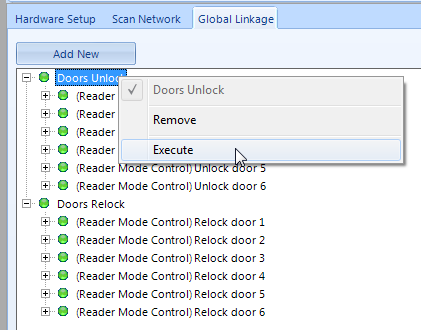
- Highlight the macro, click Add Action Item again, then repeat this same process for every reader on the system that needs to be part of the global unlock configuration. You will then have a Macro with multiple action types listed beneath - each one will be setup to unlock each of the doors.
Keep in mind, as it is global linkage the doors can be located on completely different controllers, even different hardware gateways.
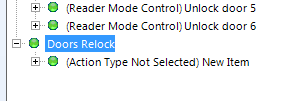
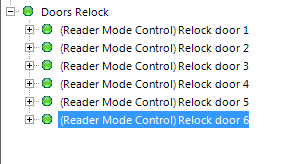
- A second macro needs to be added, this macro will put the doors back to their normal mode.
- Rename the second macro and click the Add Macro Item button.
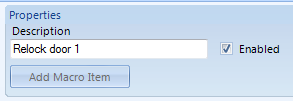
- Again, give a descriptive name to the action type.
- From the Macro Item type drop-down list select Reader Mode Control.
- Select the appropriate hardware gateway.
- Select the relevant controller.
- Select the 1st reader to be used.
- Set the Reader Mode to Locked.
- As with the first macro, multiple action types need to be added - each one corresponding to the participating doors. Each action type will set the selected door back to being locked.
- You can now right click on the first macro, select 'Execute' and the configured doors will unlock.
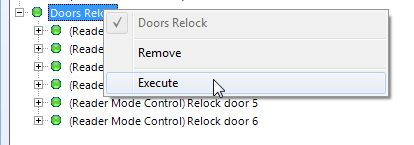
- The doors will relock when you right-click and 'Execute' the second macro.
3.0 Trigger Setup
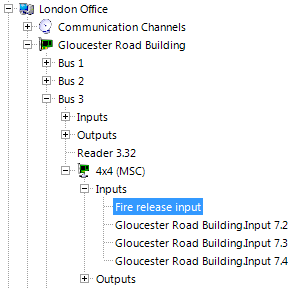
- Ensure that an input has been labeled in the hardware tree for the purpose of the trigger.
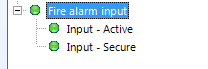
- Two trigger conditions must now be defined; The first trigger condition will be the input going active, this will activate the macro that will unlock the selected doors.
- The second trigger condition will be the same input going secure, which in turn will activate the second macro (to relock the doors again). Only one Global Linkage Trigger needs to be setup (Global Linkage triggers can have multiple conditions assigned to them).
3.1 Trigger Condition 1
- Click Add New button from the triggers tab, under Description give it a name.
- From Condition Type drop-down list select Monitor Point then click Add Condition button.
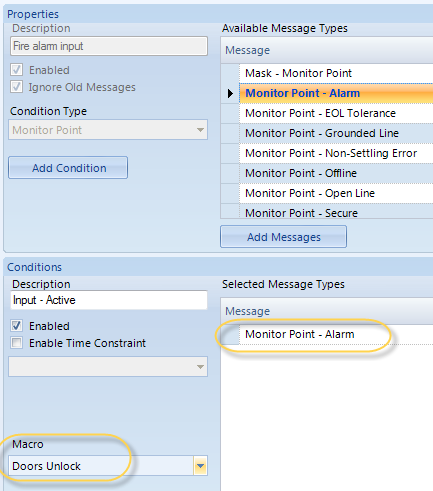
- Highlight the New Condition and rename it, i.e Input - Active.
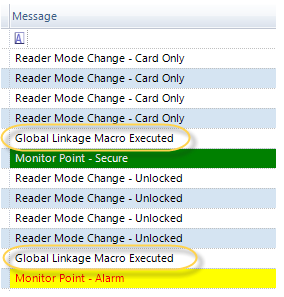
- From the Available Message Types list locate the message type Monitor Point - Alarm, then click Add Messages button.
- From the Macro drop-down list select the Doors Unlock macro, then save.
3.2 Trigger Condition 2
- Highlight the same trigger and click Add Condition button.
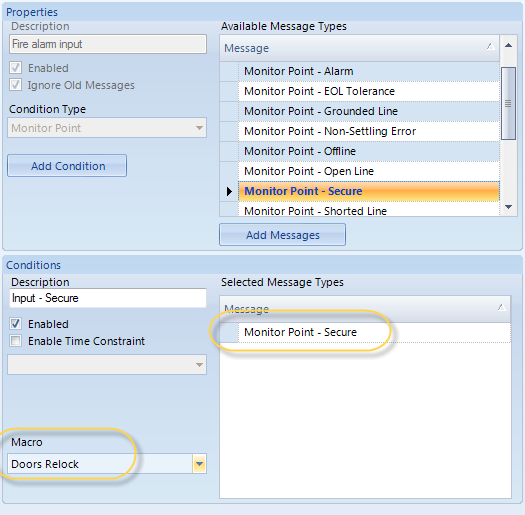
- Highlight the second New Condition and rename it, i.e Input - Secure.
- From the Available Message Types list locate the message type Monitor Point - Secure, then click Add Messages button.
- From the Macro drop-down list select the Doors Relock macro, then save.
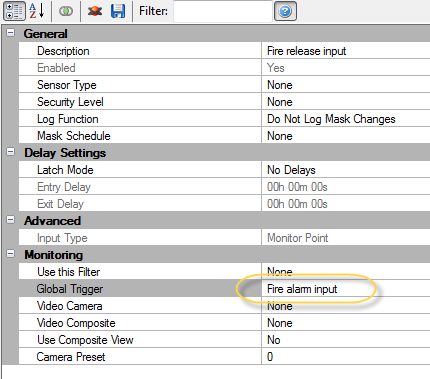
- Finally, locate the input point in the hardware tree. In the properties go to Monitoring >> Global Trigger and select the new trigger from the list.
- There's no need to do any kind of update because the configuration gets sent out to the hardware as soon as it is saved.
- Transaction will also appear in Live Events whenever the Global Linkage action happens.
Related Articles
Global Unlock - Hardware
1.0 Introduction Included in Doors.NET is the ability to perform a Global Unlock of all doors on the system from an input on the system, designated as a Global Unlock input. This input cannot be programmed for any door function; such as ...Global Lock, Lockout, Lockdown - Software
1.0 Introduction This section explains how to use the basic Situation Manager feature to set a Global Lock command via an icon in the software, allowing you to immediately lock a designated group of doors, over multiple controllers and even over ...Auto-Unlock - Suspend and Restore
1.0 Introduction The Suspend feature allows you to suspend any Auto Unlock/Lock (AUL) time schedule applied to a door or set of doors. Suspend affects the AUL time schedule in these ways: When you suspend a door's AUL time schedule, the door is ...Doors.NET - End User's Guide
Doors.NET user guide for the end-users (attached).Doors.NET - End Users Guide
Doors.NET End Users Guide (attached)