Backup the Doors.NET Database
This procedure describes a backup process for Doors.NET databases using Microsoft SQL Studio Manager 2019, however, the procedure is almost identical to other versions of SQL Studio Manager.
Note: These instructions specifically cover a Disc backup; Tape backup is not covered.
Note: Microsoft does not provide a downgrade path for SQL databases. This means you cannot, for example, use SQL 2016 or 2019 files on a SQL 2012 database engine. You can, however use SQL 2012 database files on any other newer version of SQL Server.
Doors.Net Database Backup Microsoft SQL Server 2019 Studio Express
Note: You do not have to stop any Doors.Net services to perform an SQL database backup.
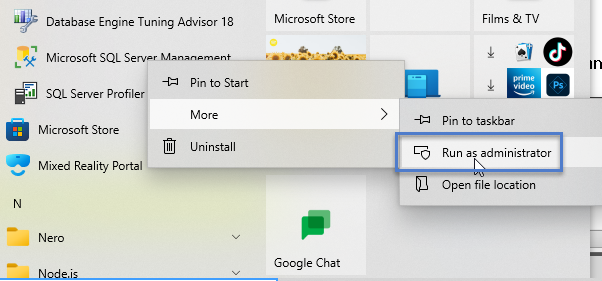
- Open the SQL Server Management Studio Express application in the Windows Start Menu. You should right-click and select Run as Administrator.
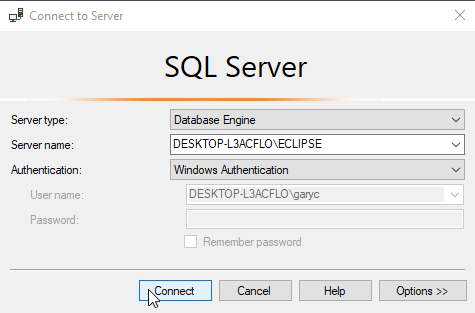
- Log in using Windows Authentication (You must have full administrative rights on the PC to log in using Windows Authentication, if you do not then you should consult an IT professional).
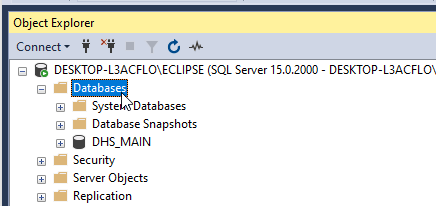
- Expand Databases on the left hand pane.
- Right click on the DHS_MAIN database and choose Tasks > Backup.
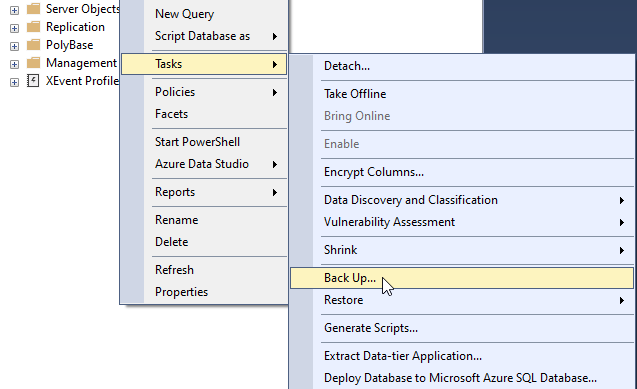
- The Back Up Database window will appear.
- In the Source section, the first backup you make should be a Full backup.
- Backup component should be left at the default selection of Database.
- The destination should backup to Disk.
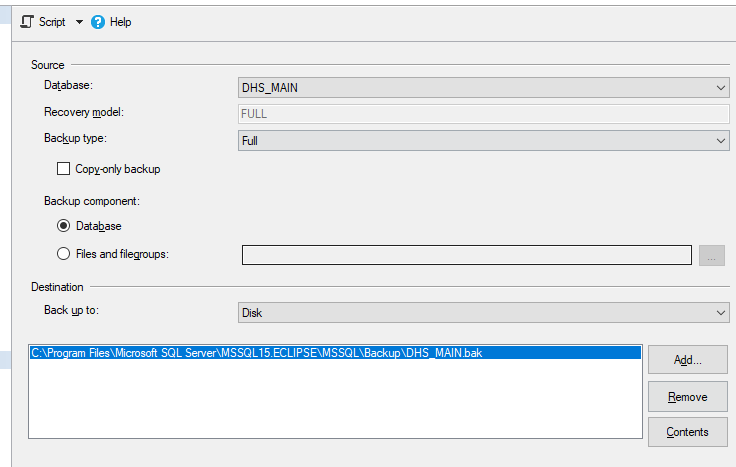
Note: These instructions specifically cover a Disc backup; Tape backup is not covered. For information on Tape backups refer to your IT and/or SQL administrator. - The default, selected paths are displayed in the Backup to list box. By default the backup will be saved to:
- "C:\Program Files\Microsoft SQL Server\MSSQL.1\MSSQL\Backup\." (32-bit)
- "C:\Program Files (x86)\Microsoft SQL Server\MSSQL.1\MSSQL\Backup\." (64-bit) - Click the OK button and the backup will be created.
- The backup file will appear as DHS_MAIN.bak in the destination selected. The default destinations are:
- C:\Program Files\Microsoft SQL Server\MSSQL.1\MSSQL\Backup - on a 32-bit operating system, and:
- C:\Program Files\Microsoft SQL Server\MSSQL.1\MSSQL\Backup - on a 64-bit operating system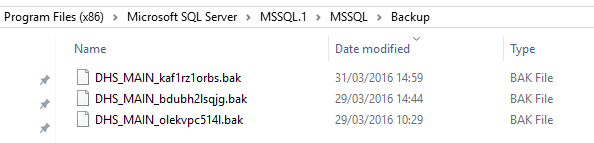
Note: This file can, and should, now be copied from this source location onto a removable media such as USB thumb drive.
Related Articles
Setup Automated Database Backup
1.0 Introduction Doors.NET includes the ability to schedule a system backup to be automatically created once a week, every week. This is included in the standard and professional versions of Doors.NET. The feature is setup via the License Manager. By ...Quick Database Backup
Backup The backup features is a very simple means of creating a full backup of the entire Doors.NET database. There is no configuration required and the backup process completes very quickly. On the top toolbar click on the 'Tools' tab. The Backup ...Doors.NET Database Backup to a Custom Location
It has often been asked if the Doors.NET SQL database can be backed up to a custom location such as a network drive or a USB stick. By default the backup file is created in C:\Program Files (x86)\Microsoft SQL Server\MSSQL.1\MSSQL\Backup when you ...Restore the Doors.NET Database
Instructions for Restoring the Doors.NET SQL Database Notes: - performing this task will completely overwrite ALL data in the existing Doors.Net database. - this backup procedure pertains to Doors.Net databases using Microsoft SQL Server 2016 ...Doors.NET Cloud Backup and Restore
1.0 Introduction Doors.NET Cloud Backup and Restore allows you to create Amazon Web Services (AWS) backups of your Doors.NET database and all Doors.NET configuration files. Cloud Backup is a subscription service (with a 1-year license term) which ...