Keypad User Commands
Keypad user commands can be used as a Local Linkage trigger to activate a specific action such as unlocking doors, activating control points, latching a door, setting a reader mode or locking down an entire facility, for example.
A user command is similar to a PIN but is not assigned to a particular cardholder within Doors.NET.
An example of how user commands have been used in the past is for a secured detention center which has several cells. The cells had 2 doors; the inside door was manually opened with a key but the outside doors were controlled by control points located on a NXT-GIOX. This application used just one keypad wired into one of the buses of an NXT-MSC controller and this single NXT-6RK keypad was used to unlock any of the cell doors. A certain 6-digit PIN number would unlock cell 1, another PIN would unlock cell 2, etc. The most important thing to remember when setting up this feature is that the keypad needs to be outputting the PIN data in 8-bit mode.
Note: Advance Local Linkage must also be enabled in your license.
Setup
This setup procedure explains how to use a certain keypad user command to activate a specific control point (located on an NXT-GIOX module) - The control point then unlocks and re-locks a door.
- In the software go to Setup >> Hardware Setup >> All
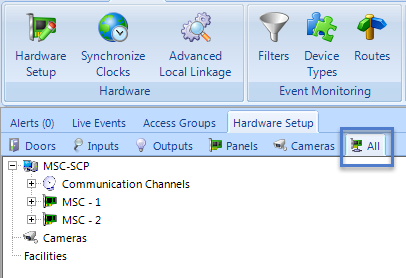
- Double click a controller listed in the hardware tree to display the buses.
- With one of the buses highlighted (the bus that the GIOX is wired into) click the Add GIOX icon.
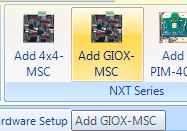
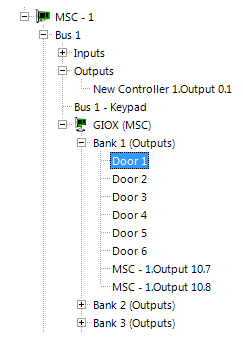
- The GIOX will appear in the hardware tree and the number of connected input and output cards will be detected.
- Expand one of the output cards and rename one of the control points, i.e 'Door 1'
- Go to Setup >> Advanced Local Linkage.
- From the Procedures tab select the controller which has the GIOX added to it.
- Click the New Procedure button.
- In the Description text box type in a name for the procedure; such as 'Door 1 Unlock'.
- Click the Add Action button.
- Select Control Point Control from the Action Item Type pull-down list.
- Select the control point renamed in the hardware tree (Door 1).
- Set the control point to 'Single Pulse' then type in how long you wish the door 1 to unlock for.
- Click save.
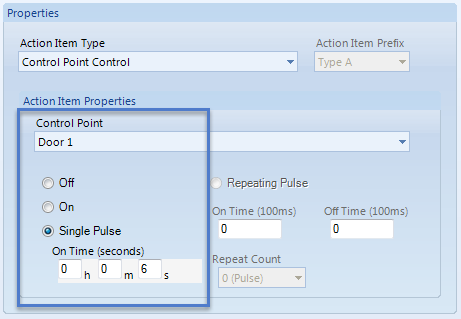
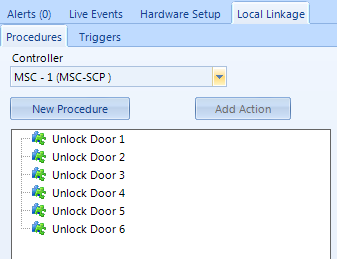
- The procedure can be thought of as what you want to happen; in this instance (highlighted above), it is to activate the first control point on the GIOX for a total of 6 seconds.
- Next, go to the Triggers tab.
- Click the Add Trigger button then give the new trigger a name.
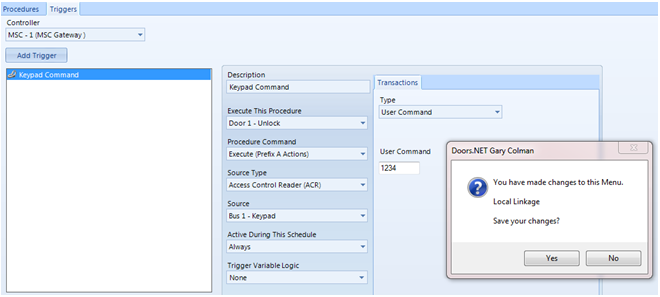
- Execute This Procedure - Select the Unlock Door 1 procedure.
- Procedure Command - Should be left at the default setting.
- Source Type - Select Access Control Reader (ACR).
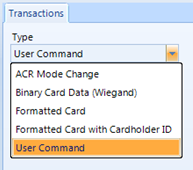
- Transaction Type - Select 'User Command'
- Click into the User Command field and you should notice a fly-out. The fly-out informs you that when inputting the user command (PIN) at the keypad it must be preceded with an * and followed with the # key.

- In the text field enter the PIN that will be used to unlock door 1 (you do not need to enter the * or the # in the field).
- Source - Select the keypad that will be used to unlock the doors.
- Active During This Schedule - Set Always for this Local Linkage action to always be functional or select an alternative time schedule to restrict when the action can be operative.
- Trigger Variable Logic - Remains at the default setting of 'None'.
- Click save to save the trigger settings.
- Your Local Linkage trigger screen should resemble the following:
- Go to the keypad and press the * key followed by the PIN specified in the trigger setup then after the PIN press the # key.
- Output number 1 on the GIOX should activate for 6 seconds and the relevant Local Linkage events will be generated in Live Events. These events can be suppressed by applying a filter to either the GIOX control point(s) or the reader.

- This setup example explains how to unlock door 1 (control point 1 on the GIOX). Repeat the same steps to configure a different user command to activate another procedure that will unlock other doors.
Related Articles
Doors.NET - End User's Guide
Doors.NET user guide for the end-users (attached).Doors.NET v4.3.6 Release Notes
Operating System Compatibility Doors.NET software IS COMPATIBLE with: (both 32-bit and 64-bit where applicable) Windows 8.1 Windows 10 - all versions Windows Server 2012 and 2012 R2 Windows Server 2016 All other operating systems are NOT SUPPORTED. ...Doors.NET v4.3.7 Release Notes
Operating System Compatibility Doors.NET software IS COMPATIBLE with: (both 32-bit and 64-bit where applicable) Windows 8.1 Windows 10 - all versions Windows Server 2012 and 2012 R2 Windows Server 2016 All other operating systems are NOT SUPPORTED. ...Local Linkage Procedure Actions
The table below lists all of the available procedure action item selections. Changing the Action Item Type drop-down selection will change the available Action Item Properties. Action Type Available Selections Access Area Control Areas 0 - 31 ...Application Permissions
1.0 Introduction The Application Permissions use the Account Type to determine which menus are hidden or disabled from the user. This is in addition to the user group settings which control which Gateways, Controllers, Access Groups, and indirectly, ...