LP1501 Controller Setup
1.0 Introduction
2.0 Configure the Controller for DHCP
Before setting up an LP1501 controller, a bulk erase should be performed to remove any existing configuration.
Because Borealis operates on a DHCP network, the controller will also need to be set to DHCP using the S1 DIP switch. This will configure the controller to obtain an IP address from the DHCP network that the Borealis hub is added to. The following steps explain how to perform the bulk erase and then to set the controller to a normal operating mode (and a DHCP configuration).
- Power-down the controller.
- Set the S1 DIP switches 1 and 2 to the ON position.
- Power-up the controller.
- After bootup is complete, there is a 10-second window that if switch 1 or 2 is changed to the OFF position memory is erased. The LEDs flash the following pattern when in the reset window: LED 1 & 2 and LED 3 & 4 flash alternately at .5 second rate. When erasing memory, LED 2 flashes at a 2 second rate; DO NOT CYCLE POWER. It takes less than 60 seconds to erase the memory. LEDs 1 and 4 flash for 10 seconds after the memory has been erased. Full memory erase takes up to 60 seconds.
- Cycle the power to the controller.
- With all 4 DIP switches now in the OFF position the controller will be in its normal operating mode and will be configured to obtain a DHCP address from the network.
- Wait at least 2 further minutes for the controller to obtain a DHCP address from the DHCP network. LED 1 will be blinking slowly (approximately once every second) when the DHCP address is assigned and status LEDs 4 and 5 will be solid red.
3.0 Add the LP1501 Controller via the Scan Function
This section assumes that you have an existing Borealis system and you have already added a Mercury/MSC site and have also added and claimed a hub to that site. The hub should be online and updated, only then will you be able to scan for the LP1501 controller.
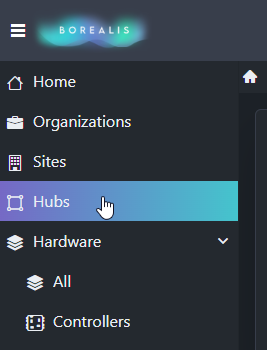
- From Borealis, click Hubs from the main menu.
- Your online hub should be displayed.
- Click the SCAN button located on the right-side of the screen.
- The hub will scan the local DHCP network for the LP1501 controller.
- The controller will be detected and you will see the assigned DHCP address and MAC address.
- Place a check mark against the controller and enter a new description.
- Click the CLAIM button on the right side of the screen.
- The new controller will be added to the system.
- Go to Hardware >> Controllers and you will see the new controller listed.
- Within a few seconds the controller should show as online.
5.0 Manually Add the LP1501 Controller
If you know the LP1501 controller's programmed IP address (for example, if the controller has been setup externally via a web browser), you can manually add the controller.
- From the main menu, click on Hardware >> Controllers.
- The controller screen will appear.
- On the right-side of the screen click the ADD CONTROLLER button.
- Enter a name for the controller.
- Select the hub that the controller will be added to.
- Select the specific controller type from the drop-down list.
- Enter the IP address that is pre-programmed on the controller.
- Enter the controller's MAC address (this is printed on the side of the controller's Ethernet port) it begins 00-0F-E5.
- Click the SAVE button.
6.0 Memory Reset the Controller
- Once the controller has been added/claimed you will be able to see the controller via Hardware >> Controllers.
- Next to the controller name you will see an orange-colored indicator - this indicates that the controller requires a reset.
- On the right-side of the screen use the Actions menu and select Reset.
- The controller memory will be reset and the controller will momentarily go offline.
- When the controller is back online the reset indicator will have disappeared.
Related Articles
LP2500 Controller Setup
1.0 Introduction The next generation, advanced LP2500 allows you to connect to additional controllers and I/O expansion modules and the connection is protected by AES encryption. When connected to additional door control modules the LP2500 allows you ...LP4502 Controller Setup
1.0 Introduction The new Authentic Mercury LP Series Intelligent Controllers are Mercury Security’s next generation advanced access control platform that runs on embedded Linux. The enhanced platform offers an improved processor and increased memory, ...MP4502 Controller Setup
1.0 Introduction The MP4502 is a next generation MP series controller from Mercury - offering seamless expansion to an existing Mercury hardware system. The MP series Mercury controllers are completely interchangeable and backwards compatible with ...MP2500 Controller Setup
1.0 Introduction The next generation, advanced MP2500 allows you to connect to additional controllers and I/O expansion modules and the connection is protected by AES encryption. When connected to additional door control modules the MP2500 allows you ...MP1502 Controller Setup
1.0 Introduction The next generation, advanced MP1502 is capable of managing two doors/readers “on board” and hundreds of I/O points via connection to additional door modules or MR16 I/O modules. Based on the intelligent, non-proprietary Mercury ...