Milestone XProtect Video Integration Setup Guide
The integration with Milestone allows interoperability with the Doors.NET software and allows you to view live video streams within XProtect. In addition, it allows for control over the Doors.NET system hardware and to associate Doors.NET system events with captured live video recordings.
1.0 Main Features
- The Integration combines Doors.NET with Milestone's XProtect software.
- Supports access control systems of up to 5,000 doors.
- Supports up to 10,000 cardholders.
- Allows viewing of video within XProtect plus hardware control and cardholder editing.
- The Integration allows you to control the doors on the system (i.e lock and unlock, from within the X-Protect client).
- The access control tab of the XProtect provides a list of live system events coming in from the Doors.NET system. Time and date stamp, location, message type, cardholder name, door name are displayed as well as many other selectable event information. XProtect Access 2016 can process up to 600 access control events per second (per site).
- Doors and Cameras can be placed onto a map image - providing a geographical overview of the entire system.
- Alerts can be configured in the XProtect client. A sound alert will bring attention to the oprator and the system alert will need to be confirmed. Pop-up alerts can also be configured for immediate confirmation of critical system events.
2.0 Supported XProtect Versions
The integration with Doors.NET will work with all XProtect versions that support 'third-party integration'. This includes all the '+' versions of the following versions.
- XProtect® Express
- XProtect® Professional
- XProtect® Expert
- XProtect® Corporate
- XProtect® Enterprise
3.0 System Requirements
- Doors.NET v3.5.1.22 and newer versions
- Microsoft .NET Framework 4.5
- Microsoft Windows 8.1 or newer Windows operating system
- Milestone video system with valid XProtect Access Base License and XProtect Access Door License
4.0 Licensing Requirements
4.1 Milestone Licensing
You must contact Milestone Systems to purchase required licenses before Milestone XProtect Access integration will work.
XProtect Access is licensed through the following licensing scheme:
- XProtect Access Base License (XPABL) - unlocks all XProtect Access functions
- XProtect Access Door License (XPADL) - enables a single physical door in XProtect Access
4.2 Licensing for Doors.NET Plugin Integration with Milestone XProtect Access
Your Keri Doors.NET Application Server license should have the following feature activated:
- Video Integration Clients – must be licensed for at least one Video Integration Client
5.0 Download the Milestone XProtect Plugin
5.1 Register an Account at Kerisys.com
- Open a web browser and go to www.kerisys.com
- On the Kerisys.com homepage click on the Member Login button in the upper-right.
- You will receive an approval email to create your password.
- Once a password has been created you will be able to login.
5.2 Download the Milestone Plugin File
- Log into Kerisys.com
- Click on Software and Downloads.
- In the Download Area on the right side of the screen, click on Milestone XProtect Plugin.
- Click the Download button and the file will download to the host PC.
6.0 Install the Doors.NET Plugin
The next steps explain how to install the Plugin that provides the communication between Doors.NET and XProtect. This section assumes you have already installed one of the supported XProtect versions and have licensed both the XProtect software and Doors.NET. It also assumes that you have already added your IP cameras to XProtect and that the hardware is added and online in Doors.NET.
To install the Plugin:
- Run the installer named: “DoorsNetMilestonePlugin.exe”.
Note: You may be prompted to stop the Milestone XProtect Event Server. Stop this Windows service. Click RETRY. Then restart the service and click OK. - Click NEXT on the Welcome page.
- Accept the End User License Agreement. Click NEXT.
- Select the specific version of XProtect you have already installed. Click NEXT.
- On the Destination Folder page DO NOT change the location of the destination folder. If you do change the destination then the XProtect system will not be able to find the Doors.NET Plugin DLL and thus, the Plugin will not work. Accept the default location and click NEXT again.
- Click NEXT to install the Doors.NET Plugin.
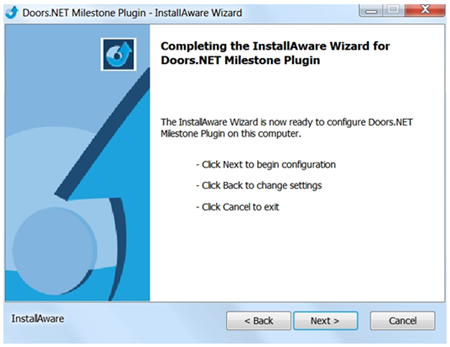
- The Plugin will now be installed.
7.0 Create and Configure the Doors.NET Plugin Integration for Milestone XProtect Access
- On the host workstation where Milestone XProtect VMS Server is installed:
- Start Windows Service “Milestone XProtect Event Server”
- Run Milestone XProtect Management Application.
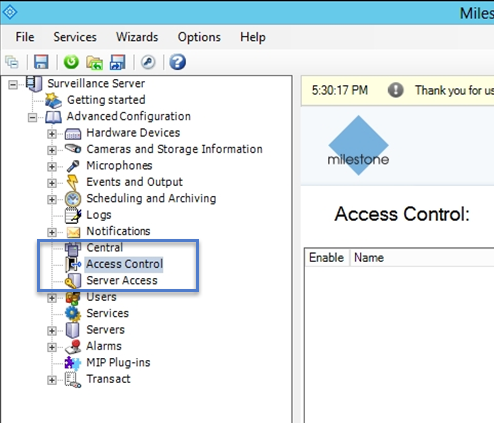
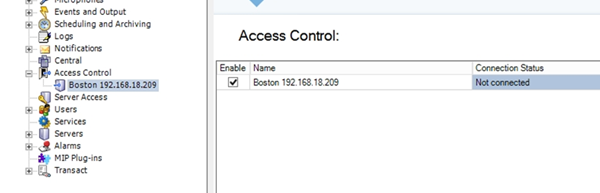
- Expand the tree in the left panel and select “Access Control”.
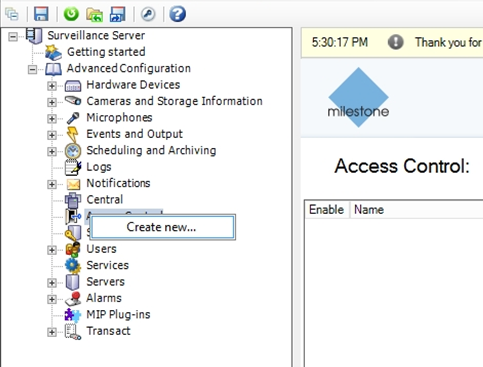
- Right-click on Access Control and select 'Create New... '
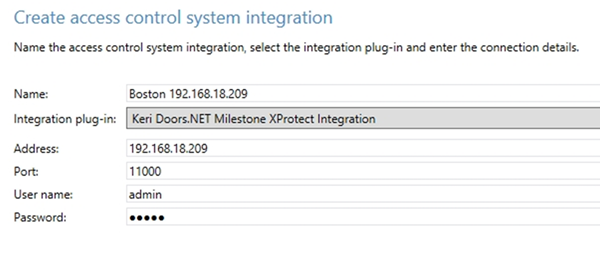
Enter values for all the visible fields. Then press NEXT to connect to Doors.NET Application Server.
- NAME – refers to your Doors.NET Application Server location- INTEGRATION PLUG-IN – In the dropdown list, select “Keri Doors.NET Milestone XProtect Integration”
- ADDRESS – IP address of Doors.NET Application Server
- PORT – TCP port of Doors.NET Application Server
- USER NAME – Doors.NET login user name with Administrator permissions
- PASSWORD – Doors.NET login password
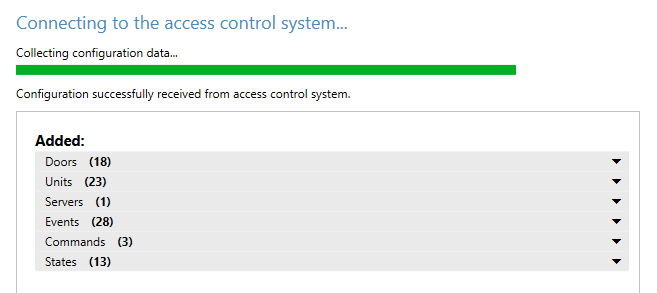
- The following screen will display the access control system connection status and configurable items. Click NEXT.
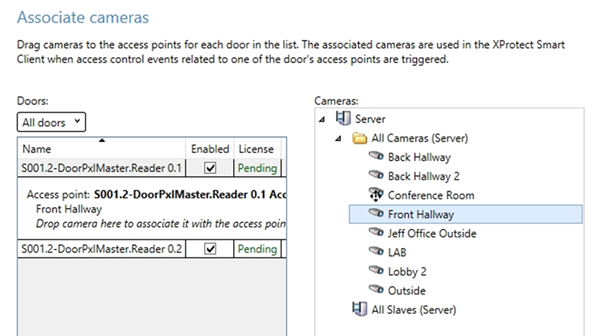
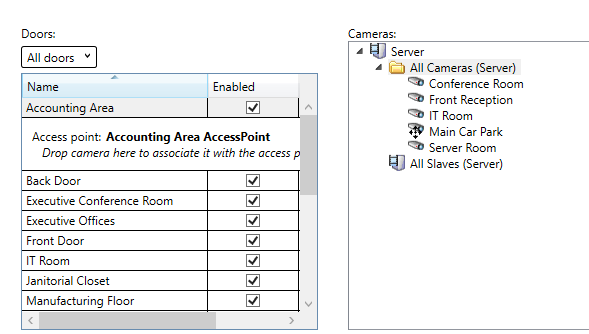
- The next page will display all the IP cameras which are added to the Milestone XProtect system. The doors will be displayed on the left and the available cameras will be displayed on the right. Associate cameras with the doors by dragging the camera names onto the doors. The associated cameras are then used in the XProtect Smart Client when access control events are triggered by the door's access point events. Click NEXT.
- The final screen confirms you have completed the access control system integration.
- Click CLOSE to return to the Milestone XProtect Management Application.
8.0 Configure the Access Control System Integration
- Select the newly created integration in the tree on the left (located under 'Access Control').
- The Access Control integration properties screen will appear.
- Select “General Settings” in left panel to access and edit General Settings.
- ENABLE – to enable the Access Control integration, this must be CHECKED. If you wish to disable the integration, un-check the checkbox.
- NAME – refers to Doors.NET Application Server
- DESCRIPTION – text that describes the Access Control integration
- INTEGRATION PLUG-IN – name of Doors.NET plugin integration
- LAST CONFIGURATION REFRESH – date and time of last configuration refresh
- REFRESH CONFIGURATION BUTTON – click this button to refresh configuration after changes to Doors.NET hardware, such as adding / removing controllers and readers.
- ADDRESS – IP address of Doors.NET Application Server
- PORT – TCP port of Doors.NET Application Server
- USER NAME – Doors.NET login user name
- PASSWORD – Doors.NET login password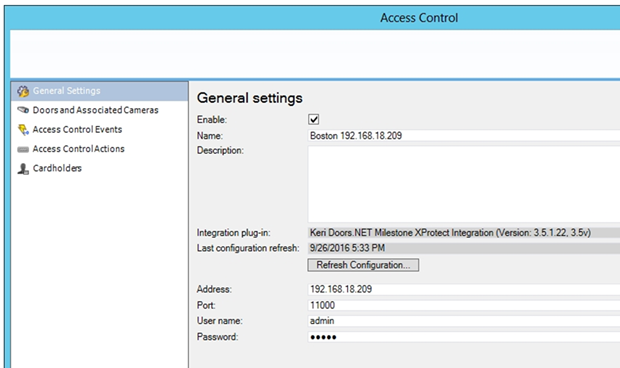
- Associate one or more cameras with each Door by dragging and dropping camera(s) from the right panel to a specific Door. Click OK.
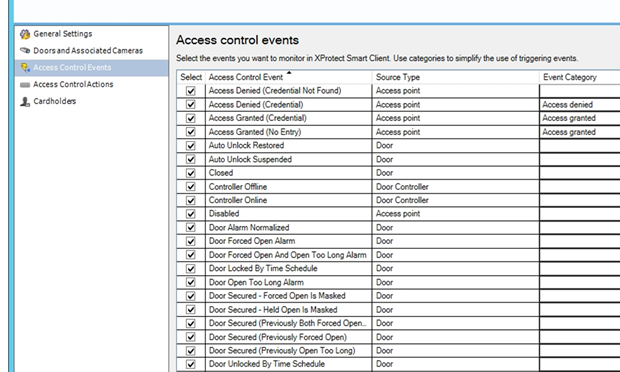
- Select the system events that you wish to monitor within the XProtect Smart Client application. You can also use categories to simplify the user of triggering events.
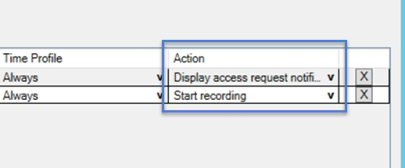
- Next, select 'Access Control Actions' then define the Source, Time Profile and Action for each chosen item. Click OK.
- Select 'Cardholders' to search, view, add or delete a picture of the cardholder. Cardholder pictures are used in XProtect Smart Client for access control events that are received by the Doors.NET Plugin Integration.
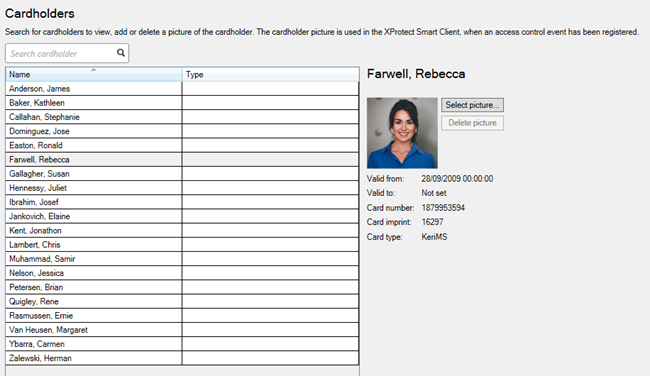
Cardholder pictures are used in XProtect Smart Client for access control events that are received by the Doors.NET Plugin Integration.
9.0 Further Details
If you want further details about the Doors.NET integration with the XProtect software, or if you want to be introduced to this Solution Partner, please submit your information. You will be contacted by Milestone shortly.
Related Articles
Milestone XProtect Integration User Guide
1.0 Introduction This document explains how to use the Milestone XProtect Smart Client once you have installed and configured the Doors.NET Plugin. This document makes the following assumptions: You have already added IP cameras to your XProtect ...Milestone Video Integration Overview
Milestone Integration (XProtect Access) Setup Guide 1.0 Introduction This section covers the integration of Doors.NET access control system with Milestone XProtect VMS (Video Management System). The integration with Milestone allows interoperability ...