PXL-500 Controller Setup in Visual Doors
| 1.0 | Manually Add PXL Controllers |
When manually adding PXL controllers there are three available communication methods: Serial, Modem or TCP/IP. Visual Doors supports a mixture of multiple Primary PXL controllers - each using a different communication method.
The following steps explains how to manually add the PXL using each communication method.
| 2.0 | Ethernet Connection Method |
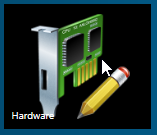
- From the Visual Doors home screen click on the Hardware tile.
- The communication gateways will be listed on the left (if there is more than one hardware gateway).
- If you have more than one gateway, ensure you have selected the correct gateway.
- Click Manually Add Controller.
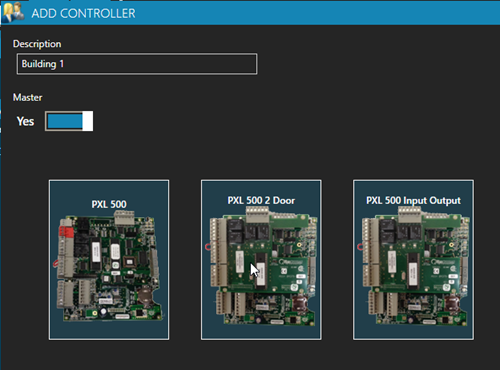
- The Add Controller window will appear.
- Enter a description for the new controller.
- Ensure the controller is set as a Primary controller.
- Click the icon corresponding to the controller type you are adding.
- The new controller will be added to the controller list.
- Highlight the controller and you will see the controller properties.
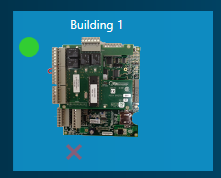
- The controller, at this point, has a red dot against it (indicating it is offline).
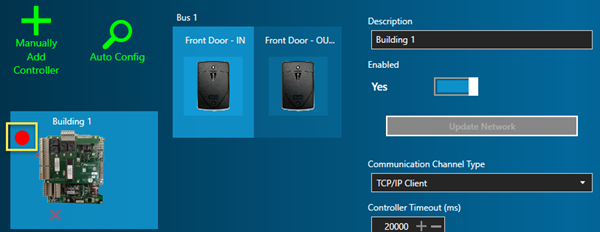
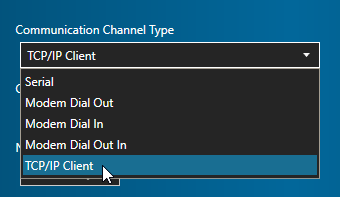
- Locate the Communication Channel Type and select TCP/IP Client.
- Locate the IP address field and enter the IP address for communicating to the PXL network.
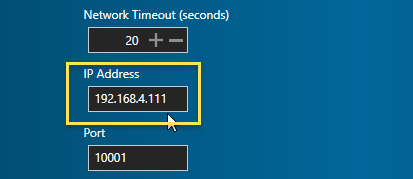
- Click the green save icon.

- Within approx. 30 seconds the controller should come online.
- The controller will have a green dot against it when it is online.
| 3.0 | Serial Connection Method |
When connecting to a Primary PXL controller using a serial connection, the steps are the same as what is outlined in the previous section, except for steps 13 and 14. Instead of selecting a TCP/IP communication channel you leave the setting at the default of Serial:
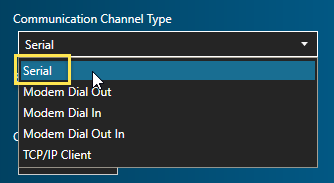
- You then have to enter the COM port number for the physical COM port, or the assigned COM port if you are using a USB-Serial adapter.
- Click the green save icon.
| 4.0 | Modem Connection Method |
- Again, following steps outlined in the Ethernet (TCP/IP) setup method.
- When you reach communication channel selection, select Modem Dial Out.
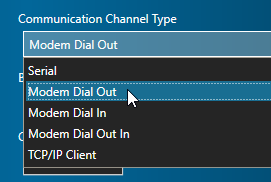
- Enter the Com port number for the modem connected to the host PC.
- Enter the phone number for the remote location of the PXL Primary controller.
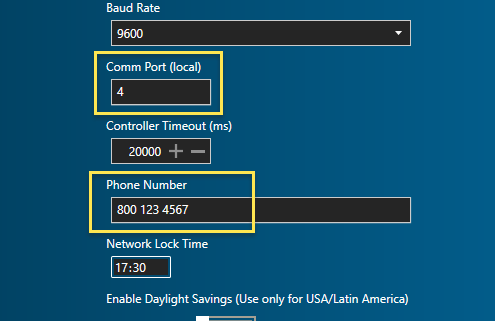
- Click on the green save icon.
| 5.0 | Auto Configure PXL Controllers |
Once the Primary PXL is online you can use the Auto-configuration feature to detect the Secondary PXL controllers. 'Auto config' is used to automatically retrieve the PXL controller and door information from the PXL network and then populate the Visual Doors software with the hardware details.
- From the home screen, click on the Hardware tile.

- If you have multiple different gateway types, ensure the PXL gateway is selected.
- Highlight the PXL Primary controller.
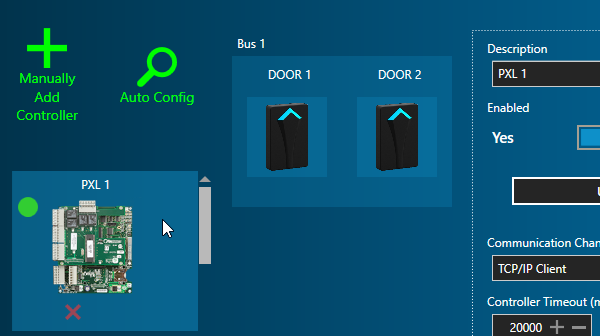
- Click the Auto Config icon.

- The Auto Config window will appear immediately.
- In the Status Message section you will start to see regular events stating: "PXL Primary is searching for Secondary controllers". Be patient as it will take a few minutes for Auto Config to complete (as the Primary controller looks for a possible 127 Secondary controllers).
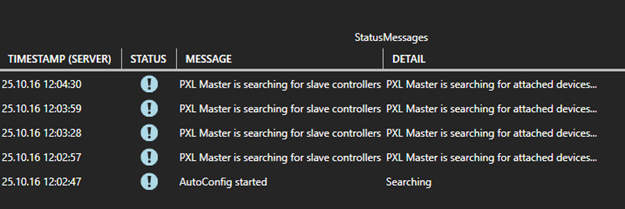
- Once searching is complete, all the detected Secondary controllers will be listed.

- Click the APPLY button and the detected PXL Secondary controllers will be added to the system.
- In the Status Messages section you should see an Auto Config Complete message.
- Close the Auto Config window and the new controllers will now be listed on the hardware screen and should be showing as online.
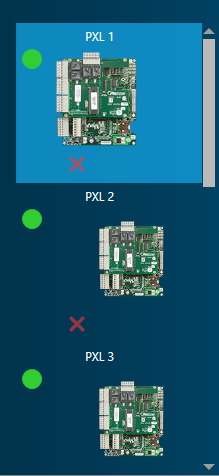
- The green dot indicates an online PXL controller. When the dot is red this indicates the controller is offline.
Related Articles
Entraguard Controller Setup in Visual Doors
Entraguard Setup 1.0 Introduction Visual Doors supports the Entraguard, Silver and Titanium Telephone Entry controllers functioning as a node on a PXL-500 network for seamless integration with a PXL system. The Entraguard can work as a single unit or ...Visual Doors Data Sheet
Visual Doors Data Sheet (attached)Visual Doors - Full Reference
Visual Doors - Full Reference Guide - P/N: 01691-001 - Rev B (attached)Controller Settings in Visual Doors
Controller Settings PXL Controller Settings Description - Enter a description for the controller, for example, where the controller is located within the facility. Enabled - Allows to you quickly toggle between enabling and disabling the controller. ...Setup Time Schedules in Visual Doors
Time schedules are assigned to access groups to determine the hours in which cardholders are able to gain access. They are also used in Auto Unlock Schedules (AUL). AUL schedules are assigned to doors to determine when the door should automatically ...