PXL-500 Setup in Doors.NET With a USB-Serial Adapter
1.0 Introduction
This guide explains how to setup a connection to a PXL-500 Primary controller using a USB-serial adapter.
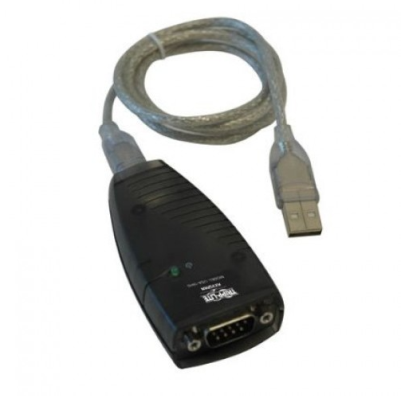
The adapter used in this example is the Keyspan 19-HS by TRIPP-LITE which is one that Keri highly recommends. It is robust, durable and is compatible with all Doors.NET supported Windows operating systems - Keri also supplies a plug-on comms module that supports an RS-232 and a USB connection.
This document assumes you have already successfully installed the drivers for your USB-serial Adapter and you have successfully installed and licensed Doors.NET and you have the PXL gateway setup and online:
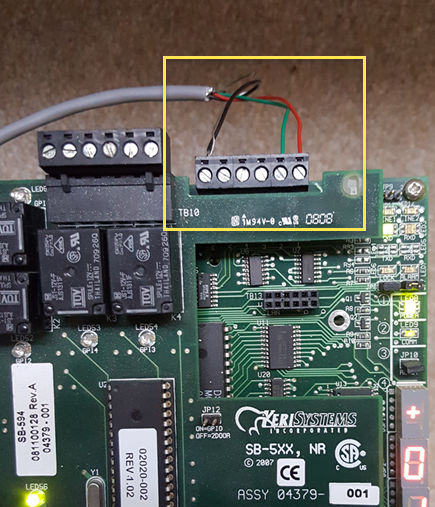
In summary: the USB-serial adapter connects to the host PC via a USB cable - (maximum length is 3m/10 feet) - a serial cable is then wired into the TB12 connector of the PXL controller -(maximum length 15m/45 feet) and connects to the adapter using the D-plug at the opposite end), as shown below: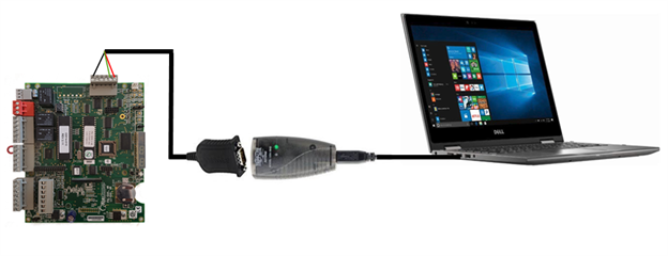
2.0 Important Note:
|
3.0 Setup Instructions
- Plug in the USB-serial adapter into an available USB port of the host PC.
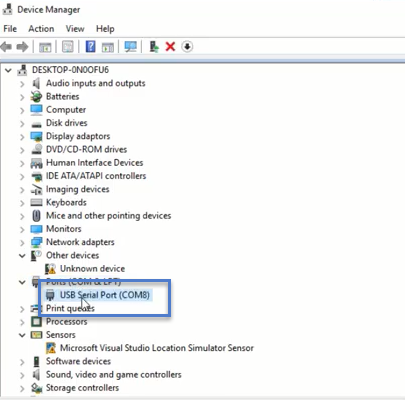
- Go to Device Manager on the host PC and check which COM port has been assigned to the adapter. Make a note of the COM port number.
- Close down the Device Manager window.
- Ensure the serial cable is connected to the USB-serial adapter.
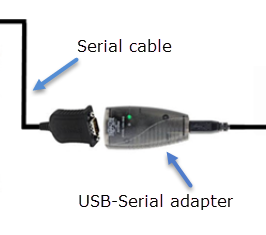
- Ensure the other end of the serial cable is hard-wired into the PXL Primary controller (via the TB12 connector).
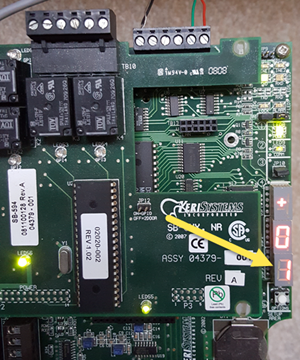
- Ensure the Primary PXL controller is addressed as #1.
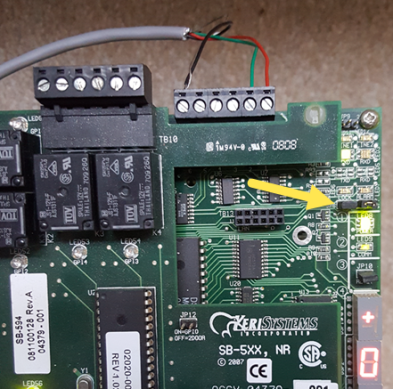
- Verify that the controller's JP6 and JP7 jumpers are shorted.
- Ensure you have performed a factory reset if the controller is brand new or if the controller has come from a Doors32 installation.
- Log into Doors.NET (the default username and password are both admin)
- Once logged into Doors.NET go to Setup >> Hardware Setup >> All.
- The PXL gateway will be listed at the top of the hardware tree.
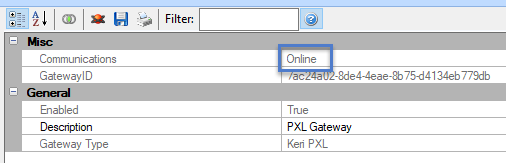
- Highlight the PXL gateway and check it is online.
- With the PXL gateway still highlighted click the Add PXL icon.
- Enter a new description for the PXL and select the exact controller model (if you know it) - it doesn't matter if you don't because the controller model will be automatically detected when the controller comes online.
- Click the APPLY button and the new PXL controller will be added to the hardware tree.
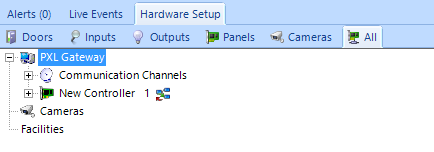
- A new Communications Channel must now be created so select Communications Channels
- Click the Serial Option and New Channel will appear in the hardware tree.
- Select New Channel
- Enable the channel then enter a new description for the channel.
- In the Comm Port field enter the COM port that is assigned to the USB-to-Serial adapter.
- Then save the communication channel settings.
Note: if the USB-to-serial adapter was connected to the PC when the PXL gateway was created, then a communication channel will have been automatically created. Feel free to rename and use this communications channel rather than setting up a new one:
- You must now select the PXL controller in the hardware tree.
- In the controller properties, look for the Communication Channel setting.
- Assign the new Serial comms channel that you created.
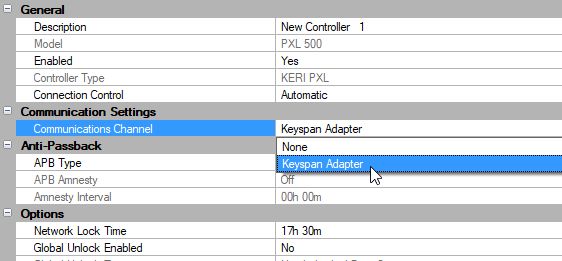
- Save the controller settings and within a few seconds the controller should come online.
- If it doesn't, try restarting the PXL gateway service.
4.0 Troubleshooting Information
- Ensure the Primary PXL is addressed as #1.
- Verify jumpers JP6 and JP7 are across both sets of pins.
- If the adapter is showing in Device Manager is the assigned COM port number displaying.
- Is the assigned COM port number correctly defined in the Doors.NET communications channel which is assigned to the controller?
- Is the USB-serial adapter on Keri's recommended peripherals list?
- Is the adapter correctly installed? and displaying in Device Manager of the host PC.
- If the adapter is showing in Device Manager is the assigned COM port number displaying?
- Does the USB cable length exceed 3 metres?
- Does the serial cable run length exceed 15 meters/45 feet?
Related Articles
PXL-500 Controller Setup - Doors.NET or Borealis
1.0 Introduction This section covers the initial setup and basic configuration of PXL controllers in the Doors.NET and Borealis software. If Using Doors.NET It assumes Doors.NET has already been successfully installed on your host PC, the software ...PXL-500 Troubleshooting Guide
Following is a list of possible scenarios you may encounter when setting up or using the PXL-500 controllers. You will then see a possible solution or a list of possible solutions listed in order of the most likely cause: 1.0 Controller Communication ...PXL-500 - Recommended USB-Serial Adapters
Because of the vast number of different manufacturers and models of USB-to-Serial adapters it would be impossible for us to verify the functionality of each one. Here is a list of specific models of adapter that are approved and recommended for use ...PXL-500 Setup in Doors.NET with a LAN-520
1.0 Introduction The following are basic setup instructions for the LAN-520 module. Some settings may not apply to every application. Note: The LAN-520 AESP is an updated version of Keri’s LAN-520X device. If you are using the new NC-485X Network ...PXL FAQs
PXL-500 Controller FAQs What reader types are supported with the PXL-500 controllers? The PXL-500P supports Keri MS series readers and the PXL-500W supports Wiegand readers. What method is used to communicate to a PXL-500 controller? The recommended ...