Rollcall Client - Advanced
1.0 Introduction
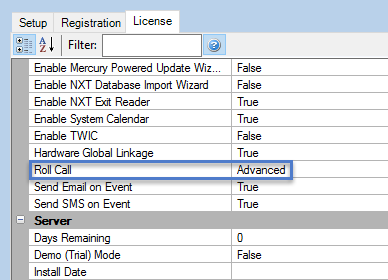
The main benefit of Rollcall Advanced is you have the option of adding muster readers and you also have the ability to automatically print area occupancy lists.
An example of where this would be useful is if you had a building with multiple floors and different companies or department working on each of the floors. Each floor would have an IN reader and there would be an OUT reader to exit the building, plus a muster reader located away from the main building, such as in a guard station. When employees enter their floor they would be seen as IN their work area but when they badge the OUT reader to exit the building they would be taken out of the area.
In the event of an evacuation, perhaps due to a fire or fire drill, some employees may exit the building via a fire exit (which may not have access control operating on it). The employees would then be required to badge their card at the Muster station located at the assembly point (such as near to the car park). A security guard in a guard station would have Doors.NET Rollcall Client installed on the PC in the guard station and the security guard would be able to use the Rollcall Client to print of a list of who is still within the building (because they have not badged the OUT reader or the reader at the Muster Station.
2.0 Rollcall Advanced Setup Example
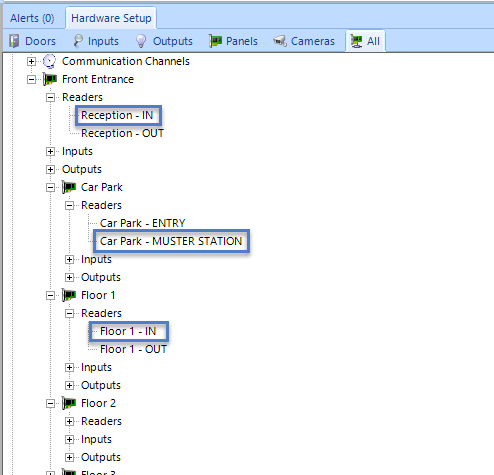
- In the Doors.NET standard admin client ensure you have three readers appropriately labeled.
- Double-click the Rollcall Client icon on the desktop of the client installed at the guard station.

- Log into the client using the default user name and password (both admin)
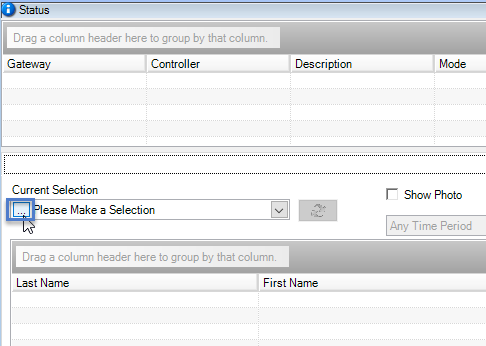
- Once logged in you will see a message stating: "There are no readers assigned to this area" - This is expected so click OK.
- From within the area selection list, click on the browse icon, highlighted below:
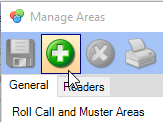
- You will then see the Manage Areas window.
- Click the Add Area button.
- Rename the area Floor 1.
- While you are on the General tab place a check mark in the Muster Area option.
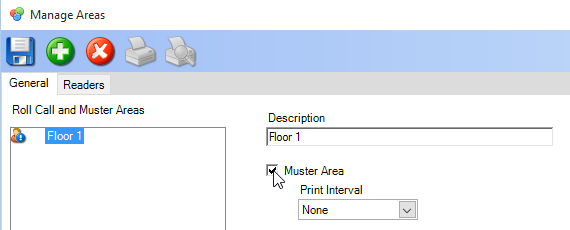
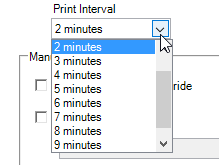
- Set the Print Interval to a value of between 1 minute and 10 minutes. This is the frequency of how often you want the occupancy list to be printed in the event of an emergency evacuation.
- Then click the Save icon to save the area.
- Next, click on the Readers tab.

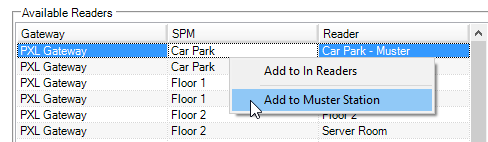
- On the right of the window you will see a list of all the available readers on the system, you will also see an "In " readers section and a "Muster" readers section.
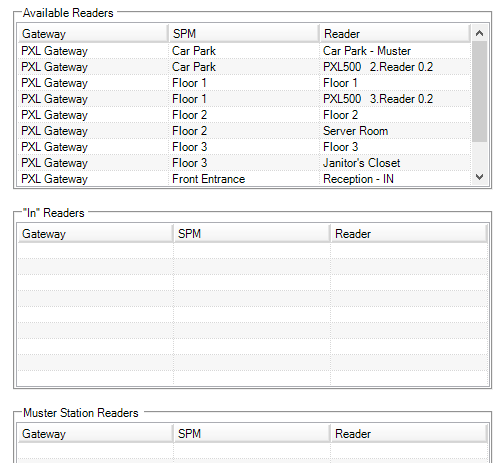
- You will perhaps be wondering why there is no section for "OUT" readers... that is because any reader that is NOT added to either the "IN" or "Muster" list is AUTOMATICALLY regarded as an OUT reader by the Rollcall feature.
- Right-click the reader for Floor 1 and select "Add to In Readers".
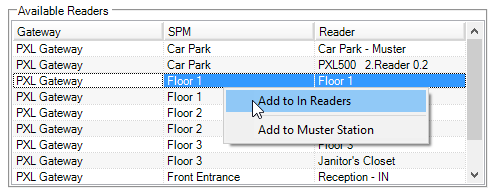
- Right-click the Muster reader located in the car park and select "Add to Muster Station".
- So now you have one IN reader and one Muster Station reader, save the area settings and close the manage areas window.
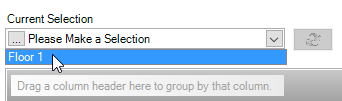
- You will then be back on the general Rollcall client screen.
- Select the newly created area from the area selection list.
- Even though the occupancy list is empty to begin a report will be printed to the default printer as soon as the list is selected.
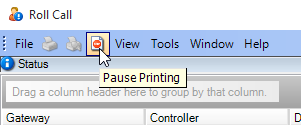
- To prevent further printing you have to click on the pause printing icon. The pause print icon will remain highlighted in yellow while printing is paused.
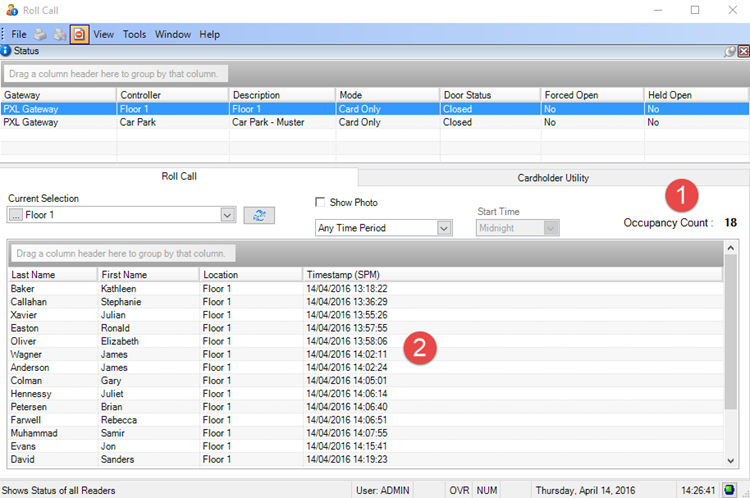
- The status grid at the top of the screen will provide you with status information for the doors which are added to the area.
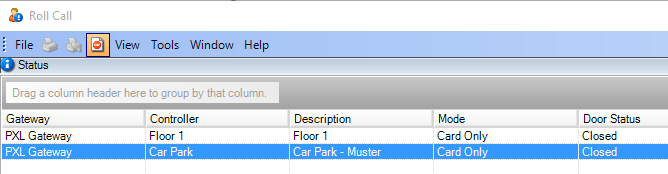
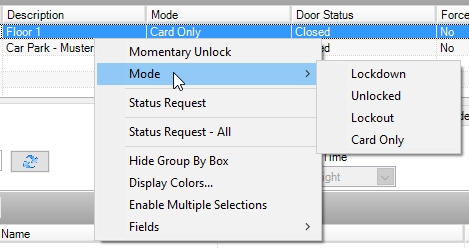
- If you right-click one of the listed doors you will notice that there is the option to perform a momentary unlock, or you can select Mode and then set the door to Lockout, Lockdown, Unlocked or Locked (Card-only).
- As cardholder gain access through the reader for Floor 1, the occupancy count will start to increase and the occupancy list will contain all the cardholders names along with the time stamp of when they badged their cards.
- In the event of a building evacuation some employees may leave the building via a fire exit (without badging their cards)... therefore the Rollcall client will still 'see' those cardholders as being in the area. Therefore when they reach the assembly point they should badge their cards at the Muster Station reader.
- The Muster Station reader is regarded by the Rollcall Client as an 'out' reader, so when cards are badged those cardholders are automatically removed from the Rollcall occupancy list.
- Once the employees have been given an adequate amount of time to congregate at the assembly point (and badge their cards), the Rollcall operator then presses the Print Pause button again to resume printing.
- The Pause Print button will then not be highlighted and printing will resume every X minutes (depending on what you have your print interval set at).
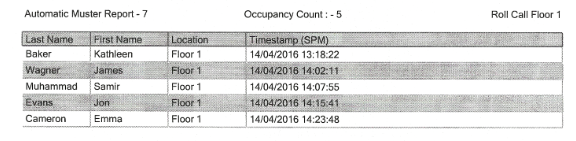
- The report which is printed off will have a list of all the cardholders who are still in the building (or those who have not yet badged at the Muster Station reader).
- When all personnel have been accounted for the Rollcall operator can click the Pause Print icon again and the printing will stop. Remember: Once printing is resumed an occupancy report will be printed every X minutes according to the value that has been set in the Print Interval setting in the Rollcall Area setup.
Related Articles
Rollcall Client Overview
Roll Call Client The Doors.NET Roll Call Client has been developed to provide you with a graphical representation of occupancy within defined areas of a facility. Roll Call areas can be setup to include all system readers, or just specific readers. ...Rollcall Client - Basic
The main purpose of the basic version of the Rollcall Client is to provide a list of all the cardholders that are 'In' a designated area. When setting up an area you select a reader (or readers), to be the 'In' readers, all other readers on the ...Professional Report Client Setup
1.0 Introduction The system has a built-in report designer that allows you to create a new report from scratch or to modify any of the default reports. You can change fonts, add your own logo, change header and footer text, add a barcode field to the ...Professional Report Client Data Sheet
Attached.Doors.NET - Admin Client Only Install
1.0 Introduction This section explains how to install just the administrative client onto a PC, such as for installations where multiple client connections are required. Important Note: If the host PC/Application Server PC software is updated you are ...