Rollcall Client - Basic
The main purpose of the basic version of the Rollcall Client is to provide a list of all the cardholders that are 'In' a designated area. When setting up an area you select a reader (or readers), to be the 'In' readers, all other readers on the system are automatically defined as the 'Out' readers. Out readers do not need to be added to the areas. When a cardholder presents their card to an 'In' reader the occupancy count increments, when they badge at an 'Out' reader the occupancy count decrements.
The occupancy list is dynamic and updates in real-time as the cardholders enter or leave the area.
Rollcall Basic Setup Example
This example uses three PXL-500 2-door controllers, each one controlling an entry door and an exit for a building (three buildings in total). An area is setup for each of the buildings so that at any time the Rollcall Client operator can view who is 'In' any of the buildings. This example will detail the process for setting up and viewing an area that includes building 1.
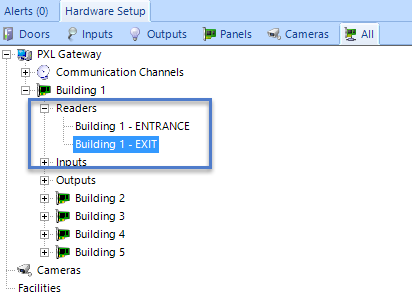
- From the Doors.NET admin client go to Setup >> Hardware Setup >> All. This will take you to the hardware tree.
- The hardware gateway will be listed at the top and the controllers will be listed beneath.
- Ensure you have appropriately named the readers for area 1 (Building 1 in this example).
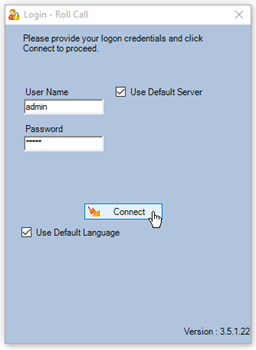
- Double-click the Rollcall Client icon on the desktop.

- Log into the Rollcall client (default username and password are both admin).
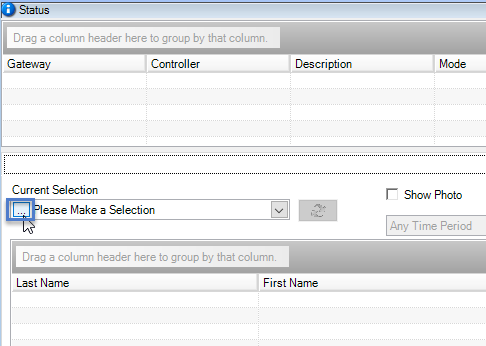
- You will see a message stating no readers are defined for this area, this is expected, so click OK.
- Click the area browse button.
- Click the Add Area icon.
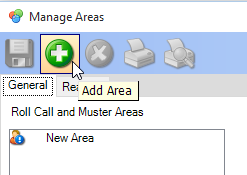
- Enter a description for the new area then click the save icon.

- Go to the readers tab.
- Right-click the entrance reader connected to the controller for this area and select "Add to In Readers".
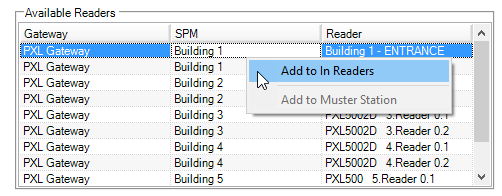
- This reader will then be listed within the "In" Readers list (you do not need to save the setting).
- You can now close the Manage Areas window.
- In terms of this area, all other readers on the system will be regarded as "Out" readers, including reader 2 for the building 1 controller.
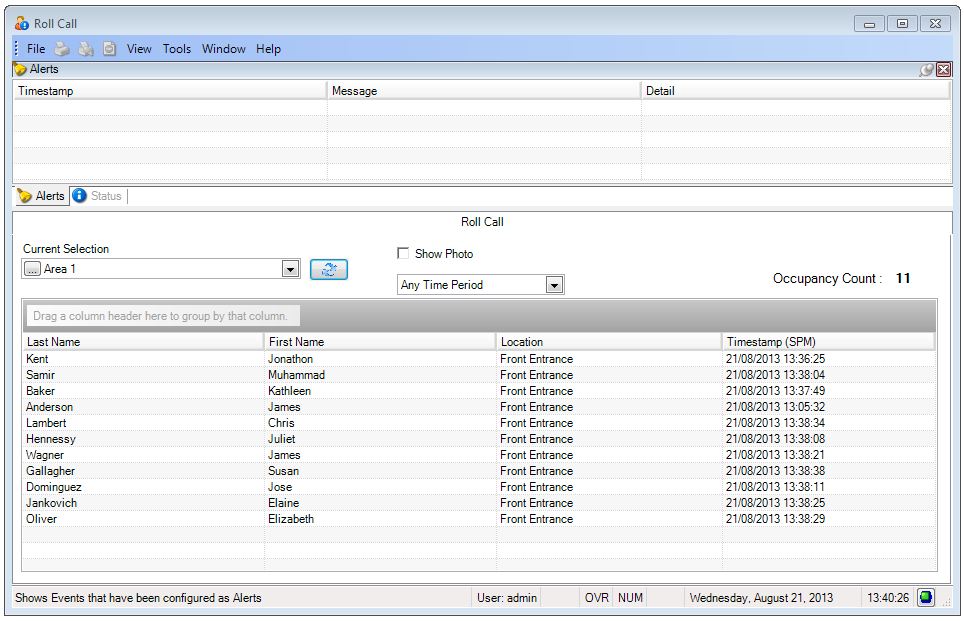
- Back on the main Rollcall client window, select the new area from the area selection list.
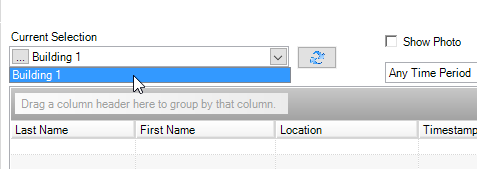
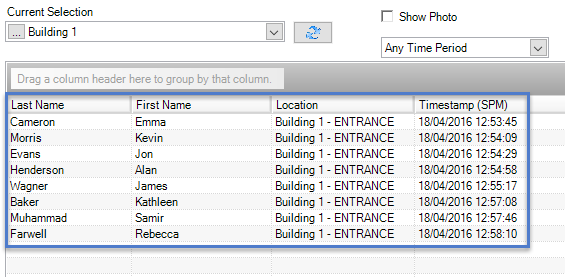
- This area will now be monitored in real-time... whenever a cardholder gains access through the building 1 entrance reader they will then be seen as 'in' the selected area.
- The occupancy count will be increased accordingly.
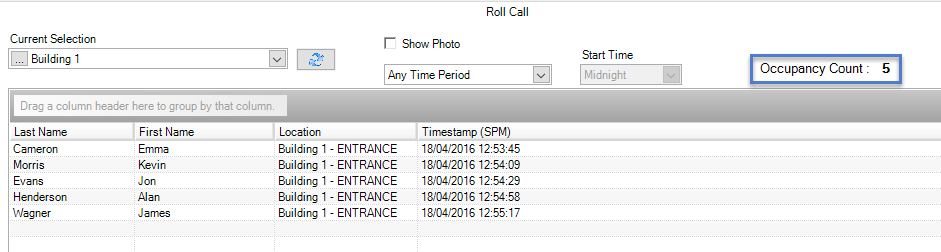
- The occupancy list will have a list of the cardholder names who have entered, along with a time stamp of when they used their card to gain access.
- When the cardholders use their cards at the exit reader the occupancy count will decrement and the cardholder will be removed from the occupancy list.

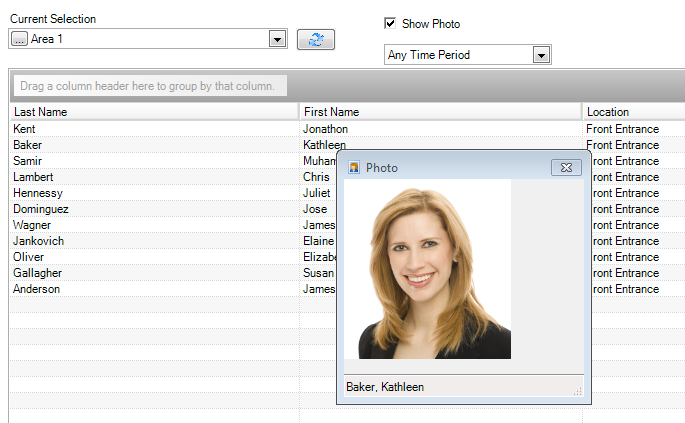
Show Photo Option
A 'Show Photo' option, when ticked, will display the cardholders image when you click on the cardholders name in the occupancy list.
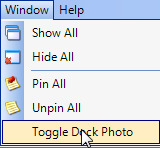
By default the Photo Window will appear next to the main Roll Call window. If you want to be able to make the Photo window a 'Floating' window so it can be re-positioned anywhere, click on the Window tab in the main Roll Call GUI and select 'Toggle Dock Photo'.
Show Area Access During a Time Period
A selection is also available to show access to an area by cardholders within a specific time period. This look-back time period selection is used to prevent older transactions from displaying.
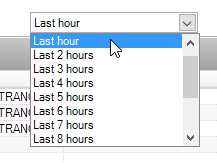
It is very useful for when there is no exit reader defined for the facility.
Related Articles
Rollcall Client Overview
Roll Call Client The Doors.NET Roll Call Client has been developed to provide you with a graphical representation of occupancy within defined areas of a facility. Roll Call areas can be setup to include all system readers, or just specific readers. ...Doors.NET - Admin Client Only Install
1.0 Introduction This section explains how to install just the administrative client onto a PC, such as for installations where multiple client connections are required. Important Note: If the host PC/Application Server PC software is updated you are ...Rollcall Client - Advanced
1.0 Introduction Advanced Rollcall is an option that can be enabled on your license. The main benefit of Rollcall Advanced is you have the option of adding muster readers and you also have the ability to automatically print area occupancy lists. An ...Doors.NET Standalone Technical Documents
Here you can download various Doors.NET technical documentation in PDF format: Doors.NET Setup and Installation Guides Doors32 and PXL Controller Upgrade Data Sheet Recommended PC and Operating System Information Doors.NET Ethernet Communication ...Photo ID Client Overview
The Photo ID Badging client is a licensed Doors.NET components that allows you to: Design and print badges with photo IDs and custom graphics on plastic cards, overlays for standard proximity cards, or ISO thin proximity cards. Single card database ...