Setup an Airlock
1.0 Introduction
The airlock feature is available on NXT-MSC or Mercury SCP controller when Area Control is enabled on the license. This is so you can setup two or more areas as 'airlock' areas.
Anti-passback is not required for airlocks to work, however if anti-passback is configured, it does not effect the operation of the airlocks.
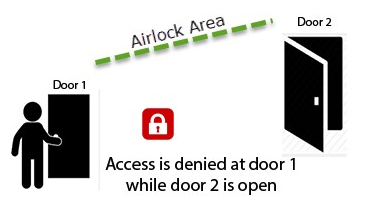
The basic principle of an airlock between two doors, is that if one the doors is open then you cannot open the second door.
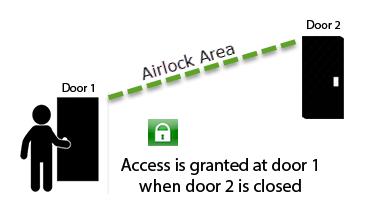
You will only be able to open the second door once the first door has been closed and you will only be able to open the first door when the second door has been closed.
Note: You must have door contacts installed at each door to correctly use this application (so that the controller will know if either door is in the open state).
2.0 Airlock Setup
The following steps explain how to setup the Airlock feature in Doors.NET using NXT-MSC controllers.
- Ensure your Doors.NET license has Area Control enabled.
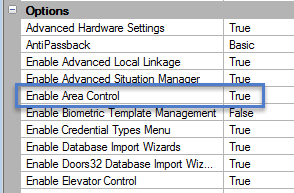
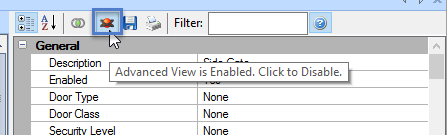
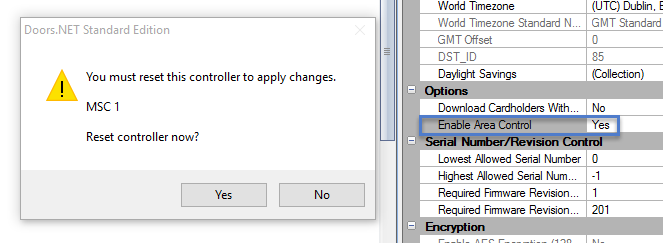
- Area Control is also enabled on a per controller basis, so highlight the controller in the hardware tree and in the properties scroll down to the Options. If you cannot see the Options setting then you will need to enable Advanced View.
- In controller options select Yes to Area Control and click save. You will be advised that a controller reset is required, so click yes to this.
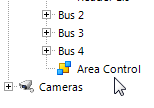
- In the hardware tree you will then see an entry/node named Area Control, so click this.
- To setup an airlock between two doors click the Add icon twice and two new areas will be added to the hardware tree.
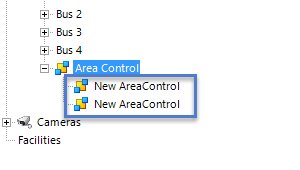
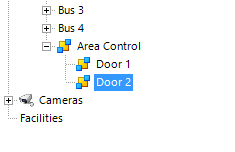
- Give both Areas a new name - One for door 1, the other for door 2, for example:
- Highlight the first Area so that the properties can be seen on the right. Set Enable Airlock and Enforce Airlock One Door to Yes.
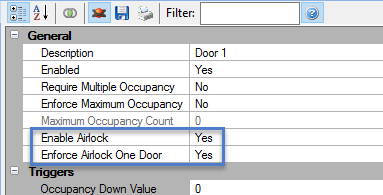
- Then do the same for the second Area.
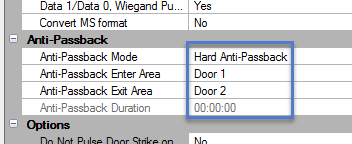
- Highlight the reader in the hardware tree that relates to door 1 and in the reader properties locate the Anti-Passback settings.
- Anti-Passback Mode - must be set to Hard
- Enter Area - must be set to Door 1 (or the name assigned to the first area)
- Exit Area must be set to Door 2 (or the name assigned to the second area)
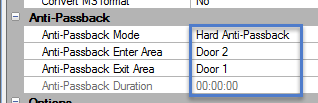
- Highlight the reader for Door 2 and again locate the Anti-Passback settings.
- Anti-Passback Mode - must be set to Hard
- Enter Area - must be set to Door 2 (or the name assigned to the second area)
- Exit Area must be set to Door 1 (or the name assigned to the first area)
- The Airlock setup/configuration is then complete, so the next step is to present a valid card at Door 1, then open the door contact when access is granted.
- With the door contact still open for Door 1, present the same card to Door 2 - You will get Access Denied and in Live Events the full message will be:

- You will only be able to get access at Door 2 again when the Door 1 door contacts are in the closed state.

- And you will only be able to get access through Door 1 when the contacts for Door 2 are closed.

Related Articles
Setup Outputs
The Setup Outputs process allows you to configure the output type and monitoring parameters. 1.0 Via the Outputs tab Under the Hardware Setup tab, Click the Outputs tab. The Selected Hardware tab is then loaded on the ribbon . 2.0 Via the Hardware ...Setup Inputs
The Setup Inputs process allows you to configure the input type, circuit supervision, and monitoring parameters. Under the Hardware Setup tab, Click the Inputs tab. The Selected Hardware tab is then loaded on the ribbon. Display Input Information by ...Setup Access Groups
1.0 Introduction Access groups are setup in Doors.NET via Home >> Access Groups. There are two default access groups; Never and Total Access. When a controller is added to the system it's doors are automatically added to the Total access group (with ...MP2500 Controller Setup
1.0 Introduction The MP2500 is a powerful, intelligent controller that's network-enabled and is scalable to 64 doors/openings with the addition of downstream door modules. The high performance MP2500 system processor module uses an Ethernet ...EP2500 Controller Setup
1.0 Introduction The EP2500 is a powerful, intelligent controller that's network-enabled and is scalable to 64 doors/openings with the addition of downstream door modules. The high performance EP2500 system processor module uses an Ethernet ...