SQL Express 2014 Manual Install
1.0 Introduction
With the release of Doors.NET v4.0.1 Keri is now using .NET Framework v4.6.2 and SQL Express 2016. This allows the software to take advantage of the power, functionality, and speed provided by the current .NET Framework revision, and also reduces software installation/upgrade time. However, it also brings limitations, set by Microsoft, for Doors.NET v4.0.1 software installation:
NET Framework v4.6.2 is incompatible with certain older operating systems. This means Windows 8, Windows 7, Windows Server 2008 R2, and any older operating systems are no longer supported.
SQL Express 2016 requires a 64-bit microprocessor/operating system and .NET Framework v4.6.2 for operation. This means the 32-bit versions of Windows 10 and Windows 8.1 will require a manual installation of SQL Express 2014 prior to installing Doors.NET v4.0.1.
SQL 2016 does not work with 32-bit versions of Windows. Therefore, if you are using a 32-bit version you will have to manually download and install SQL Express (we recommend you install SQL Express 2014) as that is the most recent version of SQL Server that supports a 32-bit operating system. We include the new SQL Server Express 2016 because of the recent enhancements and modifications are built on this version of .NET Framework (version 4.6.2).
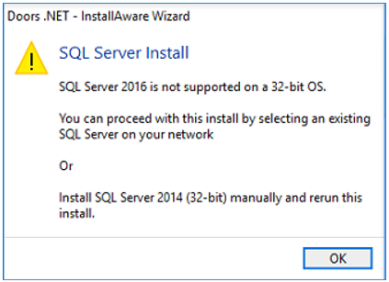
If you are using a 32-bit version of Windows you will need to install SQL Express manually. You can download the installation file directly from the Microsoft website. The link to use is noted further on.
NOTE: If you are upgrading an existing installation of Doors.NET then this document does not apply. Existing systems will use the existing, installed version of SQL Server.
2.0 Which Operating Systems Does This Apply to?
You will need to manually install SQL Express 2014 if you are using one of the following:
- Windows 8.1 (32-bit)
- Windows 10 Home (32-bit)
- Windows 10 Pro (32-bit)
- Windows Server 2008 R2 (Incl. SP1)
Older Windows operating systems, such as Windows 7, 8 and 8.1 are capped at Doors.NET v_3.5.1.22 (SP1)
NOTE: There is NO functional difference between Doors.NET v3.5.1.22 SP-1 and v4.0.1 software.
For further details refer to the document: Doors.Net_Software_Release_Notes_v4.0.1_Rev-A.pdf (P/N - 01298-001).
3.0 What Else is There to Consider
There are certain requirements to be aware of when manually installing SQL Express:
- The database instance MUST be named ECLIPSE
- Database Authentication MUST be set to SQL Mixed Mode (and not Windows Authentication).
- The required SQL username and password are noted in section 5.
4.0 Downloading the SQL Express Installation File
The software can be downloaded from the Microsoft website at the following
location (correct at the time of writing):
https://www.microsoft.com/en-gb/download/details.aspx?id=42299
- Once you are on the download page, click the DOWNLOAD button.
- Click NEXT and then save the file to your PC.
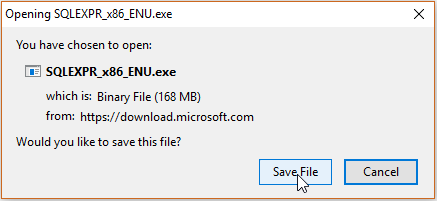
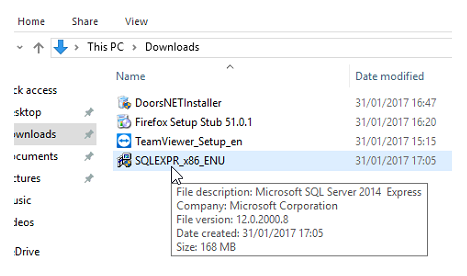
On a default Windows system you will find the file in your Downloads folder.
- A dialog box will appear, prompting you to extract the files.
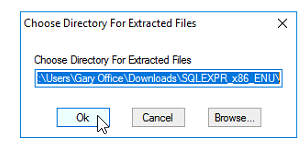
Within a few seconds, all the files will have extracted, including the installation files.
5.0 Installing SQL Express 2014
Typically, the Installation will automatically begin as soon as all the files have been extracted.
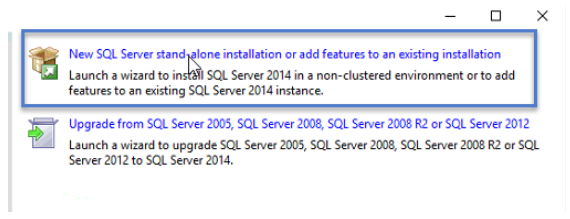
- The first screen to appear gives you the option to perform a new install (or add features) and the second option is to upgrade a version of SQL Server.
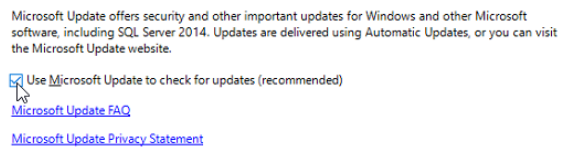
Next, it is recommended that you select the option to allow automatic updates.
- The installer will then scan for any available updates.
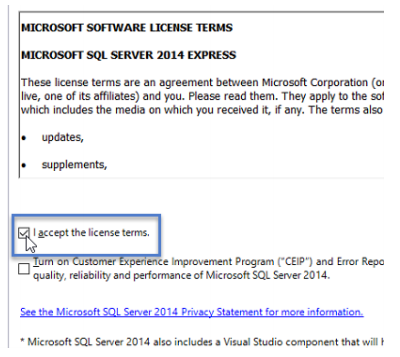
You will then see the Terms and Conditions list. Read through and accept them.
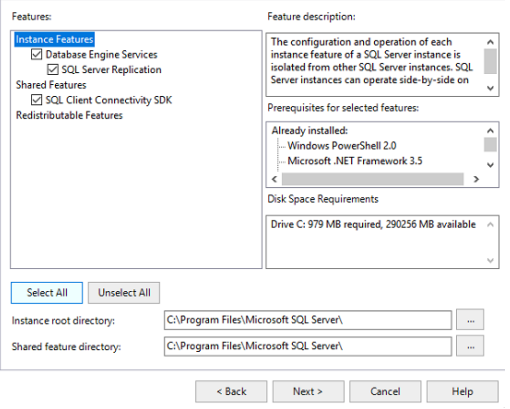
- All the required fields should then be selected by default, so click NEXT again.
- You will now need to specify the name of the SQL Instance...
IMPORTANT: You MUST specify the instance name as ECLIPSE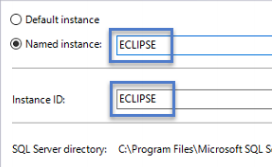
- The Server Configuration settings should be left at their default values, unless they specifically have to be changed.
Next are the database configurations settings - Here you will specify the SQL username and password that will be used to install SQL
IMPORTANT:
- Authentication should be set to Mixed Mode - You should not use Windows Authentication.
- Enter the password as: dhs$e700 - This is the password associated with the SQL 'sa' account and must be entered exactly as highlighted (in blue).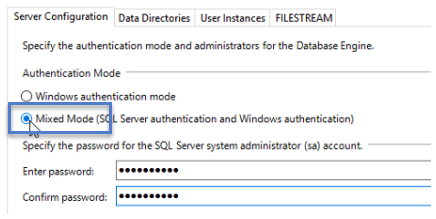
NOTE: The sa account is used to install SQL. Once installed is not used to access the Doors.NET database by the Application Server.
SQL Server Express installation will then begin.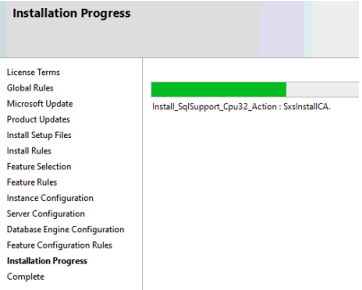
- Installation should take no longer than 10 minutes to complete.
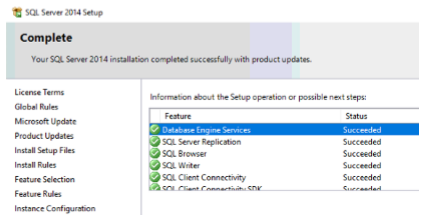
You can now close the installation window.
6.0 Run the Doors.NET Installer
The Doors.NET installer will now detect that an SQL version is installed - you can then select the option to install the Doors.NET database on 'this computer'.
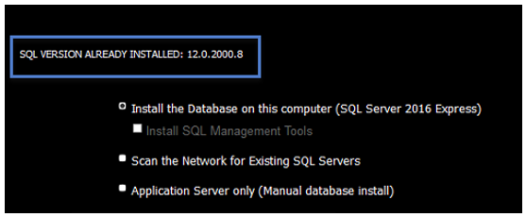
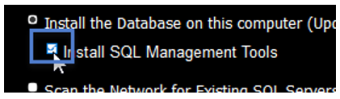
NOTE: On this screen you should consider placing a check-mark in the option to 'Install SQL Management Tools' - Otherwise referred to as SQL Server Management Studio. -This management tool, once installed, allows you to configure, manage and administer your Doors.NET SQL database (and it is required for restoring a syste backup or a database upgrade from a Doors32 system).
7.0 Installing SQL Management Tools
Once Doors.NET has been installed you will be prompted to run the License Manager.
- Enter your license key and activate your license.
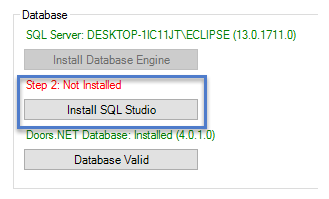
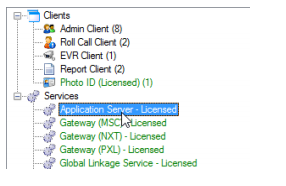
On the License Manager window you should select Application Server from the list on the left.
On the right, you will see the 'Database' section - The red text above the Install SQL Studio button should state: 'Not Installed'.
- Click the Install SQL Studio Button.
- An install wizard will appear. Follow the on-screen instructions to install the management tools.
- Installation of SQL Studio Manager should take around 15-20 minutes.
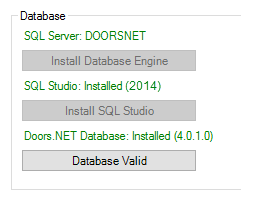
- Once complete, close then re-open License Manager.
- Select Application Server again and SQL Studio should be indicated as installed.
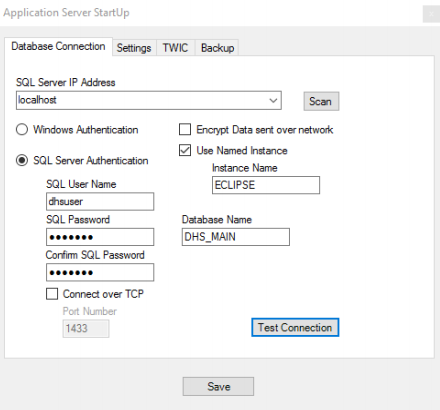
8.0 Test the Database Connection
Once the database and SQL Studio Manager are both installed you should test the connection to the database.
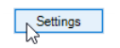
With Application Server still selected (listed on the left).
- Then click the SETTINGS button.
- Your database connection settings should appear as shown here:
- Click the TEST CONNECTION button.
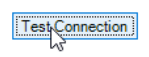
- Then YES to proceed.
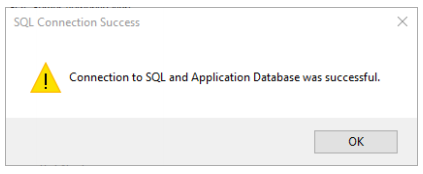
- Almost immediately you should see a connection successful message.
- Click the SAVE button
- You will then be prompted to start the Application Server Windows service.
- Moments later you will see a message confirming the Application Server is started.
- You are now ready to use your Doors.NET system.
9.0 Further Information
For further information about adding cardholders to Doors.NET, adding hardware, backing up and restoring the database, etc, please refer to the help file which is included in the program.
The help file can be accessed via the Keri logo image in the top left corner of the client.
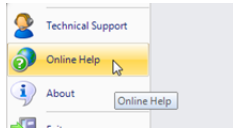
Or you can access it by pressing the F1 key while on any screen. The help file will open out on the page related to the screen you are on.
Related Articles
SQL Express 2019 Manual Install
Manually Install SQL Express 2019 1.0 Introduction There may be a scenario where SQL Express 2019 must be manually installed on the host PC. The installation file can be downloaded from the Microsoft website. At the time of writing, the correct URL ...SQL Express 2016 Manual Install
1.0 Introduction You can encounter a situation where you need to manually install the SQL Express database engine and database management tools (SQL Studio Express. This article walks you through the process of manually installing SQL Express 2016 ...Doors.NET - Upgrade the SQL Express Version
1.0 Introduction Windows 11 has been approved for new installations of Doors.NET software from v4.8.0 and newer. Windows 11 has been approved for older installations of Doors.NET software under the following conditions: * The installation is upgraded ...Install SQL Studio Manager
1.0 Introduction Doors.NET installation does not automatically install SQL Studio Manager (which is required for administering the database or for detaching/attaching a database backup). 2.0 Download the Studio Manager Setup File On the final screen ...Upgrade the Installed SQL Version
1.0 Introduction Windows 11 requires Doors.NET to use SQL/SQL Express 2019. Any upgrade installations will use the SQL version that was installed at the time of installation (this will typically be SQL 2016). For this reason, SQL will need to be ...