SQL Express 2016 Manual Install
1.0 Introduction
Notes:
- You should have logged into the PC with full administrative rights to perform this installation.
- SQL 2016 does not work with 32-bit versions of Windows. Therefore, if you are using a 32-bit version you will have to manually download and install SQL Express 2014 - which is the most recent version of SQL Server that supports a 32-bit operating system. Keri Systems includes the new SQL Server Express 2016 with the Doors.NET installer but sometimes there is a security setting, such as in a Server environment, that may not be easily bypassed or resolved - or the database my need to reside on a different PC.
2.0 Download the SQL Express 2016 Installer
The installer for SQL Express should be downloaded from the Microsoft website. At the time of writing, the official URL is as follows:
https://www.microsoft.com/en-us/download/details.aspx?id=56840

- Visit https://www.microsoft.com/en-us/download/details.aspx?id=56840.
- Click the bright red download button.
- The installer should download within a few seconds.
- Locate the installer on the host PC, (highly likely to be the Windows Download directory).
3.0 Install SQL Express 2016
- Go to the Downloads folder on the host PC.
- Click on the SQL Server 2016 Express installer executable.
- Select the 'Custom' installation option.
- Review the target download location for the installation media.
- Click the INSTALL button in the bottom-right.
- The entire installation media will first be downloaded (approx. 1.4GB). A reasonably fast internet connection should allow for the download to complete in just a few minutes.
- The setup files will be extracted.
- When the Installation Center window appears, click on the first option 'New SQL Server stand-alone installation or add features to an existing installation.
- The installer first gives you the option to check for updates to the Windows operating system. Keri systems recommends that you do check for updates before proceeding. So place a check in the check-box and click the NEXT button. The installer will check for updates, it will download setup files and then extract the setup files.
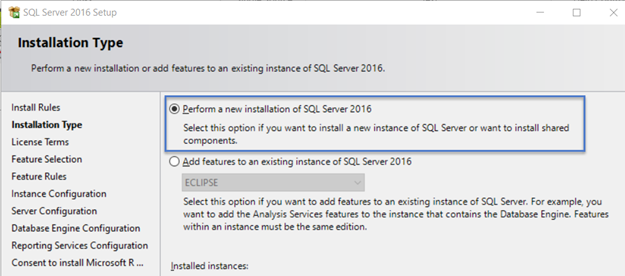
- You will then see the Installation Type window - here you should choose the option to 'Perform a new installation of SQL Server 2016. Click NEXT again.
- You should then read through and accept the Microsoft software license terms. Click NEXT.
- The feature selection screen appears next. You should leave all default selections in place (do not deselect any of the features). Click the NEXT button.
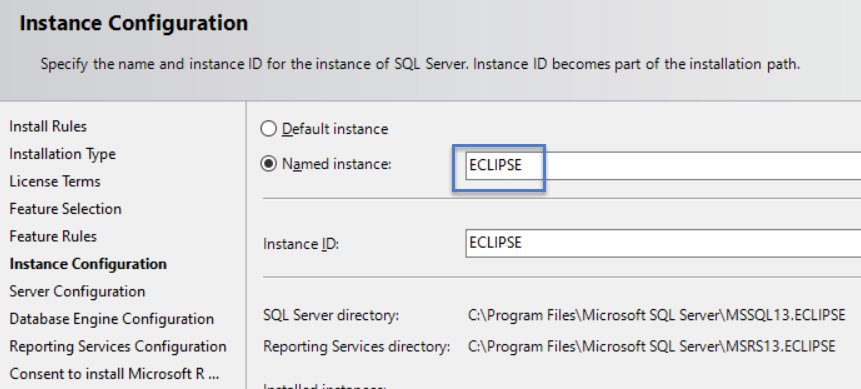
- The Instance Configuration screen now appears. On this screen you should type in the instance name as ECLIPSE. All uppercase letters.
- You should accept the default settings on the Server Configuration screen. NEXT again.
- You will now see the Database Engine Configuration screen.
- You must set the authentication mode to 'Mixed Mode (SQL Server authentication and Windows authentication)'.
- Enter the 'sa administrator' password as 'dhs$e700'.
- Enter dhs$e700 a second time to confirm the password. All lowercase characters.
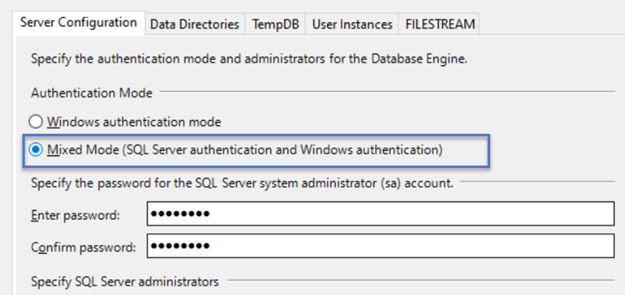
- Click NEXT.
- On the Reporting Services Confirguration screen, leave it set to the default option (install and configure). Click NEXT.
- Click the ACCEPT button to consent to installation of Microsoft R Open. This also agrees to accept all associated future updates and patches. Click the NEXT button again.
- SQL Express 2016 will now install on the host PC.
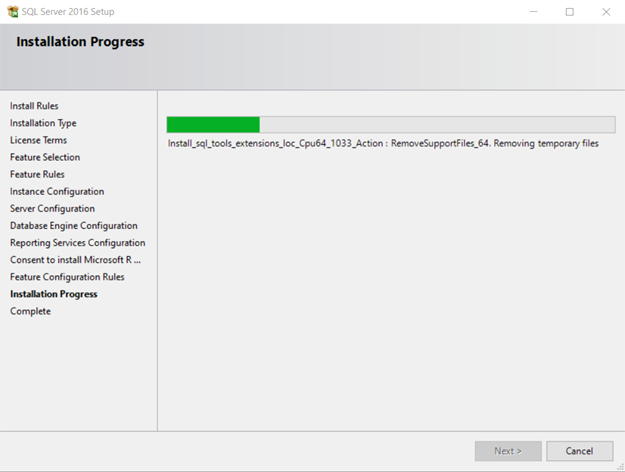
- The installation should take approximately 5 minutes to complete.
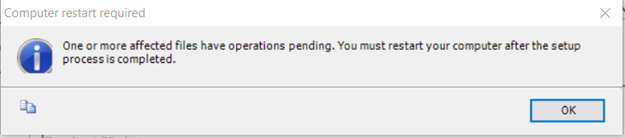
- During the install, you may see a notification that the PC requires a restart. If so, click OK to proceed with the restart.
- Once the PC has restarted SQL Express 2016 will have been installed.
4.0 Install SQL Studio Manager 2016
You should now ensure that Studio Manager database management tools is also installed on the host PC. Studio Manager allows you to perform database administrative functions, such as attaching and detaching a database, deleting a database, restoring a database and viewing and editing database tables and database values.
4.1 On a Standalone host PC (that does NOT have Doors.NET installed)
- Open a web browser and navigate to the following location: https://docs.microsoft.com/en-us/sql/ssms/download-sql-server-management-studio-ssms?view=sql-server-ver15
- Keri Systems recommends downloading and installing the most recent version of Studio Manager.
- Click 'Download SQL Server Management Studio (SSMS)'. The file is approx 550MB - So it should download in just a few minutes.
- Once downloaded, navigate to the Downloads directory.
- Double-click the SSMS-Setup-ENU file.
- When the Welcome screen appears click on the INSTALL button.
- Studio Manager installation should complete in a few minutes.
- Restart the PC when prompted to do so.
4.2 On the Doors.NET host PC (which DOES have Doors.NET installed)
If you have Doors.NET installed on the host PC you can download and install Studio Manager via the License Manager.
- From Windows Start menu go to Doors.NET >> License Manager.
- On the right, you will see the 'Database' section - The red text above the Install SQL Studio button should state: 'Not Installed'.
- Click the Install SQL Studio Button.

- First the installation files will be downloaded.
- Once downloaded, click the install SQL Studio button again to perform the installation.
- Installation of SQL Studio Manager should take just a few minutes.
- Once complete, close then re-open License Manager.
- Select Application Server again and SQL Studio should be indicated as installed.
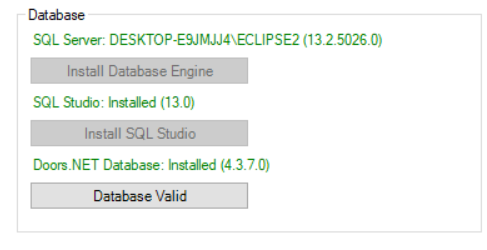
- You can now close the License Manager.
5.0 Manually Install the Doors.NET Database
If the database will reside of a different PC to the application server PC then you will need to install the database manually.
When you install the Doors.NET software there is a utility automatically created in the C:\Keri\DoorsNET directory. This utility can be used to manually install the Doors.NET database, such as for a situation where the database needs to be located on a different PC/Server, or where there is an existing SQL Server.
- Locate InstallDHSDB file within C:\Keri\DoorsNET.
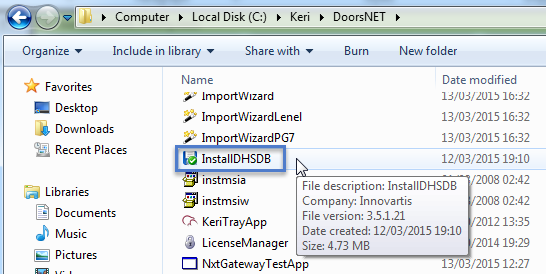
- Run the utility if you are on the database host PC or copy the file to a storage device such as a USB drive to run on a different PC/Server.
- When the utility opens you will see the option of either installing a new database or updating an existing database. Select to Create a new database then click Next.
- Ensure Create a New Database is selected, click NEXT.
- Enter the new database name as 'DHS_MAIN'. Click NEXT again.
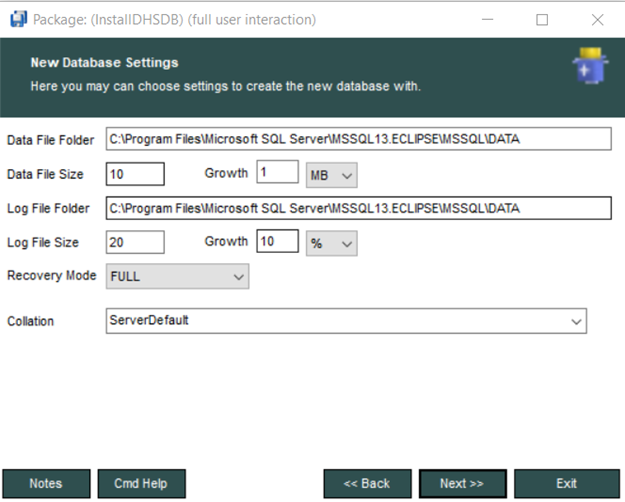
- The database settings screen appears next. In most situations using the default values should be fine. Click NEXT again.
- Click the PROCESS button and the Doors.NET database installation will begin.
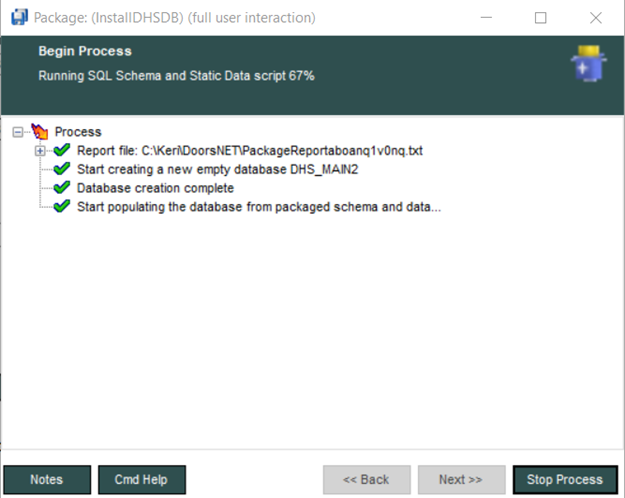
- The database installation should complete within a few seconds.
- Click EXIT to exit the InstallDHSDB utility.
6.0 Test the Database Connection
Once the database and SQL Studio Manager are both installed you should test the connection to the database.
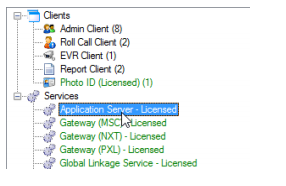
With Application Server still selected (listed on the left).
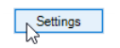
- Then click the SETTINGS button.
- Your database connection settings should appear as shown here:
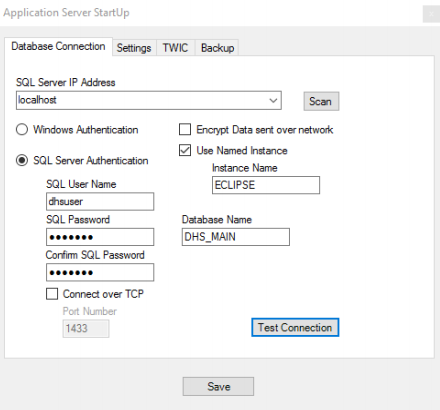
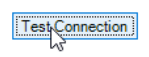
- Click the TEST CONNECTION button.
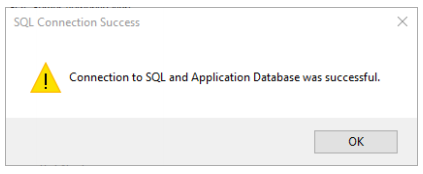
- Then YES to proceed.
- Almost immediately you should see a connection successful message.
- Click the SAVE button
- You will then be prompted to start the Application Server Windows service.
- Moments later you will see a message confirming the Application Server is started.
- You are now ready to use your Doors.NET system.
7.0 Further Information
For further information about adding cardholders to Doors.NET, adding hardware, backing up and restoring the database, etc, please refer to the help file which is included in the program.
The help file can be accessed via the Keri logo image in the top left corner of the client.
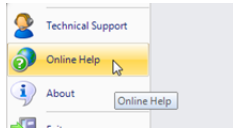
Or you can access it by pressing the F1 key while on any screen. The help file will open out on the page related to the screen you are on.
Related Articles
SQL Express 2014 Manual Install
1.0 Introduction With the release of Doors.NET v4.0.1 Keri is now using .NET Framework v4.6.2 and SQL Express 2016. This allows the software to take advantage of the power, functionality, and speed provided by the current .NET Framework revision, and ...SQL Express 2019 Manual Install
Manually Install SQL Express 2019 1.0 Introduction There may be a scenario where SQL Express 2019 must be manually installed on the host PC. The installation file can be downloaded from the Microsoft website. At the time of writing, the correct URL ...Doors.NET - Upgrade the SQL Express Version
1.0 Introduction Windows 11 has been approved for new installations of Doors.NET software from v4.8.0 and newer. Windows 11 has been approved for older installations of Doors.NET software under the following conditions: * The installation is upgraded ...Install SQL Studio Manager
1.0 Introduction Doors.NET installation does not automatically install SQL Studio Manager (which is required for administering the database or for detaching/attaching a database backup). 2.0 Download the Studio Manager Setup File On the final screen ...Upgrade the Installed SQL Version
1.0 Introduction Windows 11 requires Doors.NET to use SQL/SQL Express 2019. Any upgrade installations will use the SQL version that was installed at the time of installation (this will typically be SQL 2016). For this reason, SQL will need to be ...