Telepathy - Maps

The Maps are from where you monitor your system. They are the combination of building images, floor plans and sensor icons and the Maps section is where you graphically monitor you access control system in real-time. The Maps screen is also where you would receive alerts, (if you have alerts configured).
Note: You will not be able to open the Map section until you have: 1) added Map Diagrams, 2) linked the Map Diagrams together, 3) Enabled the hardware and, 4) linked your hardware to your Map Diagrams.
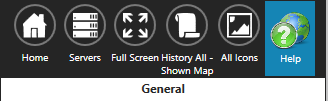
As you can see in the image above, the Maps screen has a ribbon bar giving you quick links to other areas of the program (and a link to this help file).
The main area of the screen will display your map diagrams and, of course, the icons on the floor images will change state when the hardware conditions change, for example: door forced.
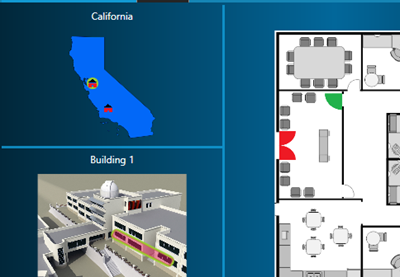
Note: If you are monitoring multiple floors in a building, the software will automatically switch between floor images only if alerts have been setup for the monitored hardware.
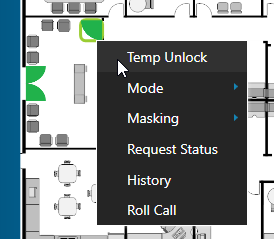
You can also right-click on the hardware sensor icons and operate the hardware... for example; right-click on a door icon and you will be able to unlock the door.
Related Articles
Telepathy - Event History
You can very easily retrieve a list of all of the events history of a hardware object, for example, a door. From the Telepathy home screen, click on the Maps tile. Right click a sensor icon located on one of the floor maps. Select History.Telepathy - Server Settings
The server settings section allows you to connect to multiple Doors.NET installations using a single Telepathy client. All the maps images for each of the remote sites are stored locally at the PC which Telepathy is being run from. The following ...Telepathy Data Sheet
Telepathy Data Sheet (attached)Telepathy - Map Editor
For setting up a typical system, the first place to go to is the Map Editor. But before setting up your Telepathy map client, you should have images of your building(s) and your building floor plans, which you will import. Once imported into ...Telepathy - Operate the Hardware
This section assumes you have already followed the appropriate instructions for adding and linking hardware to your map diagrams. Controlling Outputs From the Telepathy home screen, click on the Maps icon. Right-click on a sensor icon that represents ...