Time and Attendance Sync Service Setup
1.0 Introduction
2.0 Setup Instructions
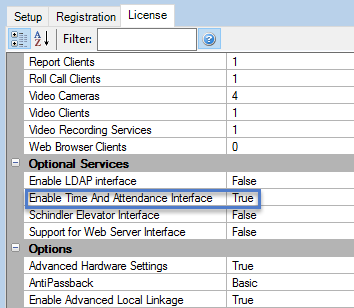
- The first step is to ensure the Time and Attendance Interface is enable in the license.
- Open he License Manager and click on the License tab.
- Scroll down the list until you find 'Optional Services'.
- Verify that 'Enable Time and Attendance Interface' is set to True.
- Verify on the list of installed services that Time and Attendance is showing as Licensed.
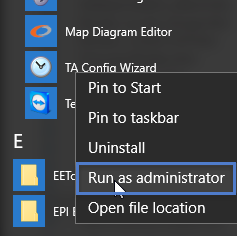
- From the Windows Start menu click on All Programs >> Doors .NET >> TA Config.
- Or click the TA Config Wizard icon on the desktop.
- When the TA Config wizard opens type in the IP address of the Application Server or type 127.0.0.1 to connect to the local host.
- Enter the default username and password of admin/admin.
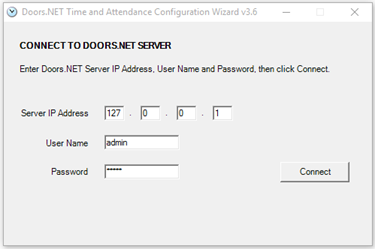
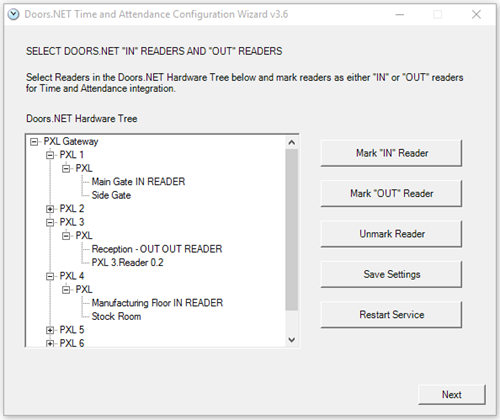
- If any of the information is incorrect you will see an error message when you click Connect. Otherwise you will next be presented with the Readers dialogue box.
3.0 Doors.NET Readers Dialog
- To mark a reader as “IN”, select the reader in the tree and then click “Mark IN Reader” button. Same process to mark “OUT” reader.
- To change a reader from “IN” to “OUT” or vice versa, just select the reader and click Mark "IN" Reader or Mark "Out" Reader, you do not need to click Unmark Reader.
- One you have made your reader selections click the Save Settings button.
- Next, click the Restart Services button. The Time and Attendance Sync Service will be restarted and it will read the new IN/OUT reader settings. It will then start logging "Access Granted" Doors.NET events into the T&A database using the new IN/OUT reader settings.
- Click the Next button to display the next window.
Select SQL SERVER ODBC Data Source For Time And Attendance Database
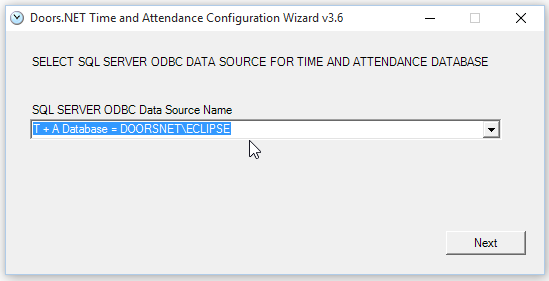
- SQL SERVER ODBC Data Source Name – dropdown list. You have to select the SQL SERVER DSN that points to the T&A database. The SQL database must be setup and attached to your SQL database engine before proceeding with the next steps.
4.0 Creating an SQL Database ODBC Data Source
- Go to Control Panel => Administrative Tools => ODBC Data Sources (32-bit).
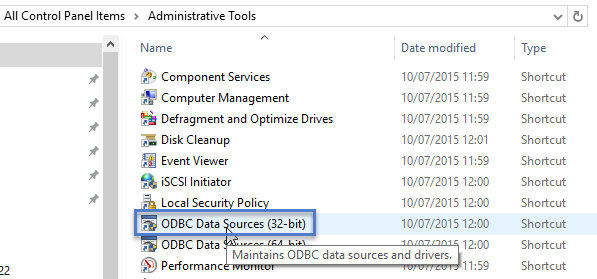
- Click the System DSN tab.
- Click the Add button.
- From the data source list select SQL Server.
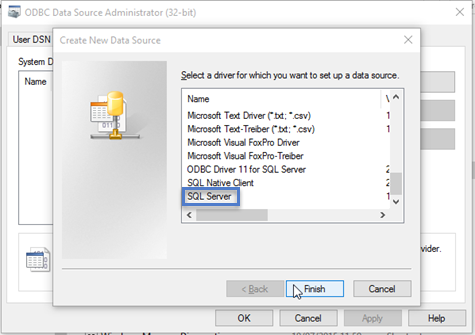
- Click the Finish button.
- The ODBC create window will appear:
- Enter a name (1)
- Enter a description (2)
- Select the instance which has the attached SQL database which you will be sending the access granted events (from the Doors.NET database). (3)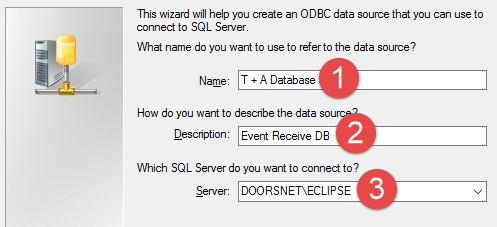
- Click the NEXT button.
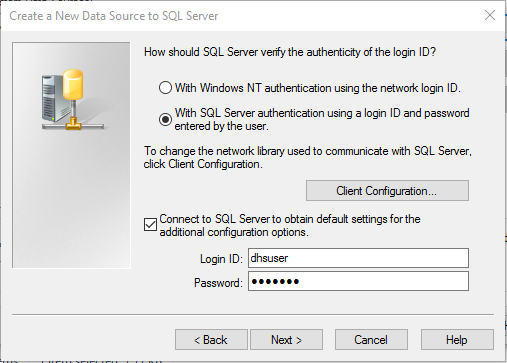
- Select with method to use to authenticate to the database (Windows Authentication uses the Windows user account log in credentials or SQL Server Authentication, where you specify an SQL Server username and password.
- Do not create User DSN’s because those may not be visible to a Windows Service such as the T&A Sync Service.
- Click NEXT to proceed
- Change the default database to: Select the Doors.NET database.
- Click NEXT again.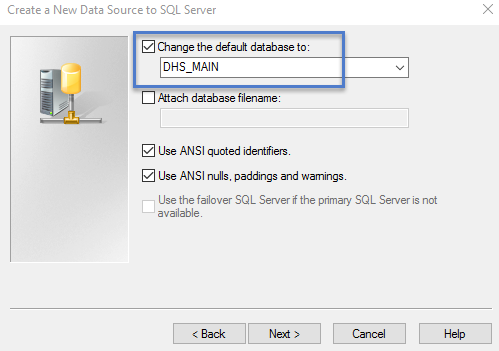
- On the following page all settings can be left at the default values. So click the FINISH button.
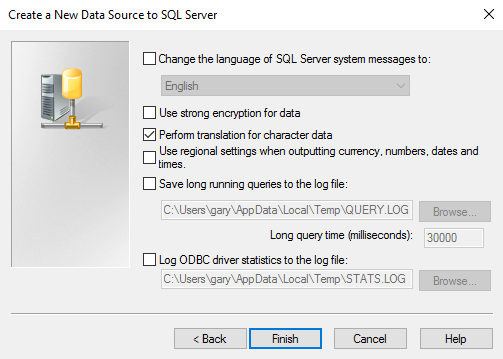
- Finally you will see the database setup confirmation page. Click OK and the window will close..
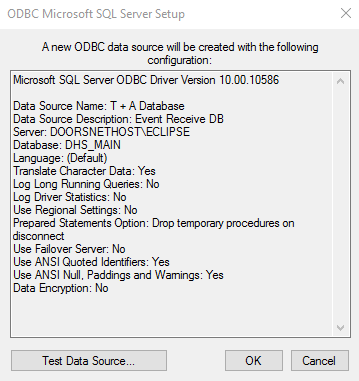
- This ODBC connection will now be available to select during the T & A sync setup.
Server Authentication Dialog
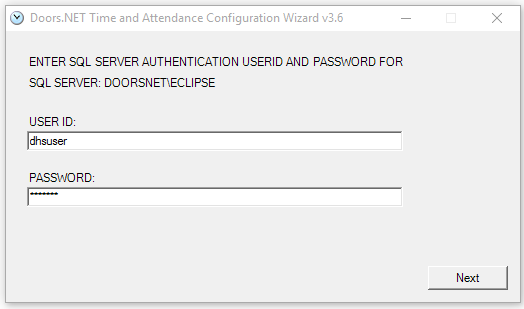
“User ID” – admin user id needed to connect to T&A database server. This will be stored
(encrypted) for later use by T&A Sync Service.
“Password” – admin password needed to connect to T&A database server. This will be
stored (encrypted) for later use by T&A Sync Service.
“Next” button – clicking this displays next dialog.

Select Time and Attendance SQL Server Database Dialog.
This only gets displayed if the DSN points to SQL Server; does not get displayed for Oracle since there are no named databases inside Oracle Server like there are inside SQL Server.
Dropdown is a list of databases that reside in SQL Server. Select the SQL Server database where you want the Doors.NET T&A Sync Service to copy all Doors.NET Access Granted event messages. This could be your T&A SQL Server database, or it could be some other database; it’s up to you what you want to do.
Click the “Next” button to display the next dialog.
If user authentication for the database is set to SQL Authentication you will have to enter the database username and password.
- You now have to create mappings which will link the message information in the Doors.NET database with the information you wish to store in the Time & Attendance database.
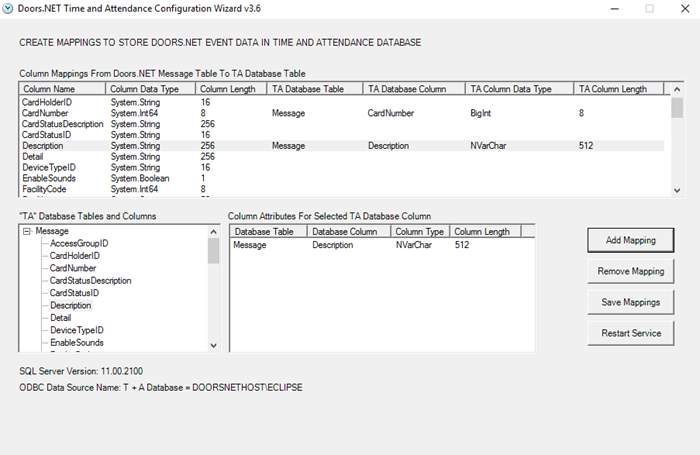
Column Mappings Dialog
Dialog showing mappings from Doors.NET “Access Granted” event properties to T&A SQL Server database columns where each property value will be stored as “Access Granted” events occur.
“Doors.NET Access Granted Event Property Mappings” – this multi-column listbox (top of dialog) shows all mappings you have defined. Each mapping shows the name, type, and length of the Doors.NET Access Granted event property, and what database table and column the property will be stored in, as well as the database column data type and column length.
“Database Tables and Columns” – this listbox (bottom left) shows a tree of all tables in the T&A database. Expanding each table name shows column names. Selecting a column name displays column attributes in the multi-column listbox on bottom right.
“Selected Database Column Attributes” – if table name is selected, displays table name. If column name is selected, displays attributes of selected T&A database column.
“Add Mapping” button – to create a mapping, you must select one Doors.NET Event Property in the top listbox, select one column name in bottom left listbox, then click “Add Mapping” button.
“Remove Mapping” button – to remove a mapping, you must select one mapping in top listbox, then click “Remove Mapping” button.
“Save Mappings” button – clicking this button saves all mappings to disk. After saving mappings, you should click “Restart Service” to make the T&A Sync Service read and use the new mappings. Each time the computer is rebooted, T&A Sync Service reads saved mappings and uses them to store Doors.NET Event message fields into the T&A database.
“Restart Service” button – click this to restart the T&A Sync Service.
Note: You MUST RESTART T&A Sync Service each time you save new mappings.
Note: If you modify mappings, clicks “Save Mappings”, but does not click “Restart Service”, new mappings DO NOT take effect with T&A Sync Service.
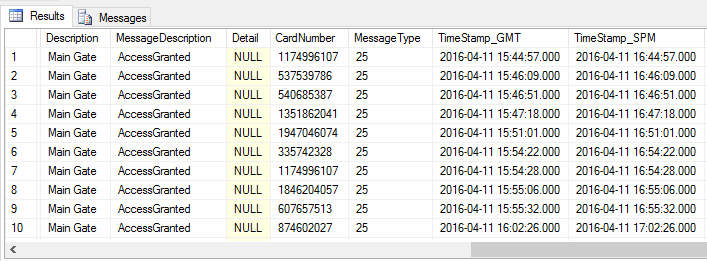
Once configured, access granted events will automatically be 'pushed' to the Time and Attendance database, this will happen in real-time (therefore when the event is added to the Message table of the Doors.NET database a duplicate of that event will also be sent to the Time and Attendance database.
Related Articles
Automatically Export an Attendance Report
1.0 Introduction This setup example explains how to automatically export a report which lists the cardholders that have badged their cards at some point during the day. For this you need to have three Licensed Features enabled in your license: Host ...Reports - Automatically Export an Attendance Report
1.0 Introduction This setup example explains how to automatically export a report which lists the cardholders that have badged their cards at some point during the day. For this you need to have three Licensed Features enabled in your license: Host ...Setup Time Schedules
1.0 Creating a new Time Schedule Click the Add icon in the Time Schedules icon group. A new time schedule is added to the list with a generic name and no active time interval. In the grid, enter the time interval values for this time schedule. In ...Doors.NET - Time Schedules
This video explains how to setup time schedules in Doors.NET and how those schedules are then used. Auto-Unlock Time Schedules
1.0 Introduction Auto Unlock Time Schedules are used to automatically open and then close doors at certain times of day (they are assigned to doors as Auto Unlock Schedules). An auto unlock schedule may have one interval consisting of a single start ...
