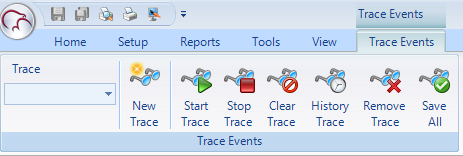
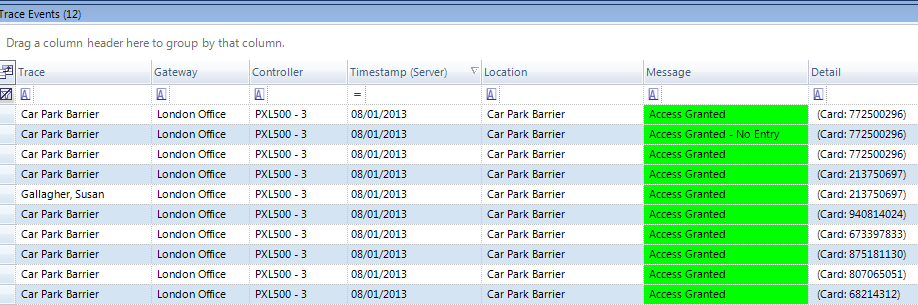
Trace Events
The trace events grid displays specific messages that you are interested in seeing without the distraction of unrelated events. These trace events are grouped by the trace name. The trace name is automatically assigned when you add a new trace event. There are a number of different trace event types. The available trace types are:
- By Cardholder
- By Cardnumber
- By Control Point
- By Controller
- By Gateway
- By Message Type
- By Monitor Point
- By Panel
- By Reader
Setup a Trace Event
- To add a new trace click the New Trace icon.

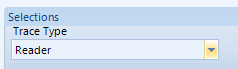
- Select a Trace Type from the drop-down list, i.e By Reader.
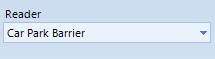
- Select a reader on the system from the Reader drop-down list.
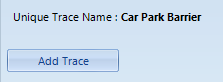
- Note that since trace events are grouped by the trace name, it must be unique. For this reason, the Unique Trace Name is automatically created, so at this point you simply have to click the Add Trace button and the trace becomes active immediately.
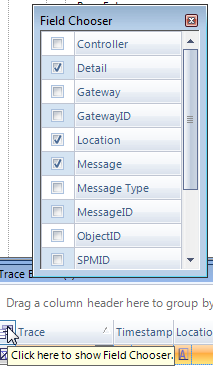
Messages that are generated by this reader are displayed independently on the trace grid similarly to Live Events. - Also similar to Live Events is the Field Chooser, which allows you to select which columns and information is displayed for the events. Click the icon to the left of the first column and then make your field selections.
- The context menu from the trace events window allows for the following selections:
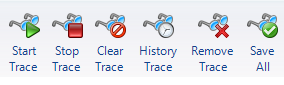
Start and Stop Trace - allows you to quickly start or stop current traces.
Clear Trace - Will remove any trace events from the screen. It does not remove or start/stop the trace.
History Trace - Allows you to retrieve the last 50 events that match the trace criteria - even if they are not in the grid.
Remove Trace - You can delete the trace from Doors.NET entirely
Save All - Saves the current trace events to the local hard drive, they will be available when Doors.NET starts.
Related Articles
Trace Events
The trace events grid displays specific messages that you are interested in seeing without the distraction of unrelated events. These trace events are grouped by the trace name. The trace name is automatically assigned when you add a new trace event. ...Live Events
Live Events Status displays real-time transactions as they occur and includes system messages with the newest transaction at the top of the window. Each column can be sorted or grouped to quickly find a specific item. If not already displayed, this ...Live Events - Event Monitoring
Live Events Live Events Status displays real-time transactions as they occur and includes system messages with the newest transaction at the top of the window. Each column can be sorted or grouped to quickly find a specific item. If not already ...Cardholder Enrollment - Using Live Events
Live Events Enrollment You can enroll cardholders into Doors.net using an access denied events in the Live events grid. Note: This method only detects the card 'internal number' - the unique number that is processed by the controllers and do not ...Viewing the Hardware Status
Status tabs are found at the bottom of the work space/data display field. Certain status tabs only appear when its corresponding feature is accessed or enabled. Mouse over a tab to have that tab's window open in the work space/data display field. ...