Primary and Secondary Reader Setup
1.0 Introduction
NXT Exit readers are only supported on the NXT-MSC controller type. It is however, possible to configure a Primary and Secondary reader when using Standard NXT controller. This is done by using two controller buses and wiring a reader into each of the buses.
Once the readers are connected to the controller you would need to configure the first reader as the 'Primary' reader and the second reader as the 'Secondary' reader. The secondary reader will then perform the same functions as the primary reader (for example: an access grant on each reader will activate the same strike output on the controller).
 Note: When configuring an Exit reader on a Standard NXT controller both readers are 'Standard' NXT readers (NXT-1R/NXT-3R or NXT-5R) without the 'E' designation in the part number.
2.0 NXT Primary and Secondary Reader Wiring
When using a Standard NXT controller it is not possible to use an NXT Exit reader (with the part number NXT-1RE/NXT-3RE or NXT-5E) - which would be wired into the same bus as a standard NXT reader. Because each reader is wired into its own bus this option is supported with all reader types (Keri MS, Keri NXT or Wiegand readers).
2.1 Standard NXT Wiring
2.2 Standard NXT Wiring to the Standard NXT Controller

On power-up, both of the NXT reader's LED will flash amber, then green.
3.0 Verify Both Readers are Online
The following steps assume that you already have a Standard NXT controller online in the software with both readers connected to the controller (for example, one reader connected to bus 1 and the second reader connected to bus 2).
- Log into Doors.NET with your user name and password.
- Go to Setup>> Hardware Setup >> All.
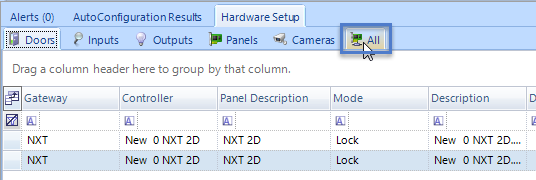
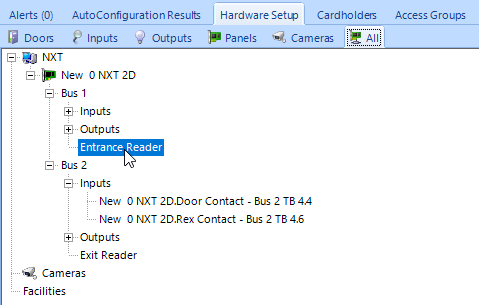
- The hardware tree will be displayed.
- At the top of the hardware tree will be the Standard NXT gateway.
- Controllers will be listed beneath the hardware tree.
- If you select a controller the controller properties will be displayed on the right. In the properties you can check that the controller is online.

- Double-click the controller on the hardware tree and you will see the controller's buses.
- Expand the first controller bus and select the reader on the bus.
- The reader's properties will then be displayed on the right.
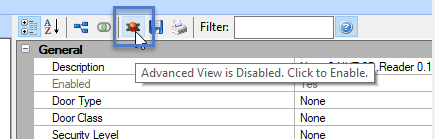
- Enable 'Advanced View' in the reader properties and the reader's advanced settings will be displayed.
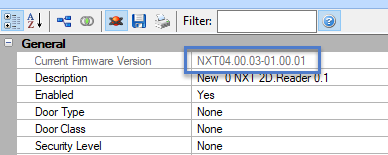
- If the reader's firmware version is displayed at the top of the properties then you know that the reader is online.
- Select the second reader and ensure that it also online.
4.0 Configure the Primary Reader
- Select the first reader again.
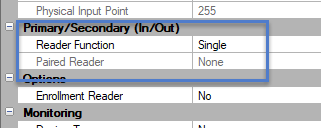
- In the reader properties scroll down and locate the Primary/Secondary (In/Out) setting. By default, all readers are set to being 'Single' readers.
- Change the reader function to 'Primary', then select the exit reader (wired into the second bus).
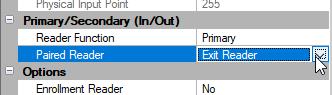
- Save the reader settings.
The primary and secondary readers are now configured. The RTE and the door contact for the second bus will automatically be unassigned. When access is granted at the secondary reader it will activate the relay for the first reader (both readers will unlock the same door).
Related Articles
Doors.NET - Door/Reader Settings
1.0 Introduction The Setup Doors process allows you to configure door operating parameters, view event history, audit changes, view current status, manually lock/unlock, configure reader type (as applicable), and mask/unmask certain door event types. ...Setup a PXL-500 Controller
1.0 Introduction IMPORTANT NOTE: The PXL and Entraguard controller types are not supported with Doors.NET version 6 (v6.0.0) and future versions. Ongoing support and development for these products will be in Borealis. Doors.NET v5.4.0.8 was the last ...NXT Exit Reader Setup
NXT Exit Reader Setup Keri NXT controllers with Mercury Firmware now provide an Entrance/Exit reader door control feature/configuration. This Entrance/Exit feature allows two readers to be wired into one bus on the NXT controller to control entrance ...OSDP Reader Setup in Doors.NET
1.0 Introduction OSDP (Open Supervised Device Protocol) is an access control communication standard developed by the Security Industry Association (SIA) to improve interoperability among access security products and is being endorsed by all leading ...Setup PIN-Only Access
PIN-Only Access 1.0 Introduction This document explains how to setup PIN-Only access when using a keypad connected to a PXL-500W or when using NXT and NXT-MSC controllers with a reader interface module. Notes: The feature setup varies slightly ...