Setup E-Mail/SMS Notifications
1.0 Introduction
 Important Note: If using a Gmail account, you will need to generate a unique 'App Password' via your Google Account Security settings. This password must be entered into the Global Linkage Service settings as a single text string (without any spaces).
- Create the Macro
- Create the Trigger
- Configure the Linkage Service
- Verify the Macro is Operational
- Link the Hardware to the Macro
Click the Email/SMS ribbon icon to open the Global Linkage window.
![]()
2.0 Create the Macro
The Macro is the action to be performed when a trigger condition is met.
- Click the Macro Tab. Click the Add New button to create a Macro entry.

- Click on the New Macro entry to enable Macro Properties.
- Enter a descriptive name into the Description field. This name is copied into the corresponding menu-tree field as it is entered in the Properties field.

- Click the Add Macro Item button.
- Enter a description for the Action Type. This name is copied into the corresponding menu-tree field as it is entered in the Properties field.

- Select the Macro Item Type - This field defines the communication method the macro will use to send messages.
- SMS (text message)

- Fill in the information fields according to the Item Type selected:
For Email

- Enter your message recipients in the To, CC, and BCC fields. Separate multiple recipients with a comma (,).
- Enter a Subject.
- Select a Priority level if desired.
- Enter the message Body.
- The Body field has variable values taken from the database that can be inserted into the text. Right-click within the Body field and a pull-down list appears. This variable list applies for both Email and SMS options.
- Timestamp GMT
- Timestamp Controller
- Timestamp Server
- Description (Location)
- Message Description
- Detail
- Cardnumber
- Last Name
- First Name
- Middle Name
- Controller Description
- Gateway Description
- Additional Fields:
- Access Group ID
- Camera ID
- Device Type ID
- Gateway ID
- Global Link ID
- Message ID
- Object ID
- Route ID
- SPM ID
For SMS

- Enter your message recipients in the Phone Number field. Separate multiple recipients with a comma (,).
- Select a cell phone carrier from the pull-down list.
- Enter the message Body.
- Save the Macro.

3.0 Create the Trigger
The Macro will execute when the Trigger condition is met.
- Click the Trigger Tab. Click the Add New button to create a Trigger entry.

- Click on the New Global Trigger entry to enable Trigger Properties.
- Enter a descriptive name into the Description field. This name is copied into the corresponding menu-tree field as it is entered in the Properties field.
- Click the Enabled check-box to enable the Trigger.
- Click the Condition Type pull-down menu and select a condition type. The Condition Type refers to the source where a change in the source's condition should be checked to see if it meets the trigger's criteria.

- Click the Add Condition button.

- Click on the New Condition entry to enable Condition Properties.
- Enter a descriptive name into the Description field. This name is copied into the corresponding menu-tree field as it is entered in the Properties field.
- Click the Enabled check-box to enable the Condition.
- Click the Enable Time Constraint pull-down menu and select a Time Schedule during which this Trigger should be active.
- Click the Macro pull-down menu and select the Macro this Trigger should activate.

- Select the Message Type to be applied to the Condition from the pull-down list of Available Message Types in the Properties pane.

- Save the Trigger.
4.0 Configure the Linkage Service
The Linkage Service makes the communication connection that sends out the contents of the Macro. Linkage Service configuration is done in the License Manager program (LicenseManager.exe). This program is found in the Keri\DoorsNet\ folder.
Linkage Service settings are already configured for major cell phone carriers, but must be configured for Email. These instructions assume you are familiar with the network configuration settings for your Email system, in particular the SMTP Host and Email Server Port values.
- Navigate to the Keri\DoorsNet folder, locate, and open the LicenseManager.exe program.
- Click the Global Linkage Service menu option.
- Click the Settings button.

4.1 Email Settings
- Click the Email Settings tab.
- Make edits according to the type of Email service you use. Keri recommends using the Simple Email option and not using the HTML option for maximum compatibility with multiple Email systems.
- Click the Save button.
- Click the Close button to exit the License Manager.
4.2 Generating an App Password for Gmail
Important note: This password must be entered into the Global Linkage Service settings as a single text string (you should remove any spaces between the sets of digits).- Log into your Gmail account.
- Click on Manage your Google Account.
- Click on Security on the left-hand side.
- Click 2-step verification.
- Scroll to the bottom of the list until you find App passwords.
- From the Select App drop-down list, select Other (Custom Name).
- Enter a new name. For example; DNET GLS.
- Click the GENERATE button and a new unique password will be created.
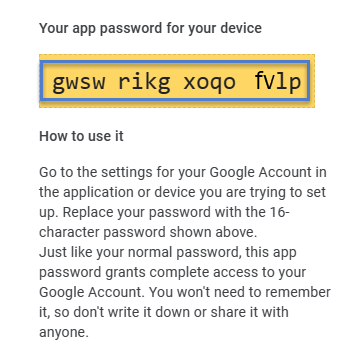
- Copy and paste the password into a word document, remove the spaces between the characters, then copy/paste the password into the Account Password field.
SMS Settings
- Click the SMS Settings tab. Default SMS settings are already entered for many major carriers.
- If your carrier is not listed you may consider co-opting one of the existing carriers and entering the SMS setting for your carrier. Remember to use this co-opted carrier in your SMS Macro definition.
- Click the Save button if you have made a change. Otherwise, click the X-box to close the window.

- Click the Close button to exit the License Manager.
Verify the Macro is Operational
- Right click on the Macro name and a pull-down menu appears.
- Select Execute and the Macro runs.
- Verify you have the expected result. Per the Macro described above, you should receive both Email and SMS messages.

Link the Hardware to the Macro
These instructions will vary slightly depending upon the type of trigger that was created.
- Click the Setup Tab at the top of the Doors.NET program.
- Click the Hardware Setup ribbon icon. The Hardware Setup window opens.
- Click the tab that corresponds to the Condition Type chosen for your trigger: Control Point, Controller, Monitor Point, Panel, Reader, Situation Manager.
- Click an entry to which the Macro should be applied.

- Enable the Parameter Pane Advanced View
 .
. - Scroll down the Parameter List until the Monitoring section appears.
- Click the Global Trigger field and select the desired Trigger from the pull-down list.

- Save the selection.
- The Email/SMS Automation Task is now complete.
Related Articles
Global Linkage Setup - Standalone Document
Global Linkage Setup Guide - Standalone Document (attached)OSDP Reader Setup in Doors.NET
1.0 Introduction OSDP (Open Supervised Device Protocol) is an access control communication standard developed by the Security Industry Association (SIA) to improve interoperability among access security products and is being endorsed by all leading ...Doors.NET Cloud Backup and Restore Setup - Standalone Document
Doors.NET Cloud Backup and Restore (PDF) PN:02438-001 Rev A (attached)Advanced Situation Manager Setup Guide
1.0 Introduction Advanced Situation Manager is an extension of the Global Lock and Global Unlock features that are available. You can not only use the Situation Manager for unlocking and locking doors but you can create different system behavior for ...Setup Inputs
The Setup Inputs process allows you to configure the input type, circuit supervision, and monitoring parameters. Under the Hardware Setup tab, Click the Inputs tab. The Selected Hardware tab is then loaded on the ribbon. Display Input Information by ...