Telepathy Installation
The Telepathy map client is installed by performing a 'custom installation' of Doors.NET.
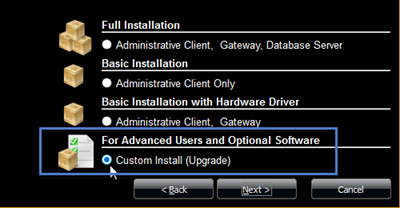
Then ensure Map Client and Map Editor is selected from the list of available clients to install.

Following installation, you will need to activate your Doors.NET license, (your license key should already have had the Telepathy client enabled).
Related Articles
Telepathy - Server Settings
The server settings section allows you to connect to multiple Doors.NET installations using a single Telepathy client. All the maps images for each of the remote sites are stored locally at the PC which Telepathy is being run from. The following ...Telepathy Data Sheet
Telepathy Data Sheet (attached)Telepathy Introduction
Introduction to Telepathy The Telepathy map client provides you with a graphical representation of your integrated security system. Know when a door has been held or forced open. Know if an input on the system goes active (motion detection, fire ...Telepathy - Licensing Requirements
The Telepathy Map Client is a licensed feature and therefore needs to be enabled in your Doors.NET license. Perform the following steps to check that Telepathy is enabled for your system: From the Windows Start menu, go to Doors.NET >> License ...Telepathy - Event History
You can very easily retrieve a list of all of the events history of a hardware object, for example, a door. From the Telepathy home screen, click on the Maps tile. Right click a sensor icon located on one of the floor maps. Select History.