dormakaba Switch Tech Setup
Switch Tech Setup in Borealis
Introduction
The Switch Tech integration allows you to manage Switch Tech core devices and access rights via the Borealis user interface. The Borealis user interface works with the Best Switch app (for administering the Switch cores and for sending configuration changes) and the Keri Key Switch app - for the users who will only be unlocking the doors that they are assigned access to.
The integration provides a cost-effective access control solution that is quick to install and easy to use and maintain.
The integration requires you to initially setup a Switch Tech site and then Switch Tech core devices are added to this site. The Switch Tech site in Borealis is much the same as a site for other hardware types - the only difference is that a Switch Tech site does not require a hub to be added to it.
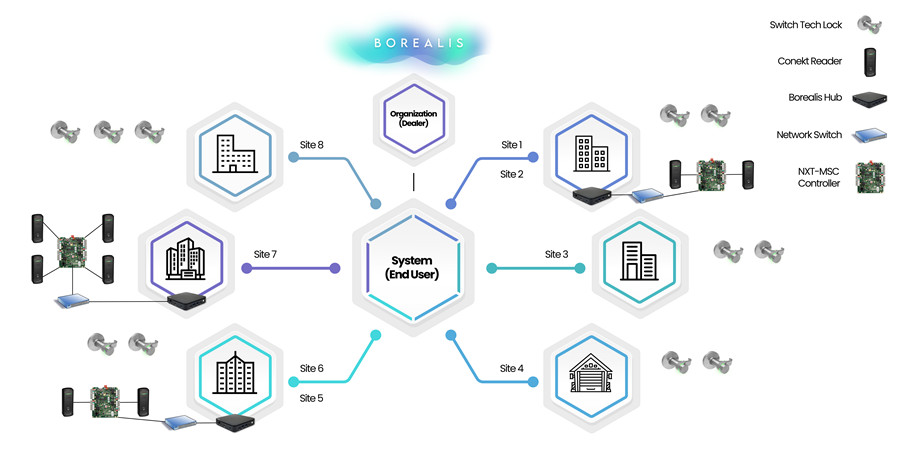
A Borealis system can be a single Switch Tech site, multiple Switch Tech sites or it can have a mixture of Switch Tech and other hardware sites (as shown in the following diagram).
Example Borealis System with Switch Tech and Other Hardware Types
The Switch Tech integration works with two apps: The Best Switch app and the Keri Key Switch app. The Best Switch app is used to claim an admin mobile credential (using the unique registration token from the credential record in Borealis). The Best Switch app is also used by an administrator to perform a variety of administrative tasks on the Switch cores and to update the device firmware, view status information, to retrieve audit information from the device memory or factory reset a core. An admin user can also unlock the core(s) from the Best Switch app. The Keri Key Switch app is used only to unlock the cores.
Changes that are made in Borealis to core devices (such as adjusting the unlock time) are automatically sent to the dormakaba server. After a couple of minutes, that information is then sent to the Best Switch app (on the administrator's mobile device) and will then need to be manually sent to the cores via Bluetooth by physically going to the core(s) and sending the new configuration. Changes to the user credentials (i.,e activation dates, enable/disabled, access rights) are sent to the user mobile device only.
Main Features
- Mobile-app-driven and uses a Bluetooth mobile credential or a Switch Fob to unlock doors.
- The communication is directly to the app from the cloud - so there's no need for a hub - everything is handled from the Best Switch app.
- Easy to install and retro-fit.
- Thousands of different application options.
- The cores are indoor only.
- 3200 events can be stored in the core.
- The padlocks are ideal for gyms, lockers, cabinets, store rooms, etc
- Borealis can potentially store years of transaction data in the Cloud.
- Retro-fits a Small Format Interchangeable Core (SFIC) 7-pin key core in doors or door handles.
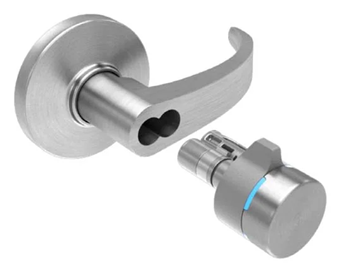
The Switch Tech Core Device
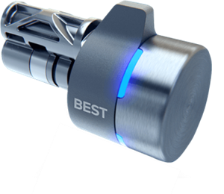
The Switch Tech core is a small-format interchangeable core that can quickly convert a standard door into a wireless, electronic access controlled door. The Switch Tech Core replaces the keyhole mechanism - so you will no longer use a physical key to open the door. Instead, access is granted using the Best Switch app or the Keri Key Switch app on your phone and a Borealis-registered Bluetooth mobile credential.
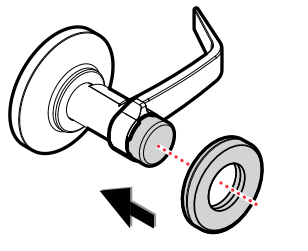
As well as directly replacing a SFIC 7-pin key core in a door, the Switch Tech core will also fit into SFIC door handles and the Switch Tech interchangeable core padlock.
The core is powered by a CR2477 lithium battery that is located under the battery cover.
Important Note: The battery cover can only be removed using the circular, magnetic battery removal tool available from Keri Systems and is not supplied with the core devices.
Setup Summary
The following is a summary list of the sections covered in this guide. It is recommended that you read through the entire document before proceeding with the system setup and configuration.
- Register a new Borealis account.
- Create a new organization (if tax exempt or if you will be administering multiple Borealis systems in the future).
Important Note: You MUST wait for the organization to be approved before setting up a new system. Create a new Borealis system.
- Purchase Switch Tech core subscriptions and mobile credentials - (you will need to contact the system owner to purchase these items).
- Add the Switch Tech core devices.
- Setup and configure holidays.
- Setup and configure time schedules.
- Setup and configure access groups.
- Install the Best Switch app on the admin user's mobile device.
Note: You must purchase at least 1 mobile credential, assign as admin to a user and claim it, before you can administer the cores. - Enroll a new Admin user credential. Each system will require at least 1 admin account for initially setting up the core devices.
- Claim the admin token using the Best Switch app.
- Initialize and configure a Switch core device.
- Unlock the Switch core with the admin account.
- Additional main menu options.
- Enroll a Switch Tech Fob.
- Enroll a new mobile credential (user account) in Borealis. Important Note: You will need to use a separate phone number (or virtual phone number for the user account, such as a Google Virtual Number). You cannot use the same phone number for an admin and a user account.
- Assign the user access rights (existing Switch Tech access rights)
- Download and install the Keri Key Switch app.
- Claim the mobile credential via the Keri Key Switch app (2 text messages will be sent to authorize the new account).
- Test access is granted at the Switch core using the Key Switch app.
- Viewing the Switch Tech live events in Borealis.
1.0 Register a new Borealis Account
This section assumes you are a first-time user of Borealis.
- Open a web browser and go to: https://keri.aetheros.net.
- The Borealis log in screen will appear.
- Beneath the log in fields. click the 'Sign-Up' text.
- Enter your new user details (Note: all fields are required). Your registered e-mail address will be your account user name.
- Confirm you have read the Borealis terms and agreement.
- Click REGISTER button.
- IMPORTANT: You must now go to the inbox of the registered e-mail address and verify your new account.
- Once your new Borealis account has been registered you will be able to log into Borealis.
2.0 Create a Borealis Organization
Borealis has the option of creating an organization - which is used to simplify the management of multiple installations and is also used to register tax exempt status (for example; if you are an installation company). The following steps explain how to create a new organization that is tax exempt.
Note: Setting up an Organization is not compulsory but it is highly recommended if you are a company that will be setting up and administering multiple Borealis systems and need to register your tax exempt status.
- Open a web browser and go to: https://keri.aetheros.net.
- From the main menu on the left, click on Organizations.
- The Create Organizations screen will appear.
- Enter a name for the new organization.
- Enter a contact name for the organization.
- Enter a contact phone number for the organization.
- Check the box if your organization is a dealer/reseller.
- Check the box if the organization is tax exempt.
- Enter the tax ID for the organization.
- Enter any additional notes for the organization.
- Select the organization country from the drop-down list and other address details.
- If the organization is tax exempt, scroll to the bottom of the window and click the CHOOSE FILE button. Then navigate to select the document that proves your tax exempt status.
- When all details have been entered click the SAVE button.
- You will see a notification that the new organization is created.
- Return to the organization screen and you will see that the new organization is pending.
- IMPORTANT: You must now wait for the organization to be approved - DO NOT ATTEMPT TO CREATE A SYSTEM UNTIL THE ORGANIZATION IS APPROVED! FAILURE TO DO SO WILL RESULT IN INCORRECT SUBSCRIPTION PRICING FOR 1 YEAR.
- Note: It can take up to 1 business day for the review process to be complete.
- You will be able to create a new system when the organization has been approved.
3.0 Create a New Borealis System
Currently a new system is created by Keri Systems but cannot be created until you have registered and verified a new account. Or, if using Organizations, you should have setup a new Organization and have waited for it to be approved.
To create a new Borealis system call the following number:
- Within the UK and Europe – 0044 (0) 1763 273243, then press option 1.
- Within the USA and Rest of the World – 001-408-435-8400, then press option 1.
Once you are through to Keri Inside Sales you will need to provide your registered e-mail address, the name of the organization (where applicable) and the name you wish to have for the new system.
When the new system has been created, log back into Borealis and the new system name will be displayed in the upper-left corner.
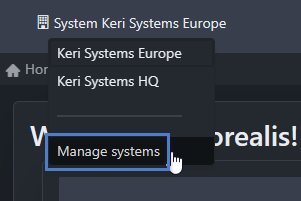
Note: If you already have a Borealis system and need to create an additional system, click on the system name >> Manage Systems >> then the CREATE button in the upper-right. You will then be able to create an additional system.
4.0 Purchase Switch Tech Mobile Credentials
Before enrolling a mobile credential in Borealis you will need to purchase it.
Note: Purchasing mobile credentials can only be performed by a Borealis system owner.
- In Borealis, click on Subscription from the main menu.
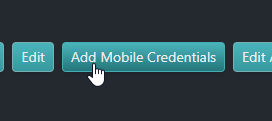
- Click the ADD MOBILE CREDENTIALS button.
- Select how many mobile credentials you wish to add (by default, 1 will be selected).
- Click the SUBMIT button and the credential will be added to the shopping cart.
- The mobile credential will now need to be paid for.
Note: The charge for the mobile credential is a one-time-fee (not a recurring fee).
5.0 Add the Switch Tech Device in Borealis
5.1 Create the Switch Tech Site
In Borealis, you will setup the Switch Tech site in the same way that a site is created for other hardware types.
- Log into Borealis with your registered e-mail and password.
Note: If you administer more than 1 system, choose the correct system from the Systems drop down list on the upper left of the screen.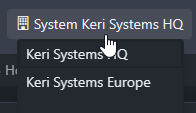
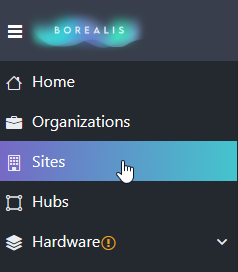
- Click on Sites from the main menu on the left.
- Click the CREATE button to create a new site.

- The create site form will appear.
- Enter the new site name.
- Enter a contact name for the site.
- Enter a contact phone number.
- Select Switch Tech from the hardware type drop-down menu.

- Select the country where the Switch core(s) will be installed.
- Select the world time zone for that country.
- Click the SUBMIT button to create the new site.
5.2 Add the Device
When the Switch Tech site has been created you will see a new entry in the main menu (Hardware >> Devices). All the individual Switch Tech cores will be found on the Devices screen.
Important Note: If the Switch cores are already installed then you should name them according to where they are physically located. If however, you are configuring multiple locks on a desk, for example, then you should configure them one-at-a-time and place a label or visual marker on them so that later you can accurately identify them.
- From the main menu click on Hardware >> then you will see 'Devices'.
- Devices is where all the Switch Tech core devices are saved and edited.
- Click the CREATE button in the upper-right.
- The Create Devices form will appear.
- Select the Switch Tech site from the site drop-down menu.
- Enter a description for the new device.
- Set the Operate Time (in seconds) - The is the total time that the core will unlock.
- Set the Extended Operate Time (in seconds) - This is the total amount of time that the door will unlock for Extended Unlock users.
- From the Access Mode menu select 'Key'.
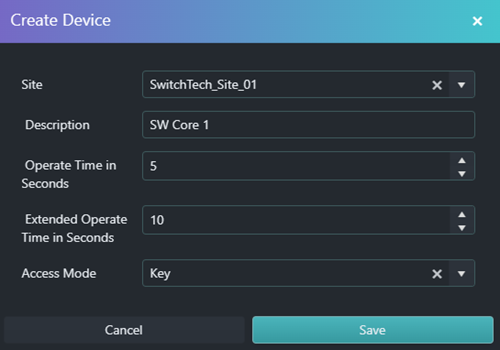
Note: There is a hidden mode, called: 'Key and PIN' - in that mode the user is required to activate their credential from the app and then also enter a PIN into the app. This option will be available soon. Click the SAVE button to save the new device.
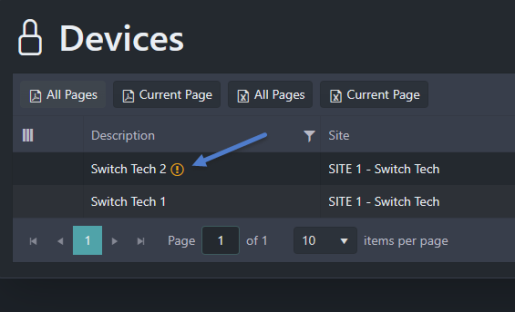
- The new Switch core will now be added to the devices list.
On the devices list you will initially see that the access mode is locked (this means admin access only) - but after the device subscription has been paid it will be set to Key mode.
Note: The device will now be added to the shopping cart and therefore would need to be paid for by the system owner. Until the device has been paid for it will have the access mode of Locked (so that will be admin access only). Once the subscription has been paid you will be able to set the access mode to Key (access using mobile credentials).- In the devices list the device will have an update required indicator next to it - because all new devices will need an admin credential to initially configure the core before it can be used. This initial sync is performed using the Best Switch app.
The next step for the hardware setup is to use an admin credential and the Best Switch app to configure the core. Updates to the admin key after a device change is typically within 2 to 5 minutes.
6.0 Holidays
You can program up to 30 different holidays across 16 different holiday types. A holiday will determine if a schedule is active or inactive on the holiday's calendar dates. Once a holiday has been created if you wish schedules to be active on those holiday dates you will need to edit the schedule and select the holiday type that the schedule is set to.
The following article gives you more information about creating and editing holidays in Borealis:
https://help.kerisys.com/portal/en/kb/articles/borealis-setup-holidays
Important Note: If you have created a holiday but have not enabled the configured holiday type on a schedule then that schedule will be inactive on the calendar dates defined for that holiday. this will also prevent access from being granted by any user who has the inactive schedule in their access rights.
7.0 Time Schedules
By default, two time schedules are added to the Switch Tech site (Always and Never) these schedules are not editable. Borealis with Switch Tech fully supports the ability to restrict mobile credentials access to only certain times of day or specific days of the week. For example; you can configure access rights so that certain users can only unlock the door between 7am and 7pm (Monday-to-Friday). Outside of those hours the user will get access denied.
The following article gives you more information about creating and editing time schedules in Borealis:
https://help.kerisys.com/portal/en/kb/articles/borealis-time-schedules
8.0 Access Rights
Access rights for Switch Tech locks are created in Borealis in the same way that you create access rights for all the other hardware types. You create a new access right, give it a name, select the site, select doors and then associated time schedules with those doors. Finally you assign the access rights to the individual credentials.
Note: Access right changes to a mobile credential do not require a core update by the admin. The individual apps will be updated automatically with the new access rights within 2 minutes.
The following article gives you more information about creating and editing access rights in Borealis:
https://help.kerisys.com/portal/en/kb/articles/borealis-access-rights
9.0 Install the Best Switch App (For an Admin User)
Before you can connect to or configure any of the core devices you should download and install the Best Switch app and enroll to the app.
The Best Switch app is used to perform administrative functions on the cores but it can also be used by an administrator to perform an unlock.
Notes:
- Mobile credentials that are configured as Users do NOT use the Switch app.
The Best Switch app is only used by administrators. Users will use the Keri Key app to perform an unlock. - The Best Switch APP is available for iOS or Android.
- Before using the Best Switch app, go to connections settings on your mobile device and enable Bluetooth.
If the administrator wants/needs another mobile credential setup as a User they can create a virtual phone number (such as a Google Voice number).
The following steps explain how to download the Android version. But the process is the same as downloading and installing any typical app (or downloading the iOS version).
- Open the Play Store app.
- In the search field, type in 'Best Switch Mobile Access'.
- Tap the INSTALL button.
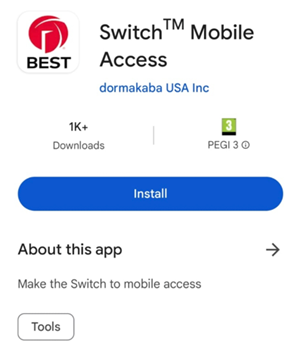
The installation will take no longer than a few seconds.
- Once complete you will see a 'Best Switch' icon on your device screen.
- Tap the BEST icon to open the app.
- You will be prompted to select your country of residence and enter your phone number.
Note: Initial enrollment can also be performed by admin users with an e-mail address - in which case a 6-digit code will be sent via email instead of SMS. - Enter this 6-digit code to authenticate.
10.0 Enroll a New Mobile Credential as an Administrator
Before you can configure or initialize a new Switch core you will need to enroll a mobile credential as an administrator.
10.1 Enroll a New Cardholder
- From the Borealis main menu, click on Cardholders.
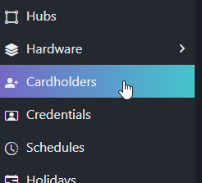
- Click the CREATE button.
- Enter a first name and a last name for the cardholder.
- Leave the PIN field empty.
- Select Never Expire or set an activation date and an expiration date to configure the cardholder as temporary.
- Click the SAVE & NEXT button.
10.2 Enroll the Mobile Credential
- The new cardholder record will be pre-selected.
- Place a checkmark in Mobile Credential.
- Select the country code for where the mobile device is located.
- Enter the mobile phone number for the mobile credential device.
- Enter a PIN for the administrator. The PIN is important as it is used for factory resetting the core or performing the initialization of a factory reset core. Make a note of this PIN as it is used in the Switch app.
- The Enabled checkbox is selected by default.
- Click the Save & NEXT button again.
- Select an access group to assign to the mobile credential.
- Click Credentials from the main menu.
- You will see the new mobile credential at the top of the credential list.
- The new credential record will have a unique token that will be required for claiming the credential to your mobile device (using the Best Switch app).

- If the credential is added as an Admin credential, a text message will also be sent to the mobile device to confirm the new credential is created. The text will also include the unique token.
- The credential will initially show as Unclaimed.
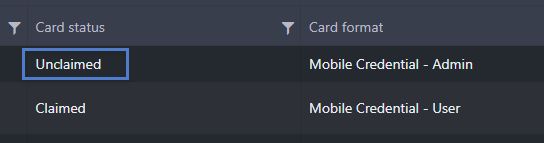
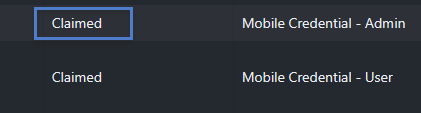
- The credential will show as Claimed once it has been claimed using the Best Switch app.
Note: See the next section for instructions on claiming the admin credential.
11.0 Claim the Admin Mobile Credential in the Best Switch App
Note: You can only have one unique mobile credential per phone number. For additional mobile credentials they would need to be assigned to a different phone number.
- Once you have enrolled to the Best Switch app you will be able to claim the admin token.
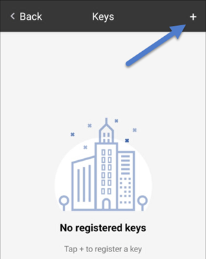
- The app will open up on the keys tab. You will see a notification on-screen that there are no registered keys.
- Tap the '+' symbol in the upper-right corner.
Enter the unique token into the registration fields.
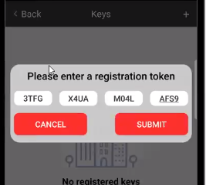
- The Best Switch app will now connect to the dormakaba server and will register the mobile credential using the registration token.
Once registered, the mobile credential is then added to the app and the app will also display the Borealis system name.
- The unique mobile credential is now claimed to the Best Switch app.
12.0 Initialize and Configure a New Switch Core
The Best Switch app is used to connect to the cores via Bluetooth and to send pending updates to the device. You will therefore need to physically visit the devices (within Bluetooth range) and logged into the app with an admin access type. You can also use the Best Switch app to do a factory reset on a core device - (this will require the administrator's PIN) which is setup in Borealis in the administrator's credential record.
Important Note: If the Switch cores are already installed then you should name them according to where they are physically located. If however, you are configuring multiple locks on a desk, for example, then you should configure them one-at-a-time and place a label or visual marker on them so that later you can accurately identify them.
When setting up a core device for the first time, you should make the following selections:
- Set the time
- Initialize
- Configure (then select the specific core device)
- View status (to check that the core has been successfully configured)
Further Notes:
- After the device has been added to Borealis, it will take 2-3 minutes for the Switch app to be updated. Wait for the update notification to appear in the app before you attempt to initialize and configure the new core device.
- On the initial setup of a factory reset core, you need to select which core you want to configure... after that, if you have auto-select (this is the default option in the iOS app), just select configure and proceed.
Setting the time, initializing, sending the configuration to the core and then viewing the status can all be performed as a single action (as covered in the next steps):
- In the Best Switch app, click on Admin.
- From the admin menu, select Set Time, select Initialize, Configure (select the specific core - if you have multiple core devices) and further down the list, View Status.
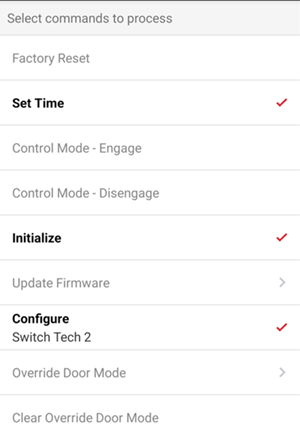
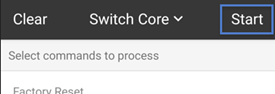
- Tap Start in the upper-right.
For a new, factory reset device, you will then need to enter the PIN that was added to the admin account in Borealis.
- Tap the battery cover of the Switch core device to wake it up.
The app will connect to the device.
- Green icons will appear next to Set Time, Initialize and Config when the commands have been successfully sent.
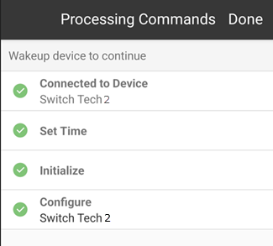
Tap Done (in the upper-right).
- Tap Clear to de-select the selected items.
- In future you will only need to send a configure to the device.
13.0 Unlocking the Core Using the Admin Account
There are two methods of unlocking the core with the admin account using the Best Switch app. The first is via the admin menu and doesn't require you to have access rights to the core.
Important Notes:
- You will need to have at least one administrator credential to configure the core devices. Only the administrators will be able to update the locks using the app (to remove the update indicator displaying in Borealis).
- Most of the employees that will be unlocking the cores (from their apps) will just be setup as users (not administrators).
13.1 Unlock via the admin menu
- Scroll to the end of the main menu and select Access - Admin.
- Tap Start.
- Tap the battery cover of the specific core you wish to unlock.
- The core's LED will flash red.
- The first time you attempt an unlock you will be prompted to enter the admin PIN.
- Enter the admin PIN and tap OK.
- The core's LED will go green and it will unlock.
- Subsequent unlocks within that user session will not require the PIN to be entered. If you restart the Best Switch app or switch admin keys, then you will need to use the PIN again.
13.2 Unlock via the Keys Tab
The following option allows you to unlock the core via the keys tab but this require the mobile credential to have assigned access rights to the core device (see section 7.0 for setting up and assigning access rights).
- Open the Switch app.
- It will open up on the Keys tab.
- Tap the ACTIVATE button in the middle of the screen.
- Tap the battery cover of the core you wish to unlock.
- The core should be unlocked.
- The app should indicate that access has been granted.
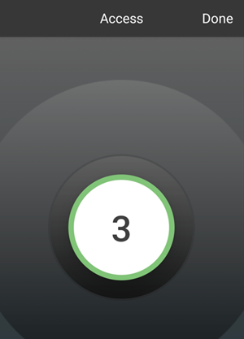
A countdown timer will display to indicate how long the core will be unlocked.
Note: The unlock time is configurable in the Borealis Device settings. Again, if this setting is edited you will then need to use the admin account to send the new configuration to the device.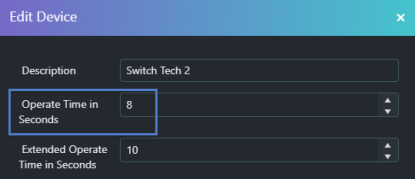
13.3 Sending New Configuration to the Core
If changes are made in Borealis (such as adjusting the unlock time on the core device) you will need to send that configuration to the core via the Best Switch app. The following steps explains what you will expect to see in Borealis and how to update the core.
- Add the core to an existing access right or create a new access right for the core.
- On the device screen you will see an indicator that the core requires an update.
You should now wait 2-3 minutes for this information to be sent to the Best Switch app.
- If the Switch app is open you will see a notification at the bottom of the screen that the Switch site has been updated. You are now ready to send the new configuration to the Switch core.
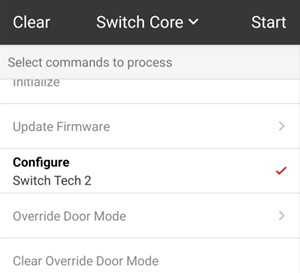
Click on the Admin tab.
- Select Configure. If you have multiple cores added you will be prompted to select the specific core you wish to update or you can use auto-select (which is selected by default with the iOS app).
Note: Read range setting should also be used if core devices are near each other. An example: would be lockers where all the cores in the area should be set to a Low read range. Click Start.
- Tap the battery cover of the core.
The new configuration will be sent to the core within a few seconds.
14.0 Additional Main Menu Options
The Best Switch app can also be used to perform these additional administrative tasks:
- Update Firmware - An administrator can use the app to update the firmware on the cores.
- Override Door Mode - Override the authentication mode:
- Locked - (no credentials will work)
- Credential Only (credential is needed to authenticate)
- Credential + PIN (future implementation)
- Clear Override Door Mode - Overrides the current door mode and sets the core back to the default authentication method.
- Set Read Range - Used to set the read range for mobile credentials (Low, Medium, High, Max).
- Set Search Duration - This determines how long a Switch Tech core will search for a credential when it is woken up.
- Set LED Intensity - Sets the LED brightness for the core (Low, Medium or High).
- Pull Audits - Pulls all the audit information that is stored locally at the core.
- Reboot - Reboots the Switch Core.
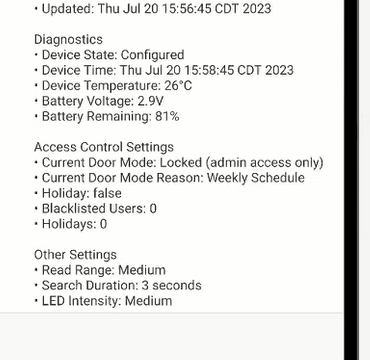
- View Status - Allows you to view the core's general status details.
15.0 Enrolling a Switch Tech Fob
A Switch Tech fob can also be used to gain access at the core devices. The fob can be used as an alternative to using a mobile smart device.

When the button is pressed on the fob it emits a Bluetooth signal to the core to enable user access. The access rights are stored on the fob.
The following section explains how to enroll the fob and then how to sync the fob with the Best Switch app using an admin account.
Notes:
- Even if using a fob, a mobile credential will need to be purchased before the fob can be enrolled.
If you press the fob button and the LED is red - then there is no credential configured for the fob. It is in a state that can be claimed (using the Best Switch app). If the LED is green, then the fob has a credential and can be synced (update access rights and upload audits) via the Best Switch app.
- Because fobs cannot support a PIN function they will not work on a core that has been set to key + PIN mode.
15.1 Fob Enrollment in Borealis
- In Borealis, enroll a cardholder via the Cardholders main menu item.
- Click on the Credentials main menu item.
- Click the CREATE button.
- Select the newly enrolled cardholder.
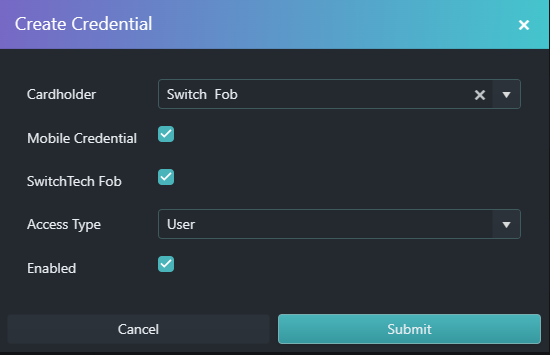
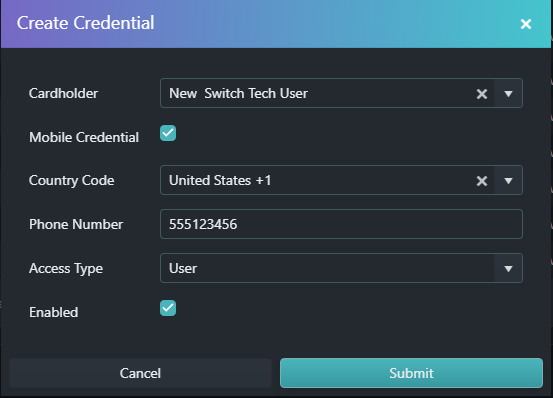
- Check the Mobile Credential option.
- You will now see an additional field for the Switch Tech fob - check this option too. When this option is selected some of the fields no longer apply so they are hidden:
- Set the Access Type as User (fobs cannot be admin access types).
- Enabled will be set by default.
- Click the SUBMIT button.
- The new record will appear at the top of the credentials list.
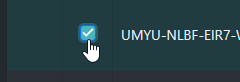
- You will see that a new unique token has been generated and is displayed in the card number field.
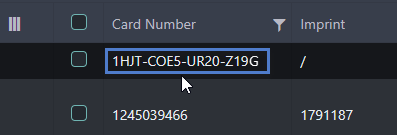
- Place a check mark in the box next to the token.
- Click the EDIT ACCESS RIGHTS button.
- Assign an access rights group to the fob.
- Click the SAVE button.
- You will now need to use the Best Switch app with an admin user to claim and then sync the fob.
15.2 Claim and Sync the fob Using the Best Switch app.
- Log into the Best Switch app using an admin account.
- Click on the Fobs tab.
Click Sync in the upper-right corner then press and hold the Fob button for three seconds.
- You will now need to enter the unique registration token (from Borealis).
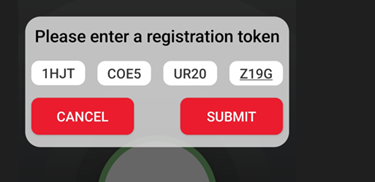
- Click the SUBMIT button.
- The fob will now register using the app.
- The app will display that an update is available for the fob.
- Click the SYNC option again and for a second time, hold down the fob button to update the access rights.
- The app will indicate that the fob has synced successfully.
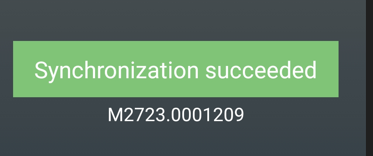
- You will now be able to gain access to any core devices that the fob has access rights to.
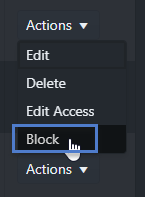
15.3 Blocking a Fob
- Switch Tech fobs can be blocked using Borealis to disable access. Typically a fob will be blocked if it has been lost and therefore cannot be synced using the Best Switch app. Blocking the fob can be done via the credential's Action drop-down menu.
A limit of 30 credentials can be blocked per core. This includes admin, mobile, and fobs in the count.
You can block an admin credential, but you will need to add another admin credential to unblock the first one.
16.0 Enrolling a New Mobile Credential as a User
- From the Borealis main menu, click on Cardholders.
- Enter a first name and a last name for the new user.
- Select Never Expire or set an activation and expiration date to make the user temporary.
- The other options can be left at the default settings.
- Click SAVE and the new cardholder will be added.
- Next, from the main menu, click on Credentials.
- Click the CREATE button.
- Search for the cardholder that you enrolled or select it from the drop-down list.
- Select the mobile credential option.
- Select the country where the mobile user resides.
- Enter the user's mobile number (without the country dialling code) as this is added automatically.
- From the Access Type list, select User.
- Click the SUBMIT button.
The new mobile credential will be added to the top of the credentials list.
- The status of the credential will be unclaimed but in the first column you will see the unique card number token - this token is used to automatically claim the credential in the Keri Key Switch app.
17.0 Assigning Access Rights to the User
Credential
In Borealis, you now need to assign the access rights to the user to determine which core devices that user will be able to unlock. This section assumes you have already setup access rights for the Switch Core devices and have sent the configuration to the core devices using an admin account and the Best Switch app.
Notes:
- Access right changes to a mobile credential do not require a core update by the admin. The individual apps will be updated automatically with the new access rights within 2 minutes.
- Access right changes to a Fob do require a sync with the Best Switch app after about 2 minutes. You will see an indicator on the Fobs tab and it will list which Fobs need to be updated. The serial is on the back of the fob and shown in the list.
- Admin credentials can also be assigned access rights. This allows the admin to use the keys tab on the dorma app to unlock a door (as opposed to the admin tab)
- From the Borealis main menu, click on Credentials.
- The new credential should be at the top of the list.
- Place a check mark against the credential record.
- Click the EDIT ACCESS RIGHTS button.
- From the access rights drop-down list select an access right to assign to the user.
- Click the save button.
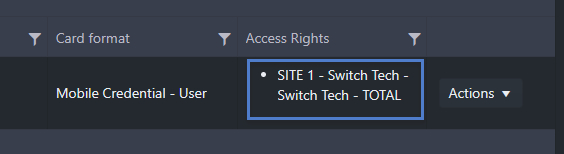
- The credential's assigned access right will now be displayed on the right-side of the screen.
18.0 Download and Install the Keri Key Switch App
- Open the Play Store app.
- In the search field, enter 'Keri Key Switch'.
- Click the INSTALL button.
The app will install within a few seconds.
19.0 Claim the User Mobile Credential
Note: Before using the Switch app, go to connections settings on your mobile device and enable Bluetooth.
- Click the Key Switch app icon on your mobile device.
- Enter the phone number of your user account then click REQUEST CODE.
- When activating a new mobile user credential, you will need to enter the 4-digit login code which will be sent as a text message.
- You will also need to enter the 6-digit login code - this enrolls your number with Best Switch app.
- Select the mobile credential which will have been sent to your device (initially it will display as Unregistered).
- After a few seconds the mobile credential will show as Active and in Borealis the credential will then be claimed.
20.0 Unlocking the Core Using the Keri Key Switch App
Note: Before using the Switch app, go to connections settings on your mobile device and enable Bluetooth.
- Once the credential has been claimed, click the ACTIVATE button.
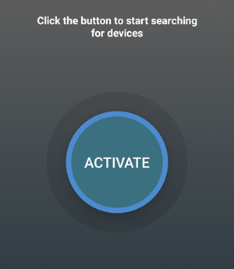
- Tap the core's battery cover once to wake it up.
- On-screen you will see confirmation that the door has successfully unlocked.

- A count-down timer will appear to indicate how long the core will be unlocked.
Note: When access is attempted the device screen will retrieve the up-to-date and accurate device information (such as the battery percentage) - This will be sent to the dormakaba server and then will be retrieved by Borealis and displayed in the Borealis UI.
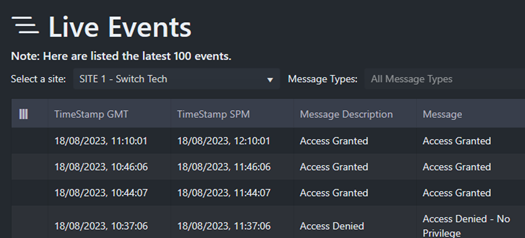
21.0 Live Events
When the mobile device connects to the core (to unlock a door) it will generate an access granted event in the app. The app then sends this event data to the dormakaba server- and is then trasferred to Borealis to display in live events.
Live events also reports device information as well (i.e factory reset, configured, override mode or anything else the admin does to the core) along with access events. We are also retrieve info as whether the devices needs an update and the battery level %.
22.0 Switch Tech FAQs
Is Switch Core durable? Can a person physically break this lock?
Switch Core has few moving parts and is built to withstand the abuse cores often get. Therefore, it isn’t the weak link in a given opening. It will be easier to break glass, kick in the door, or even break the entire lock off than to compromise Switch Core. Also, the core has been tested and exceeds ANSI standards for impact and abuse in terms of disabling the lock. Switch Core has no keyway to obstruct purposefully or accidentally.
Can the Switch Core be installed outside?
No. The Switch cores are only designed to be installed indoors.
Can someone open the door using the battery removal tool?
No, the intelligence of the core (and the unlocking mechanism) is separated from the battery compartment by hardened steel. In addition, the battery removal requires a specific tool.
How is the core powered?
The core is powered with a CR2477 lithium battery that is located under the battery cover. The battery cover is what you tap to wake up the device prior to gaining access or syncing the core.
What happens if the battery dies?
If the battery dies the keys will stop working. However, the keys will be able to gain access again once the battery has been replaced.
How long can the core's battery be expected to last?
Battery life of the cores is 1-2 years (depending on the amount of usage).
How do I replace the battery?
The battery can only be replaced using the circular, magnetic battery removal tool available from Keri Systems and is not supplied with the core devices.
What is the maximum number of Switch Cores that can be added to a Borealis site?
There is no limit the number of Switch Tech cores per site, number of sites, or number of mobile credentials/fobs.
How can I factory reset a core?
A factory reset can be performed by an admin user using the Best Switch app. A factory reset is one of the menu options and requires you to enter the PIN that is assigned to the admin user in Borealis. Note: You can also have multiple admin accounts.
How does the apps get synced from Borealis?
Borealis changes are sent to the dormakaba server which sends those changes down to the apps. It takes 2-3 minutes for the app to receive the updated information (therefore internet connection is required on the mobile device which has the app installed).
How are the core devices updated?
The core devices are updated using the Best Switch app and an admin account. Connection to the cores from the app is via Bluetooth. The core devices are not updated using the Keri Key Switch app.
Can the core devices only be fitted to dormakaba locking devices?
No, the cores can be fitted to any device which has an SFIC 7 pin key core. The Switch Tech core will also fit into SFIC 7 pin door handles and the Switch Tech interchangeable core padlock.
Does the audit information need to be retrieved from the core devices?
No. When access is granted at the core using a mobile device the audit information will be automatically sent to the dormakaba server from the app. The server will then transfer the data to Borealis to be displayed in live events.
How many transactions are stored in Borealis?
Each Switch Tech site comes with 1 free storage block (1M records). Additional storage blocks are available for purchase if more than 1 million stored transactions are needed.
Related Articles
Switch Tech Integration
Switch Tech Setup in Borealis Introduction The Switch Tech integration allows you to manage Switch Tech core devices and access rights via the Borealis user interface. The Borealis user interface works with the Best Switch app (for administering the ...Borealis Full Setup Guide
1.0 Introduction This document aims to guide you step-by-step through setting up a new Borealis system. The steps are in sequential order and begin with registering a new Borealis account and conclude with viewing live events (such as access granted ...MP4502 Controller Setup
1.0 Introduction The MP4502 is a next generation MP series controller from Mercury - offering seamless expansion to an existing Mercury hardware system. The MP series Mercury controllers are completely interchangeable and backwards compatible with ...LP4502 Controller Setup
1.0 Introduction The new Authentic Mercury LP Series Intelligent Controllers are Mercury Security’s next generation advanced access control platform that runs on embedded Linux. The enhanced platform offers an improved processor and increased memory, ...MP1502 Controller Setup
1.0 Introduction The next generation, advanced MP1502 is capable of managing two doors/readers “on board” and hundreds of I/O points via connection to additional door modules or MR16 I/O modules. Based on the intelligent, non-proprietary Mercury ...