Photo ID - License Revoking
It is important to know that your Photo ID license will need to be ‘revoked’ if you wish to move your Doors.NET badging installation onto a different PC, or if for some reason you wish to format the Doors.NET host PC hard-drive.
Once revoked, you can then re-activate the license on the same or a different machine.
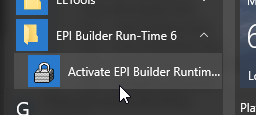
- From the Start Menu, go to All Programs >> EPI-Builder Run-Time 6 >> Activate EPI Builder Runtime License.
- Click About and a window will appear. Make a note of the EPI Builder license that appears at the bottom of the window.
It will begin with IW EB RF N. Then click the OK button.

- Click Tools >> Revoke License
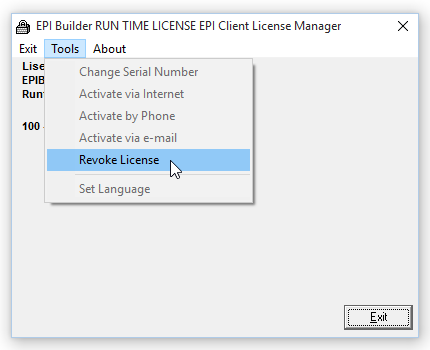
- Click OK to the warning that you are about to revoke your license.
- Choose the default option of revoking the license via Internet (Recommended). However, it is important that there are no Internet firewall filters that could be restricting your connection. If you do have a highly restrictive firewall then it would be best to select the second option of revoking the license over the phone.
- You will see one more confirmation screen stating that you are about to revoke your license over the Internet. Click the OK button to proceed.
- After a few seconds you should see a message appear stating the revoke was successful.

- You will also see the following text highlighted in red: Click the Exit button.

You are now able to re-activate the license following a format of the hard-drive, or after installing Doors.NET on a different Host PC.
Related Articles
Photo ID License Activation - Online
1.0 Introduction This article walks you through the process of activating the Doors.NET Photo ID client using an active, unrestricted internet connection. 2.0 Ensure Badging is Enabled on Your Doors.NET License The first thing you should do is check ...Photo ID Client Overview
The Photo ID Badging client is a licensed Doors.NET components that allows you to: Design and print badges with photo IDs and custom graphics on plastic cards, overlays for standard proximity cards, or ISO thin proximity cards. Single card database ...Photo ID - Creating Card Templates
Creating Card Templates in the Photo ID Client Click/double-click on the 'Keri Photo ID Icon' located on the desktop or via Start >> All Programs >> Doors.Net >> Keri Photo ID. Log into the Photo ID client using the default username and password ...Photo ID Badging Client - Quick Start Guide
Logging In Click/double-click on the 'Keri Photo ID Icon' located on the desktop or via Start >> All Programs >> Doors.Net >> Keri Photo ID. Log into the badging client using the default user ID and password (both 'admin'). On the left-hand pane ...Photo ID - Badging Printer Setup
You will need to set up a printer before creating and designing cards. All necessary printer and page information is stored in the card design file (.DGN), which in turn is used by the software as a card format (a packet of information that includes ...