Sound Alerts
![]()
Sound Alerts can be setup and used in the Doors.NET software to generate a sound at the client PC for different scenarios, usually when a critical event occurs.
You may want to know when a controller goes offline, if a possible intruder is detected, or when someone attempts to force open a door.
Different sounds can also be generated from different hardware objects on the system even though these readers, controllers, or inputs may be generating exactly the same event types.
The main purpose of sound alerts is to bring the alert to the attention of a system operator, such as a security guard, who may not always be watching the screen.
This procedure documents how to set up a sound alert for when a door forced event occurs at a certain reader. The setup uses a combination of Device Types and Filters, and it assumes Advanced View is enabled. The controller type being used is a PXL500-2D using MS Series readers.
Sound Alerts Setup
- The first step is to generate the required event in the Doors.NET software.

Note: If using PXL controllers and you also want the reader to go into 'Alarm State' when this event occurs (beeping and red LED) then you will need to make the following selection in the reader properties.
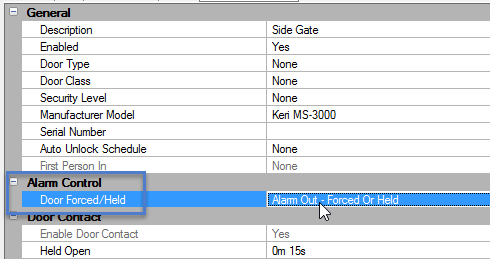
- Click Setup >> Device Types.
![]()
- Click the Add Device Type button.
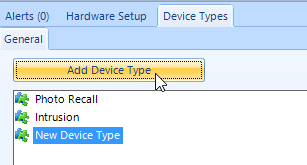
- Highlight the default name and give the device type a new, descriptive name. Then click save.
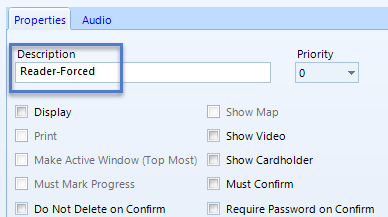
- Click on the Audio tab. The various transactions generated within Doors.NET have different event types attributed to them. They will be either: Alarm, Trouble, Masked, or Clear sounds. For example: Monitor Point Alarm is an 'Alarm' sound, whereas Monitor Point - Secure is a 'Clear' sound. Be aware that not all alarm sounds have an opposite clear sound.
- Reader Forced is an Alarm event, so you will need to select the required sound from the Alarm Sound drop-down list. The sounds that display in the list are .WAV files that are stored in the following directory of a default installation: C:\Keri\DoorsNET\Sounds.
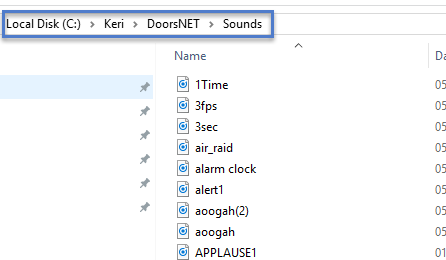
- There are several sound files added to a default system automatically, but you can add your own .WAV files to this directory so that they will become available for selection within the Device Type Audio setup. Select a sound to play at the PC when the door is forced.
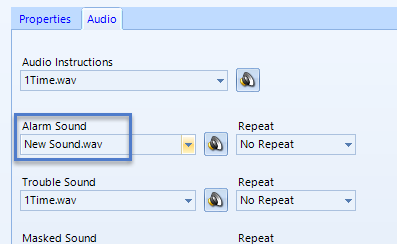
- A filter now needs to be setup and then assigned to the reader. This is so the specific event type can be defined and set for acknowledgment - the event will then be treated as an alert.
- Click Setup >> Filters.
![]()
- Click the Add Filter button, change the default description, then click save.
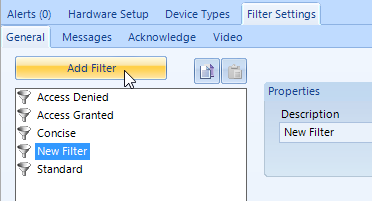
- Go to the Messages tab then locate the exact event that you wish to use.
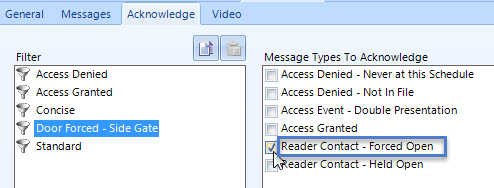
- You should also select any other events that you wish to be displayed from this hardware object. Any events that are not selected will be suppressed and therefore will not appear in live events.
- Next step; go to the Acknowledge tab - all the previously selected events will be listed. Place a check-mark against the event you wish to use for the sound alert.
- Then save
 .
.
- Locate and highlight the reader in the hardware tree - Setup >> Hardware Setup >> All.
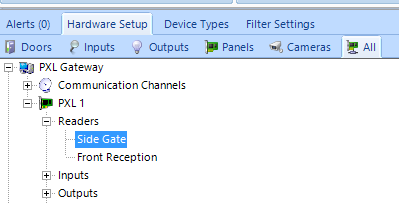
- In the reader properties, scroll down to the Monitoring section.
- Assign the device type, assign the filter, then set Require Acknowledgment and Sound Alerts both to Yes.
- Then save
 .
.
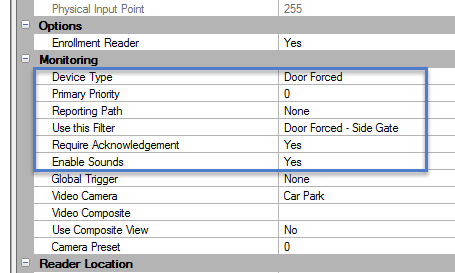
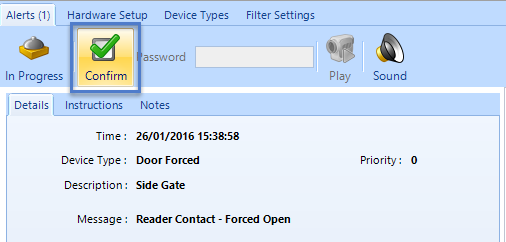
- The next time the Reader Forced event occurs at this reader it will appear in the Alerts grid and the sound selected in the device type setup will be generated and as configured, it will repeat every 2 seconds until an operator confirms it.
Related Articles
Alerts
1.0 Introduction The Alerts Status Tab is used for event processing and acknowledgment. The alerts screen lists any event types that have been configured for acknowledgment by an system operator. Alerts are created using a combination of filters and ...Pop-up Alerts
Version 3.5.1.21 of Doors.NET supports what is known in the industry as Pop-Up Alerts. When a hardware object (input, reader, controller, etc) is configured with this setting it will cause the Doors.NET user interface to become the 'Top-Most' ...Event Monitoring
The Doors.NET software was designed to support both monitored and autonomous configurations. A system is considered to be monitored when there is an operator viewing events in real time - or responding to events as they happen. For example, a sound ...Doors.NET - Software Overview
Application Server The Application Server is the heart of the Doors.NET system. It is the only component that communicates directly with the database engine. It is an asynchronous, TCP socket server that accepts connections from both the gateway and ...Doors.NET Data Sheet
Doors.NET Data Sheet (attached)