Telepathy - Adding Sensor Icons
The sensor icons are the dynamic images that will represent your doors and other security access points, or inputs/outputs. They are dragged onto your floor map diagrams to represent their physical locations within your facility. Sensor icons are available from the Icon Library, which is located in the Map Editor Section. You can also add your own custom icons to the icon library.
The following steps explain how to add sensor icons to your floor plan images (to indicate the location of the doors, controllers, inputs or outputs on your system.
- Select one of your floor plan images.
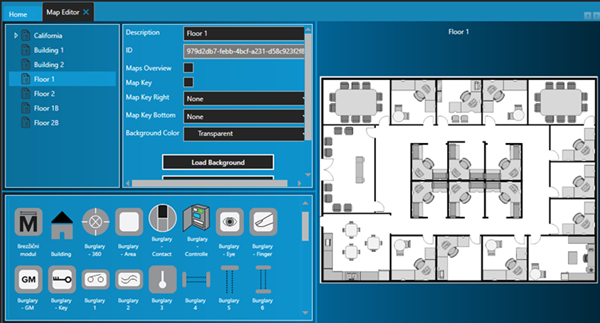
- The floor plan will display on the right.
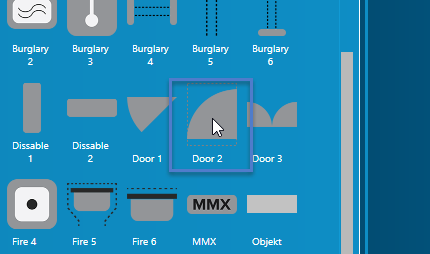
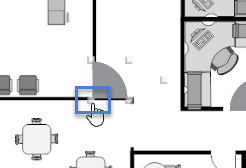
- From the library of icons, locate one of the door icons.
- Drag the icon into position on the floor map.
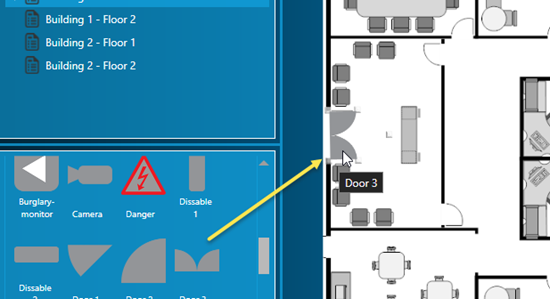
- Drag onto the map, more door icons (for all the other doors that will be monitored in the Telepathy client).
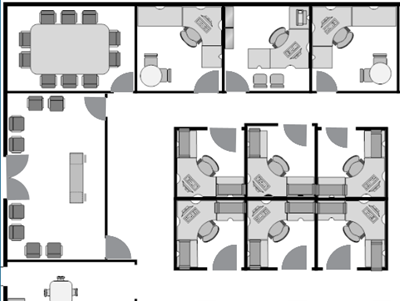
- Once icons have been dragged onto the floor map, and positioned, they can also be easily re-sized using the image handles.
- When all sensor icons are in position, click the Save Page icon.
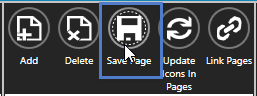
- Then click Save Diagram, followed by Reload Diagrams


- Repeat the above steps (1-8) to add sensor icons to any additional floor plan images.
Related Articles
Telepathy - Adding Map Client Diagrams
The first step in the setup process is to add your images to the Telepathy client. They can then become map diagrams. If you have multiple buildings located in different parts of a country, county, state, etc - you will also need to add an image ...Telepathy Data Sheet
Telepathy Data Sheet (attached)Telepathy - Map Editor
For setting up a typical system, the first place to go to is the Map Editor. But before setting up your Telepathy map client, you should have images of your building(s) and your building floor plans, which you will import. Once imported into ...Telepathy - Operate the Hardware
This section assumes you have already followed the appropriate instructions for adding and linking hardware to your map diagrams. Controlling Outputs From the Telepathy home screen, click on the Maps icon. Right-click on a sensor icon that represents ...Telepathy - Event History
You can very easily retrieve a list of all of the events history of a hardware object, for example, a door. From the Telepathy home screen, click on the Maps tile. Right click a sensor icon located on one of the floor maps. Select History.