Global Lock, Lockout, Lockdown - Software
1.0 Introduction
This section explains how to use the basic Situation Manager feature to set a Global Lock command via an icon in the software, allowing you to
immediately lock a designated group of doors, over multiple controllers and even over different hardware platforms. It also gives you the option to perform a Global Lockout or Global Lockdown.
Notes:
- Extended Global Lock settings *Global Lockout and Global Lockdown are NOT supported on Entraguard controllers, nor are they supported on PXL controllers using firmware versions lower than 08.06.09.
- When sending the Global Lock commands from the software to PXL hardware there is a delay of approximately one second between each controller receiving the command. For this reason, if you wish for all doors to immediately receive the Global Lock command you should use the dedicated Global Lock input located on the SB-593 satellite board.
- Global Lock is not supported with PXL controllers when communication is via a modem connection. Situation Manager with PXL controllers requires a Serial or Ethernet connection and all controllers must have the most up-to-date controller firmware 08.06.09.
2.0 Setup Instructions
- Ensure you are logged on as a System Administrator.
- Verify that Advanced View is enabled.
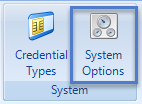
- Click on Setup >> System Options.
- Click on Situation Manager.
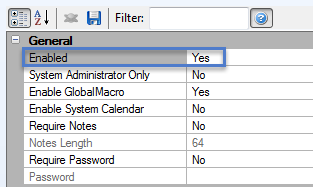
- Enable Situation Manager.
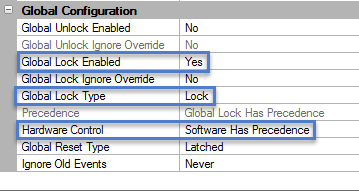
- In Global Configuration ensure that Global Lock is enabled.
- From the Global Lock Type drop-down list, choose either Lock, Lockout or Lockdown.
- Lock - immediately locks the designated unlocked doors (doors following an unlock schedule or which are manually unlocked). Locked means that credentials that have access will still work and the Request to Exit still works.
- Lockout - operates the same as Lock but no credentials are allowed access regardless of their access group. Request to Exit still works.
- Lockdown - operates the same as Lockout but with Request to Exit no longer functioning. - Set Hardware Control to Software has Precedence.
- Save these settings
 then close the System Options window.
 - If you now go tothe Home tab and look at the Situation Manager section you will see two new icons, Normal and Global Lock.
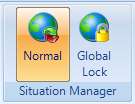
The icon highlighted in orange is the currently active global state of the system.
- Click the Global Lock icon and you will see the following notification:
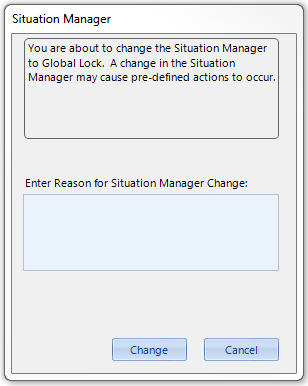
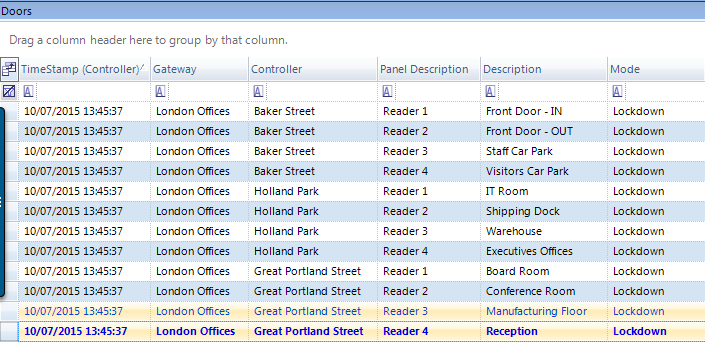
- Click the Change button and all unlocked doors will immediately lock. Depending on how you have configured the feature the doors may, of course, go into either Global Lock, Lockout or Lockdown.
3.0 Additional Settings
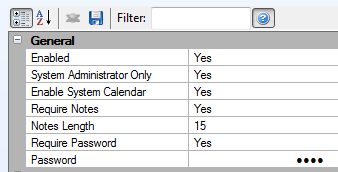
- System Administrator Only - The Normal and Global Lock icons will only show to system operators who are configured as System Administrators.
- Enable System Calendar - System Calendar is an additional licensed feature. When you enable this setting you will be able to program System Calendar to activate Global Lock at a certain time and on a certain day, or for it to occur regularly at a pre-programmed time/day.
- Require Notes - As shown in the previous image, a notification box appears when you click the Global Lock icon. You can configure the system to require the operator to enter some notes before the Global Lock command can be sent. When enabled you must also enter the minimum length of characters required before the operator can click the Change button.
- Require Password - You can define a password that needs to be entered by the system operator before they are able to Globally Lock/Lockout/Lockdown the system.
4.0 Configuring Doors to Ignore Global Lock
By default all doors on the system are set to respond to the Global Lock commands from the software. However, as with Global Unlock, you can configure doors to ignore the Global Lock commands.
- Highlight a reader from the hardware tree.
- Ensure Advanced View is enabled.
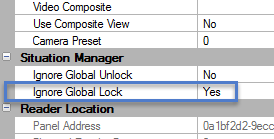
- Scroll down the reader properties until you find Situation Manager.
- Set Ignore Global Lock to Yes.
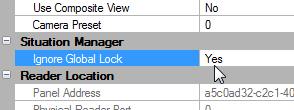
Note: This setting will be greyed-out if the system is in a Global Lock state.
5.0 Setup - If Using PXL Controllers
- Click on Setup >> Hardware Setup.
- Highlight the Primary PXL controller.
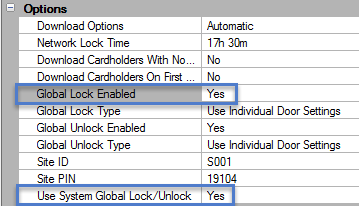
- In the controller properties, scroll down to Options.
- Set Use System Global Lock/Unlock to Yes.
- Also within the options section set Global Lock Enabled to Yes.
- Click the save icon .
- By default, all the readers connected to the PXL network will be set to respond to the Global Lock command (either from the software or from a hardware input) - You can configure a reader not to respond by; highlighting a reader, scrolling down to Situation Manager and setting Ignore Global Lock to Yes.
Related Articles
Global Lock, Lockout, Lockdown - Hardware
1.0 Introduction Doors.NET provides the ability to program any available input on the system to immediately put the system into Lock, Lockout or Lockdown status by activating the input (for example; pressing an emergency button). This feature is ...Lockout Doors
Lockout - From the Doors.NET Software The Lockout feature can be set from the software or from the hardware (from an input designated as a Global Lock input). What is Lockout? Lockout (or sometimes referred to as Emergency Lockout) is used to ...Lockdown Doors
The Lockdown feature can be set from the software or from the hardware (from an input designated as a Global Lock input). What is Lockdown? Lockdown (or sometimes referred to as Emergency Lockdown) is used to instantly lockdown all doors or certain ...Global Linkage Overview
The Global Linkage Module and related user interface screens provide a means of automating system functions, features and notifications system-wide. The configuration of the Global Linkage Module consists of two parts; the Global Macro (what you want ...Global Unlock - Software
1.0 Introduction This section explains how to use the built-in Global Unlock feature via icons located on the home tab, allowing you to immediately unlock all doors or a designated group of doors, over multiple controllers and even over different ...