Telepathy - Monitoring your Facility
Once you have linked your map diagrams together and then linked your hardware to the diagrams you will then be ready to monitor your access control system in real-time.
General Monitoring
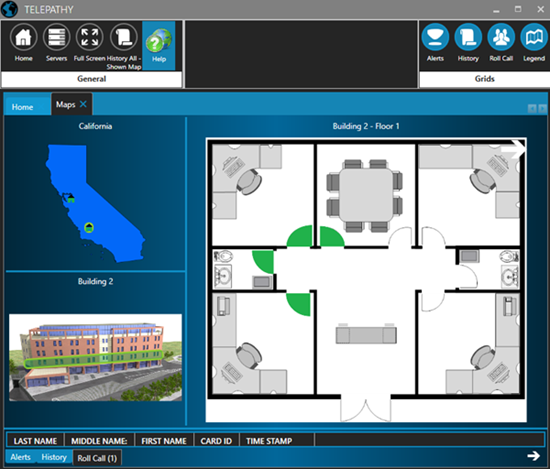
- From the home screen, click on the Maps tile.

- If your Telepathy client is setup as three-levels deep (i.e country, building then floors), the map diagrams will be displayed as below:
- But, of course, the display will be different if you only have a single building or if you are monitoring multiple buildings but in the same approximate geographical area, such as a University campus or hospital.
- If you are using the default icons (taken from the icon library), the icons, in their normal, secure state, will be displayed in green.
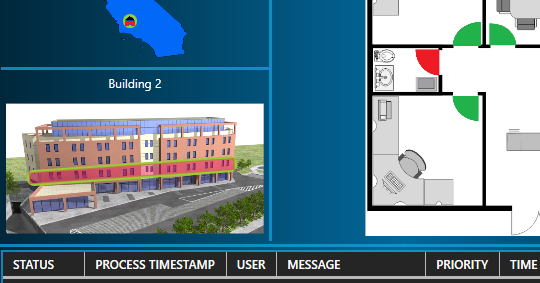
- An icon will immediately go red if for example, the door is forced/held open, if an input goes active or if a controller goes offline (depending, of course on what hardware type the icon represents.
Using a Map Key
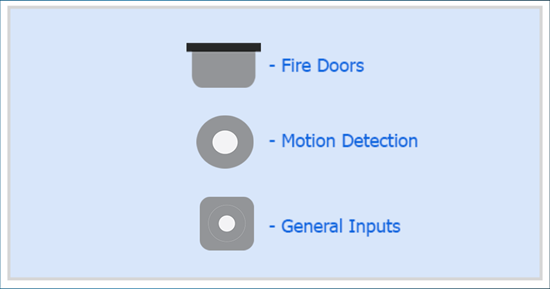
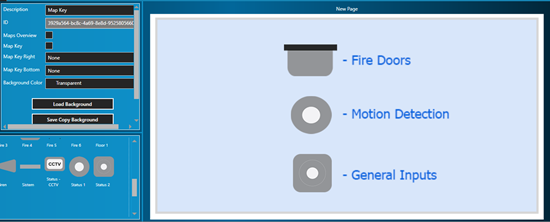
You can use a 'map key' so you can easily identify what each icon on your maps diagrams represents. Initially you have to create a separate image which has all your icons displayed on it - along with text that describes the purpose of the icons. For example, use Paint or Photoshop to produce a background image with the icons you will be using and text descriptions of your icons, such as shown below:
- From the Telepathy home screen, click on the map editor icon.

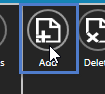
- Click the Add icon.
- Enter a new name, for example; Map Key.
- Click the Load Background button and select the separate image that you created with the text descriptions added.
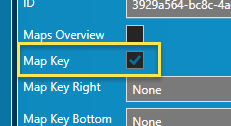
- You now need to select the Map Key option.
- Then save.
- Next, select a floor plan image that you wish the key to be displayed on.
- Depending on whether you wish the map key to display on the right of the floor plan or beneath it, select the new image from either the Map Key Right or the Map Key Bottom option.

- Click the Save Page icon, followed by Save Diagram, followed by Reload Pages.
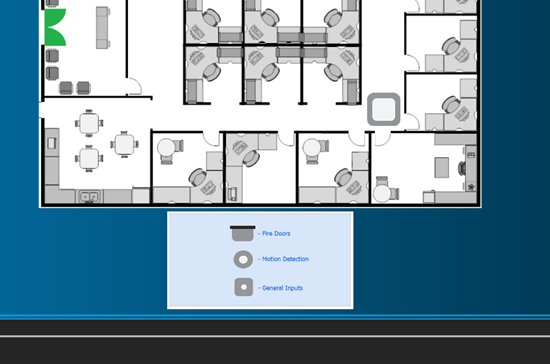
- Open the floor plan in the Maps screen and you will see the new map key displayed alongside the floor plan.
Related Articles
Telepathy - Map Editor
For setting up a typical system, the first place to go to is the Map Editor. But before setting up your Telepathy map client, you should have images of your building(s) and your building floor plans, which you will import. Once imported into ...Telepathy Data Sheet
Telepathy Data Sheet (attached)Telepathy - Adding Sensor Icons
The sensor icons are the dynamic images that will represent your doors and other security access points, or inputs/outputs. They are dragged onto your floor map diagrams to represent their physical locations within your facility. Sensor icons are ...Telepathy - Alerts and Alert Acknowledgement
You can use alerts in the map client to provide enhancements to the system event monitoring. When a hardware object (for example: a reader or input) is setup, as an alert, the icon on the map will be more clearly identified (it might be constantly ...Telepathy Installation
The Telepathy map client is installed by performing a 'custom installation' of Doors.NET. Then ensure Map Client and Map Editor is selected from the list of available clients to install. Following installation, you will need to activate your ...