Doors.NET - Quick Start Guide
1.0 Introduction
It then explains some basic administrative features and functions; such as adding/enrolling new cards, setting up time schedules and access groups and backing up the database.
2.0 Definitions
- Application Server – Main background server application for Doors.NET
- Gateway – Doors.NET service that allows communication between the Application Server and controllers
- NXT Proxy – Doors.NET communication service used for autoconfiguring standard NXT controllers.
- NXT Controller – A 2-door or 4-door access control panel.
- NXT-MSC Controller - A 2-door or 4-door access control panel that is embedded with 'Mercury' firmware.
- PXL Controller - A 1 or 2-door access control panel.
- LAN-520 Module - A plug-on Ethernet module that allows the PXL controller to be 'IP-addressable'.
- IP Address – A numerical identification for an Ethernet enabled device usually represented in “dot” notation, i.e. 192.168.100.1.
- MAC Address – A globally unique hardware number factory assigned to a networking device usually represented as 12 hexadecimal numbers grouped in pairs, i.e. 00-14-34-00-00-01.
- Time Schedule – A combination of time intervals, days of the week and holiday lists.
- Access Group – A combination of time schedules and doors assigned to a cardholder to provide or access.
- Cardholder – A collection of user information and one or more credentials.
3.0 Download the Doors.NET Software
Note: To download the Doors.NET software from the Kerisys.com website you will need to first register an account and then log into the site with your registered e-mail address and password.
- Visit the www.kerisys.com website.
- Click on 'Member Login' and then enter and submit your registration details.
- You will receive an approval email to create your password.
- Once logged in to Kerisys.com click on Software & Downloads.
From the Download Area on the right of the screen you will see two options for the Doors.NET series 5 software.
- You can download the Full Installer or the Installer Only - select the Full Installer if there is limited or slow internet access on the host PC, (or if you are unsure).
Click the link and the file will download - (typically to the Downloads folder on the PC).
Note: Series 3 software can be downloaded from the software archives section (located on the previous page) if you are using Windows 7 or older supported operating systems.
4.0 Install the Doors.NET Software
Notes:
- Record the MAC address for all NXT and NXT-MSC controllers that will be installed.
- The MAC address is located on the white label in the lower-right corner of the controller.

- Obtain an IP address for each NXT/NXT-MSC controller or LAN-520 module (for PXLs). Consult with an IT professional to obtain the IP addresses if none are available.
- Ensure the host PC has the minimum recommended requirements for running the Doors.NET software.
- Note: For initial setup. The controller’s IP address(es) should be within the same subnet as the host PC.
- Note: THE PC MUST BE UP-TO-DATE - Doors.NET utilizes the latest Microsoft .NET framework and service patches. Depending on the computer, Windows Update may need to be run multiple times before installing Doors.NET. The installer will install the required .NET patches if needed. Computers that are not up-to-date will require additional time for the install.
- Note: During installation of the Doors.NET software, you should temporarily disable any anti-virus software. Once complete, you should then re-enable the anti-virus software and add Doors.NET software as an exception/allowed program.
The following steps explain how to install the Doors.NET software onto a single PC (the database, application server, hardware gateway and client will all reside on the same host workstation):
- Go to the location on the PC where you have downloaded the Doors.NET installer.
Double-click the DoorsNETInstaller executable file.
Note: If you have downloaded the full installer, double-click the 7Zip executable file, then click the EXTRACT button to extract all the files (including the DoorsNETInstaller file).- The Doors.NET installer will then initialize.
For an existing installation, you will be prompted to stop the Doors.NET Windows Services (or you can continue with the installation, during which the services will be stopped automatically), but you will be required to reboot the PC following the installation.
- The Notifications screen will now appear. You will be prompted to temporarily disable any anti-virus software (if you are performing a new installation), or if you are using a low-spec PC that has a hard-disk drive (HDD) you will have the option of not installing the help file (which will reduce the installation time). Place a check-mark to confirm you have read the anti-virus instructions.
An existing system will now prompt you to uninstall the current version of Doors.NET >> Click START to uninstall Doors.NET.
- Once the current version has uninstalled, you will see the Welcome screen - and you will see the version to be installed >> Click NEXT.
The License Agreement screen displays next. Read through the agreement and confirm that you accept the terms of the agreement >> Click NEXT.
- You will then see the product Release Notes for this version - this displays all software and supported hardware bug fixes, enhancements and descriptions of any new features >> Click NEXT.
On the Customer Registration screen, enter a user name and the name of your organization.
Note: This is not the user name that will be used to log into the software (it is just for registration purposes). >> Click NEXT.- You will see the Type of Install screen - select Full Installation (or you can use the custom installation option to install advanced features) >> Click NEXT.
Next to display is the Features Review screen. All features that WILL BE installed are highlighted in green. The features that WILL NOT BE installed are displayed in RED. Confirm that you have verified what will be installed >> Click NEXT.
- The Destination Folder screen appears next. Keri recommends using the default installation directory >> Click NEXT.
The Shortcuts screen allows you to select to install a quick launch icon, a desktop shortcut or both. Make your selections and click NEXT.
- You will now see the Database Selection screen. If an SQL database version is detected as installed, then the version will be displayed - go with the default selection to install the Doors.NET database onto this host PC. Click NEXT again.
Note: If you are installing Doors.NET on a new PC that does not have SQL or SQL Studio Manager installed, place a checkmark in the option to Install SQL Management Tools. Finally, you will see the Ready to Install screen, click INSTALL to begin installing the Doors.NET software. A reasonably high performance host PC with an SSD (solid state drive) will take approximately 20 minutes to complete the installation. If the host PC only has an HDD (hard disk drive) the installation will take considerably longer, especially if you have selected to install the help file (in step 5.0).
Once installation is complete you will be prompted to run the license manager - allowing you to license the Doors.NET software. The following documents explain how to create a license key and activate the license.
5.0 Licensing the Doors.NET Software
- Doors.NET - Create a New Doors.NET License Key
- License Doors.NET - Online
- License Doors.NET - Offline
- License Doors.NET in Demo Mode
6.0 Setup The Hardware Gateway
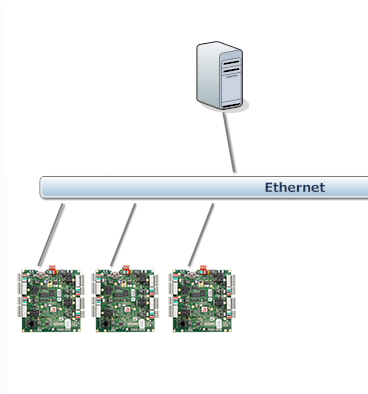
Each hardware types has its own gateway type (there is a PXL gateway, NXT gateway, Neutron gateway and an MSC gateway) the MSC gateway is used to communicate to NXT Mercury-Inside and Real Mercury (SCP) controllers.
6.1 Gateway Limitations
- A new Doors.NET system comes with a single gateway. Additional gateway connections can be purchased and enabled on you license.
- You can have multiple gateways installed on the host PC but they must be OF DIFFERENT TYPES.
- Multiple gateways of the same controller type must be running on separate PCs (for example: you might have the Application Server, Database and PXL gateway on the host PC and then a second PXL gateway running on a second, remote PC.
- Neutron Gateways cannot co-exist with other controller gateway types. When the Neutron gateway is enabled and installed ONLY Neutron controller types can be used on that system.
6.2 Setup the Gateway
- Once you have licensed the software the application server will restart and you will be prompted to install the hardware communication gateway services plus any other Doors.NET feature that requires a Windows service. Click the Yes button to install the services.
- Once all the Doors.NET services are installed you are ready to setup the gateway.
- In the license manager, refer to the list of installed components located on the left.
- You will see that the gateway is marked as needing configuration.
- Select the appropriate gateway type for the controller type you will be installing.
IMPORTANT NOTE: Standard NXT controllers require the NXT gateway to be installed. NXT-MSC controllers (with Mercury firmware) look similar to the NXT controllers but they require the MSC gateway to be installed. The NXT-MSC (Mercury-Inside) controllers have a Mercury sticker on them, the Standard NXT controllers do not. - Click the SETTINGS button.
- The Add Gateway window will appear - prompting you to enter a name for the new gateway.
- Enter a name for the gateway then click OK.
- The new gateway will be added to the system.
- You will see another message informing you that the gateway service has started.
- The gateway service will then be displayed in the license manager as licensed and no longer needing configuration.
- You can now close down the license manager. Doors.NET is now ready for controller setup.
7.0 Controller Setup in Doors.NET
- Click the Doors.NET admin icon located on the desktop or via the taskbar or start menu.
- The log in window will appear. Log in with the default username and password (both admin).
- Once logged-in, you will be prompted to go ahead and change the default admin password. Click Yes and you will be able to create a new password for the default admin account or you can do this later.
- Click on Setup >> Hardware Setup >> All.
- The hardware tree will be displayed and at the top will be the hardware gateway. Once controllers have been added they appear beneath the gateway.
The following documents explain how to add the different controller types:
- Setup Standard NXT Controllers in Doors.NET
- Setup NXT-MSC (Mercury-Inside) Controllers in Doors.NET
- Setup PXL Controllers in Doors.NET
- Setup Entraguard Controllers in Doors.NET
- Mercury EP Controller Setup in Doors.NET
- Mercury LP Controller Setup in Doors.NET
- Mercury MP Controller Setup in Doors.NET
- Neutron Controller Setup in Visual Doors (also requires Doors.NET to be installed)
8.0 Holiday Setup in Doors.NET
9.0 Time Schedule Setup in Doors.NET
10.0 Access Groups Setup in Doors.NET
11.0 Cardholder and Credential Enrollment
- Manual Enrollment - Enrolling a single credential into Doors.NET - You manually enter the imprint and facility code (note that NXT credentials do not require a facility code).
- Presentation Enrollment - Enroll a single credential into Doors.NET using a reader on the system set as an enrollment reader - this method is particularly useful if you don't know the credential's programmed facility code (if applicable).
- Block Enrollment - Allows you to enroll a block of consecutively numbered credentials - Useful if you wish to quickly enroll a large number of credentials in one go - typically you would then enter the cardholder name as and when the credentials are activated and handed out to the cardholders.
12.0 Backup the Doors.NET Database
12.1 Automatic Full Backup
- When the license manager opens, select Application Server from the list on the left.
- Click the Settings button.
- Click on the Backup tab.
- You will see that automatic database backup is enabled by default.
- The backup will be performed at 23:00.
- The backup will be performed every Friday.
- The default backup location is C:\Keri\DoorsNET\Backup.
Note: the backup location can be set to an external drive or a network location. - Make changes to any of the settings and then click the SAVE button.
Related Articles
Doors.NET Quick Start Guide - Standalone Document
Doors.NET - Quick Start Guide - Standalone Document (attached)Photo ID Badging Client - Quick Start Guide
Logging In Click/double-click on the 'Keri Photo ID Icon' located on the desktop or via Start >> All Programs >> Doors.Net >> Keri Photo ID. Log into the badging client using the default user ID and password (both 'admin'). On the left-hand pane ...Doors.NET - End User's Guide
Doors.NET user guide for the end-users (attached).Doors.NET - End Users Guide
Doors.NET End Users Guide (attached)Doors.NET - Software Installation Guide
1.0 Introduction Installing the Doors.NET software is very easy and straight-forward. There are just a few host PC requirements that should be met prior to performing the installation: The host PC must be fully up-to-date with the latest Windows ...